Коды ошибок, актуальные для Canon imagePROGRAF iPF670, iPF605, iPF770, iPF750, iPF710, iPF650, iPF700, iPF785, iPF610, iPF765, iPF680, iPF760, iPF510, iPF780, iPF600, iPF500, iPF685, iPF720, iPF670e, iPF671, iPF671e (для картриджей PFI-102, PFI-104, PFI-107).
Check printing results
Call for service.
Call for service.
После проверки датчика деталей в сервисном меню, замените деталь, указанную в ошибке.
Проверьте загруженные данные перед повтором печати.
Проверьте количество бумаги.
Exchange for the compatible paper to HP-GL/2.
The memory is full.
Check if there is the non-image area of the print. Verify the transmitted data before reprinting.
The memory is full.
The memory is full.
The parameter is out of range.
Verify the transmitted data before reprinting.
This command is not supported.
Delete unwanted data
Delete unneeded jobs stored in Personal Boxes.
Now printing without saving data.
Delete unneeded jobs stored in Personal Boxs.
Prepare to replace the ink.
Renew the C ink tank
Prepare to replace the ink.
Renew the M ink tank.
Prepare to replace the ink.
Renew the Y ink tank.
Prepare to replace the ink.
Renew the MBK ink tank.
Prepare to replace the ink.
Renew the BK ink tank.
Replace the ink tank.
Renew the C ink tank.
Replace the ink tank.
Renew the M ink tank.
Replace the ink tank.
Renew the Y ink tank.
Replace the ink tank.
Renew the MBK ink tank.
Replace the ink tank.
Renew the BK ink tank.
Check ink tank.
Attach the C ink tank.
Check ink tank.
Attach the M ink tank.
Check ink tank.
Attach the Y ink tank.
Check ink tank.
Attach the MBK ink tank.
Check ink tank.
Attach the BK ink tank.
Check the media size check. Change the media size.
Delete unwanted data.
Press the stop button to cancel the print job. Delete print jobs from the queue.
Delete unneeded jobs stored on the hard disk.
Press Online to clear error.
Clean the printhead. Identify the nozzles in a nozzle check pattern. Replace the printhead.
Lift the release lever and reload the paper.
Check the leading end of paper. Reload the paper.
Lift the release lever and align leading edge with orange line.
Check the sheet length. Check to see if paper has not jammed.
Lift the release lever and reload the paper.
Check the right edge of paper. Check the paper type.
Lift the release lever and reload the paper.
Check the left edge of paper.
Check the paper type.
Press Online to clear the error and readjust printhead.
Check the paper on which a pattern is printed for smears. Check the environment for interferences from outside light.
Clean the printhead.
Press Online to clear the error and readjust printhead.
Check the paper on which a pattern is printed for smears. Check the environment for interferences from outside light.
Clean the printhead.
Lift the release lever and replace paper with A4/ LTR (vertical) or larger.
Replace with A4/Letter or any larger-sized paper.
Lift the release lever and replace paper with A3/ Ledger (vertical) or larger.
Replace with A3/11″x17″ or any larger-sized paper.
Lift the release lever and replace roll with 10 in. wide or larger roll.
Replace with roll media at least 10 inches in width.
Remove paper and press Load/Eject.
Remove the paper jam and reload the paper.
Lift the release lever and reload paper.
Reload the paper.
Check supported paper sizes.
Replace with larger-sized paper.
Check supported paper sizes.
Replace with smaller-sized paper.
Press Online to clear the error.
Replace with adjustable media.
Lift the release lever.
Correct the skew in the paper and reload it.
Reload paper.
Reload the paper
Press Load/Eject and reload the paper.
Reload the paper
Lift the release lever and reload the paper.
Reload the roll media.
Press Online to clear the error.
Check to see if paper has not jammed.
Press Load/Eject and load sheets.
Load cut sheets at the paper tray port.
Press OK, remove the sheets, and load a roll.
Replace with roll media.
Press Load/Eject and load a roll.
Load roll media.
Turn printer off and install roll feed unit.
Install the roll media unit.
Lift the release lever and replace the roll.
Renew the supply of roll media.
Press Load/Eject and reload the paper.
Check the type of paper that can be fed and reload the paper.
Press Load/Eject and remove the roll.
Load cut sheets at the paper tray port.
03130031-2E23
Turn off printer, wait, then turn on again.
Check the cutter unit.
03130031-2E14
Turn off printer, wait, then turn on again.
Replace the main controller PCB
03130031-2E16
Turn off printer, wait, then turn on again.
Check the mist fan.
03130031-2E17
Turn off printer, wait, then turn on again.
Check the suction fan.
03130031-2E20
Turn off printer, wait, then turn on again.
Check the purge unit.
03130031-2E22
Turn off printer, wait, then turn on again.
Check the purge unit.
03130031-2E23
Turn off printer, wait, then turn on again.
Check the purge unit.
03130031-2E25
Turn off printer, wait, then turn on again.
Check the carriage unit. Check the linear encoder for smears.
03130031-2E26
Turn off printer, wait, then turn on again.
Check the carriage unit and surrounding parts.
03130031-2E27
Turn off printer, wait, then turn on again.
Check the carriage unit and surrounding parts.
03130031-2E1F
Turn off printer, wait, then turn on again.
Check the purge unit.
03130031-2E2A
Turn off printer, wait, then turn on again.
Check the feed roller encoder and surrounding part. Check to see if paper has not jammed.
03130031-2E29
Turn off printer, wait, then turn on again.
Check the roll feed unit. Check roll media. Check to see if paper has not jammed in the printer.
03130031-2E2E
Turn off printer, wait, then turn on again.
Check the roll feed unit.
03130031-4027
Turn off printer, wait, then turn on again.
Check the carriage unit and surrounding parts.
03130031-2E13
Turn off printer, wait, then turn on again.
03130031-2F32
Turn off printer, wait, then turn on again.
Replace the multi sensor unit.
03130031-2F3A
Turn off printer, wait, then turn on again.
Check the ink supply unit.
03130031-2F3B
Turn off printer, wait, then turn on again.
Remove the ink tanks and then reload them. Check the main controller PCB.
03130031-2F70
Turn off printer, wait, then turn on again.
03130031-2F71
Turn off printer, wait, then turn on again.
03130031-2F72
Turn off printer, wait, then turn on again.
03130031-260E
Turn off printer, wait, then turn on again.
Check the carriage unit and surrounding parts. Replace the main controller PCB.
03130031-2618
Turn off printer, wait, then turn on again.
Check the power supply unit.
03130031-260F
Turn off printer, wait, then turn on again.
Turn off printer and check roll feed unit
Replace the roll feed unit.
Turn off printer, wait a while, then turn it on again.
Transmit valid ROM data.
Turn off printer, wait a while, then turn it on again.
Verify the validity of MID data before transferring it.
03130031-2F2B
Turn off printer, wait, then turn on again.
Open top cover and replace the printhead.
Replace printhead
Open top cover and replace the right printhead.
Replace printhead
Open top cover and replace the right printhead.
Replace printhead
03800500-2F40
Turn off printer, wait, then turn on again.
Проверьте блок очистки печатающей головки и окружающие детали.
Проверьте датчик управления головкой и окружающие детали.
Убедитесь, что печатающая головка установлена правильно.
Если визуально все чисто и корректно подключено, нужно пробовать:
Заменить датчик управления головкой.
Заменить главную плату контроллера.
Замените печатающую головку.
Замените каретку.
03800500-2F2F
Turn off printer, wait, then turn on again.
Замените датчик управления печатающей головкой.
Замените печатающую головку.
Identify the head management sensor unit
Replace the head management sensor unit
Replace the printhead
03800500-2F30
Turn off printer, wait, then turn on again.
Замените датчик управления печатающей головкой.
Замените печатающую головку.
Identify the head management sensor unit
Replace the head management sensor unit
Replace the printhead
Press OK and replace ink tank.
Renew the Bk ink tank
Press OK and replace ink tank.
Renew the Y ink tank
Press OK and replace ink tank.
Renew the M ink tank
Press OK and replace ink tank.
Renew the C ink tank
Press OK and replace ink tank.
Renew the MBk ink tank
Press OK and replace ink tank.
Renew the MBk ink tank
Press OK and replace ink tank.
Replace with a fully replenished Bk ink tank
Press OK and replace ink tank.
Replace with a fully replenished Y ink tank
Press OK and replace ink tank.
Replace with a fully replenished M ink tank
Press OK and replace ink tank.
Replace with a fully replenished C ink tank
Press OK and replace ink tank.
Replace with a fully replenished MBk ink tank
Press OK and replace ink tank.
Replace with a valid Bk ink tank
Press OK and replace ink tank.
Replace with a valid Y ink tank
Press OK and replace ink tank.
Replace with a valid M ink tank
Press OK and replace ink tank.
Replace with a valid C ink tank
Press OK and replace ink tank.
Replace with a valid MBk ink tank
Press OK and replace ink tank.
Replace with a valid MBk ink tank
Press OK and check ink tank.
Install a Bk ink tank
Press OK and check ink tank.
Install a Y ink tank
Press OK and check ink tank.
Install a M ink tank
Press OK and check ink tank.
Install a C ink tank
Press OK and check ink tank.
Install a MBk ink tank
Press OK and check ink tank.
Install a MBk ink tank
Turn off printer, wait a while, and turn it on again.
Close the top cover and turn on the printer again.
Turn off printer, wait a while, and turn it on again.
Close the ink tank cover and turn on the printer again.
Replace the maintenance cartridge.
Renew the maintenance cartridge.
Cartridge capacity.
Replace the maintenance cartridge.
Replace the maintenance cartridge.
Replace the maintenance cartridge.
Renew the maintenance cartridge.
Replace the maintenance cartridge.
Renew the maintenance cartridge.
Check roll position.
Online: Print Load/Eject:
Change Paper
Check to see if a borderless printing spacer is installed. Reload the paper.
Check paper size setting.
Online: Print
Load/Eject: Change Paper
Check the paper size. Change the paper size.
Online: Print
Stop: Stop Printing
Load/Eject: Change Paper
Renew the supply of roll media.
Lift the release lever and reload the paper.
Cut paper manually. Check the cutter.
Press Online to clear the error.
Check the multi sensor.
Check the head management sensor.
Online: Print
Stop: Stop Printing
Load/Eject: Change Paper
Exchange for the compatible paper to HP-GL/2 before reprinting.
Delete unwanted data on your computer to resume printing.
Press Stop to cancel printing.
Delete unneeded jobs stored in Personal Boxes.
Cannot save. Delete unwanted data on your computer to resume printing.
Press Stop to cancel printing.
Press OK to reformat
Press the [OK] button to start reformatting the hard disk. When formatting is finished, the printer automatically restarts.
Turn off printer, wait a while, and turn it on again.
Invalid files will be deleted.
Restart the printer. Only the corrupted files will be deleted, and the printer will restart.
Turn off printer, wait, then turn on again.
Check the head management sensor. Replace the head management sensor. Replace the printhead.
Turn off printer, wait, then turn on again.
Check the pinch roller and surrounding part. Replace the pinch roller pressure drive unit.
Install printhead.
Install the printhead.
Replace the printhead.
Check the maintenance cartridge.
Install the maintenance cartridge.
Lift the release lever and reload the paper.
Check the cutter unit and surrounding part. Replace the cutter.
Renew the supply of roll media.
Manually rewind roll all the way and press OK.
Check the pick-up unit and roll media. Check to see if paper has not jammed.
Load cut sheets at the paper tray port.
Check the media size. Change the media size.
Confirm usage cond. of the paper.
Reload the paper.
Reload the roll media.
Hardware error 03130031-2618 is not a mega serious error. I wanted to get that out of the way early because when «hardware error» shows on the display panel, people get nervous. It’s normal to be concerned about the future of your imagePROGRAF iPF large format printer, however, in this case, take a deep breath and relax.
What is hardware error 03130031-2618?
All those numbers mean it has to be something bad, right? Possibly… this is a VH voltage error. What the heck does that mean?
It means one of two things (and one costs less than the other). You may need a new print head (or heads depending on the model). The other possibility is air in the ink lines.
Can I fix the error?
As mentioned in the section above, it is entirely possible to have a false error caused by air in the ink lines (or outdated firmware).
 Pictured here are a set of ink lines that are full of ink. If your printer does not look like the image, a false error may be your gremlin. If no error is present in the ink tanks, sub-tank system, or valves, the next system check occurs at the point of ink delivery, the print head. Assuming the situation is normal at one end (tank side), the carriage assumes a suitable ink supply is present through the lines all the way to the head.
The print head can detect any nozzles that are not spraying ink. As a result of the air in the lines, not all nozzles have an ink supply, meaning the head will notice and report to the main controller that something is not right. A false error is displayed on the screen.
Ruling out air as the cause is easy. Open the top cover (lid) and observe the ink lines. Air bubbles will be obvious, even to the untrained eye. Gaps will be present in the ink supply, as opposed to the solid flow as seen in the image here on this page. Don’t worry, you’ll know it if you see it!
If you do have air in the ink lines, you’ll have to perform an ink system fill either by initialization or by using a syringe. The syringe has been used by many and has proven to be a low-cost fix. Removing the air from the lines works, and your printer goes back to normal.
If air is not the problem, and the firmware is current, replace BOTH print heads. Direct links to print heads are available below.
How to solve error code 03130031-2618 on Canon IPF printers

Error code 03130031-2618 is a voltage error. It could happens on these printers models: IPF6350, IPF6300, IPF6000, IPF8000, IPF8300, etc…
Solution 1:
- Power off the printer.
- Disconnect the power cable
- Wait for 30 minutes.
- Connect the power cable
- Power on
Solution 2:
- Check the power supply
Solution 3: The voltage of the print head is abnormal.
- Replace the Printhead
Solution 4: Check for the cable continuity between the carriage relay PCB and the main controller PCB
- Replace the cable.
Replace the carriage relay PCB. - Replace the main controller PCB
Popular posts from this blog
MAJ11/06/17 Error B200 means the printhead voltage or temperature is not normal. The Printhead could be defective…. but first, try these solutions below: Solution 1 : Disconnect the power cable from the printer. Wait 1 hour. Connect the power cable Solution 2 : Check and Clean Head contact pin condition of the carriage unit Check Cable connection especially the carriage FFC Solution 3 : Turn off the power Open the panel Turn on the power Wait for print carriage to start moving to the left. Let it go past half way Before print carriage reaches left hand side shut the cover. Leave the Printer turned on Solution 4 : Unplug the power cable. Open the printer Push the whole print head mechanic to the center While the printer still open, plug the power and turn it ON. When the printhead still moving and is going to the very LEFT, close the cover. Wait until its boot up. Solution 4a: Take out all of the ink cartridges Lift up the gr
The error B204 could happen after a cartridge replacement. First of all, when installing, remove the cartridges from the plastic package, but do not drill any plastic membranes, as this will cause this error when placing the cartridge. The error may also appear if you change a completely empty cartridge: when installing a full cartridge, the printer enters a cleaning cycle, but the printhead has not yet received ink from the newly inserted cartridge. Here are some tips to cancel this error B204:: Solution 1: Remove the cartridges Power the printer for 2 minutes Switch on the printer Install the cartrdiges Solution 2: Switch on the printer Unplug the power cable Open the cover Move the print head carriage manually to the usual place where it goes for the cartridge change (If the printhead carriage is not movable, reconnect and then turn on the printer, then unplug it again when the head carriage is in the moving position). Change the cartridges. Close the fr
MAJ 25/08/17 The Service Tool V3400 allow to reset the counter of some Canon printers. For the error code 006 , try this : Solution 1: Check your cartridges: an empty cartridge can lead to error 006 Solution 2 : After you avec clicked on «Main», wait a few minutes. If the error still here, restarts the Service Tool Solution 3 : Close the service tool Disconnect the USB cable from the printer After 10 seconds, plug back the cable to the printer On Windows, click next when appears «New device» Open the service tool
Правила форума
Картинки и фотографии (если они нужны в сообщении) надо загружать только как вложения к своему сообщению (через кнопку Добавить файлы). Тогда картинки будут автоматически отображаться в сообщении.
-

Носки деда
- Сообщения: 5
- Стаж: 10 месяцев
- Благодарил (а): 1 раз

Ошибка canon ipf815 03130031-2618
Сообщение
Носки деда »
Добрый день! Помогите с плоттером, до этой ошибки жаловался что нужно заменить печатающую головку, путём сервисного меню ошибка сбрасывалась, до момента этой ошибки 03130031-2618, головку новую купили, но ничего не изменилось. в сервисное меню не заходит, выдаёт эту ошибку
-
Носки деда
- Сообщения: 5
- Стаж: 10 месяцев
- Благодарил (а): 1 раз
Ошибка canon ipf815 03130031-2618
Сообщение
Носки деда »
Goldwater писал(а): ↑16 ноя 2022, 08:14
Чем помочь? Приехаь починить? Почитать на ночь сервис-мануал?
есть ли он? есть только на ipf710, технически они совершенно разные. Просто может ктото сталкивался, или есть сервис мануал на ipf815
Отправлено спустя 51 минуту 47 секунд:
нашел на ipf810 0313xxxx-xxxx Sensors, fans, motors error
-
nicksun
- Сообщения: 206
- Стаж: 1 год 8 месяцев
- Откуда: Ставрополь
- Благодарил (а): 8 раз
- Поблагодарили: 35 раз
-
Репутация:
Ошибка canon ipf815 03130031-2618
Сообщение
nicksun »
03130031-2618-VH voltage error
Короткое замыкание в ПГ. Следом за ПГ могла полететь главная плата. Перед установкой новой ПГ, надо было проверить на главной плате сборку R3501 (по крайней мере на 710 так было, тут думаю не сильно много изменений), транзистор Q3601. если элементы пробиты, то менять плату вместе с ПГ. Можно попробовать оживить.
Возможно сгоревший пред на 7А на Carriage relay PCB
-
Носки деда
- Сообщения: 5
- Стаж: 10 месяцев
- Благодарил (а): 1 раз
Ошибка canon ipf815 03130031-2618
Сообщение
Носки деда »
nicksun писал(а): ↑16 ноя 2022, 09:42
03130031-2618-VH voltage error
Короткое замыкание в ПГ. Следом за ПГ могла полететь главная плата. Перед установкой новой ПГ, надо было проверить на главной плате сборку R3501 (по крайней мере на 710 так было, тут думаю не сильно много изменений), транзистор Q3601. если элементы пробиты, то менять плату вместе с ПГ. Можно попробовать оживить.
Возможно сгоревший пред на 7А на Carriage relay PCB
сегодня разберу, погляжу. нашел вроде где она стоит

- Скриншот 16-11-2022 12.23.25.png (57.85 КБ) 428 просмотров
-
- 12 Ответы
- 1431 Просмотры
-
Последнее сообщение

-
- 3 Ответы
- 769 Просмотры
-
Последнее сообщение

-
- 6 Ответы
- 1377 Просмотры
-
Последнее сообщение

-
- 10 Ответы
- 504 Просмотры
-
Последнее сообщение
-
- 0 Ответы
- 136 Просмотры
-
Последнее сообщение


Canon imagePROGRAF Hardware Error 03130031 Introduction
When your Canon imagePROGRAF Plotter is stuck with an on-screen hardware error 0313003, you need to call the service center to get assistance to get your Canon large format printer back into working state. In this printer service guide, we will give you some ideas to decode Hardware Error 03130031 and its subcodes of the 4 digits in the end. You can Buy Printer Spare Parts from here
Decoding the Error 03130031
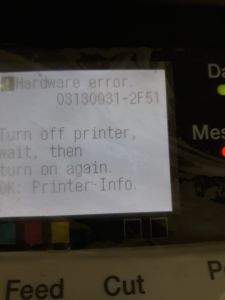
Since we have detailed documentation about this error, it will be easier for you to diagnose the error. The hard part is, this error is closely related to the ‘print head’ and in most cases, you need to replace it to fix the plotter. To diagnose the error in the right way, we need subcode, which is the last four characters of the error code followed by 03130031, for example, ‘2F51’. The whole error code will look like this, 03130031-2F51. Ca’t find the subcode? Contact us for plotter repair in Dubai
Now you know how to find the sub error code, But how to understand the meaning of the 4-digit code followed by 03130031?
Fixing HP Designjet plotter error codes
Hardware Error 03130031 Codes and their Meaning
The 03130031-[Sub Code] error codes are about 45 variants. They all have different meanings and here is how to clear/fix them.
Below are the list of Hardware Error 03130031 Codes
03130031-260E – Gap detection failure
03130031-2618 – VH voltage error
03130031-290A – HDD not connected/not detected
03130031-291B – Lift shift timeout
03130031-291D – Spur cam sensor detector failure
03130031-2E23 – Cutter unit failure
03130031-2F13 – A/D converter external trigger output stop
03130031-2F14 – ASIC register not writable
03130031-2F16 – Mist fan error
03130031-2F17 – Platen fan lock detection error
03130031-2F1F – Purge sensor error
03130031-2F20 – Cap motor cam positioning error
03130031-2F22 – Pump shift timeout
03130031-2F23 – Purge motor error
03130031-2F24 – Cutter shift timeout error
03130031-2F25 – Carriage motor HP not detectable
03130031-2F26 – Carriage Motion Error
03130031-2F27 – Carriage shift timeout
03130031-2F28 – Lift shift timeout
03130031-2F2A – Cannot detect the LF home position
03130031-2F2B – LF operation failure
03130031-2F2C – Cassette shift timeout
03130031-2F2E – Roll shift timeout
03130031-2F3A – Ink supply valve open/close monitor timeout
03130031-2F3B – CS communication error
03130031-2F3C – LP nip sensor error
03130031-2F3D – HP pre-ejection pump motor overload error
03130031-2F3E – HP pre-ejection pump motor shift timeout
03130031-2F3F – An error other than overload error or shift timeout error
03130031-2F46 – The shutter HP sensor did not respond at startup
03130031-2F48 – VHT (heater drive power supply for printhead) error
03130031-2F49 – Left side printhead
03130031-2F4A – Main controller PCB error
03130031-2F4D – VHT leak detection error of left printhead
03130031-2F4E – VHT leak detection error of right printhead
03130031-2F4F – VHT leak detection error of left and right printhead or a single printhead
03130031-2F50 – Right side printhead
03130031-2F51 – Both printheads
03130031-2F52 – Detect that a carriage unit of a legacy model has been mounted
03130031-2F53 – Supply valve motor error of the left ink tank
03130031-2F54 – Supply valve motor error of the right ink tank
03130031-2F6C – Failed self-testing
03130031-2F70 – Indication at ink priming error in both sub tanks
03130031-2F71 – Indication at ink priming error in the left sub tank
03130031-2F72 – Indication at ink priming error in the right sub tank
03130031-4027 – Lift shift timeout error
How to fix Canon imagePROGRAF Hardware Error 03130031
Fixing Canon imagePROGRAF Hardware Error 03130031 can be a simple power-cycle or a replacement of very expensive spare parts. The first thing you need to do is to make sure there isn’t any paper stuck inside the Canon imagePROGRAF Plotter. And that the carriage assembly is in the docked state on the right side hand side of the plotter. You can verify this by opening the top cover or the Canon imagePROGRAF Plotter.
The second step is to turn off the Canon Plotter by pressing the power button. You should NEVER unplug the Plotter power code while it is ‘ON’. Once you turn the power off, turn the plotter ‘ON’ in the usual way. If it clears the error message, consider you are lucky and continue your print job as usual.
If the steps as mentioned above, don’t fix the error, you will need to may need to call Plotter Service Center in Dubai.
Cube’about Technology LLC. has been rated
4.5 out of
5 based on
4 reviews as of May 2018. —
Read all customer reviews.