Содержание
- Код ошибки датчика абс JAC T6
- Комментарии к теме код ошибки датчика абс jac t6
- Код ошибки аирбэга JAC T6
- Комментарии к теме код ошибки аирбэга jac t6
- Задать вопрос
Код ошибки датчика абс JAC T6
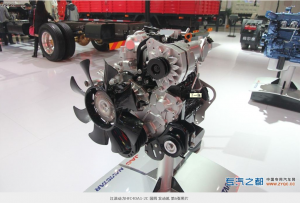
На прошлой неделе у моего знакомого возникло желание разобраться с тем, код ошибки датчика абс jac t6. Засели разбираться вместе, в итоге помогло видео ошибка abs — что проверить в первую очередь?.
Комментарии к теме код ошибки датчика абс jac t6
Альмир
Привет! скажи пожалуйста, поводки дворников от приоры покупал по отдельности левый и правый?
Панков Володимер
Спасибо, а у меня в Рено Сценик все проще — на кнопочках.
Саня Правиков
Привет Денис.давай сделаем проект совместный.ты приедешь ко мне на своей машине.а я ее куплю.или ключ на ключ поменяемся с моей доплатой.ехать надо в Чебоксары;)проект назовем Челябинск -Чебоксары-Челяб инск.рейтинг будет шикарный
Златоуст
тоже покупал у них.третья зима пошла.хороший магазин
Эраст
Хотелось бы узнать. У меня Хонда срв первого поколения 1996Г. Вопрос в том — адсорбер можно любой воткнуть или только как говорится родной?
Грейсон
Да бывает что обойма от удара молотка с привода не хочет вылазить.. В этот случае с двух сторон делается распил болгаркой, потом берется обычный молоток (желательно с заточенным бойком), маленькая кувалдочка, по распилу нужно выбивать, пока обойма не расколется, и в принципе граната снята с привода
Джей
Спасибо! Разжевал как для школьника)
Arvada
Вы че . там, церато на 124м сток моторе объезжаю с кпп 18*4.1, двух литровую церато)
Кукшева Бахруз
Дружок, во всех местах, что ты указал, металла никогда не было, нет, и не будет.
Леопольд
Развал в ланосе не регулируется только схождение развал зависит от износа салейнтблоков
Фаллон
Здравствуйте, у меня на задней двери со стороны водителя тоже не работает защелка на лексус rx300 2002 года, подскажите, какой актуатор мне надо , если можно ссылку на него
Евгений
сколько смотрю все четко рассказывает и показывает.
Мосс
Не меньше 10 переключений за какой промежуток времени? Должны ли происходить переключения при работе двигателя на ХХ?
Петрик Гарашин
мозгов ну просто пипец, накрайняк хомут можно вообще-то раскрыть и надеть через полуось,если аккуратно делать почти не погнется,немного подровняв на полуоси молотком затянуть на пыльнике. А вообще не хрен снимать видос если так косячиш, но покрайней мере не так сложно назад все разобрать, вкручиваеш болт и шрус сходит, собираеш нормально как положено.
Marika
Фух, у меня так парит тоже, тосол норм, масло, слава богу, норм. Боялся что не так что то. Камень с души
Алихан Бутурлакин
Не чего путём не показано
Дженерал
Здравствуйте можно придумать какие-нибудь часы маленькие в машину.
Барило
Я смотрю двигатели принципиальнон епоменяли конструкцию с 90х годов и старых моделей. У меня на V40 1.8 1997 такой же мотор, только без муфты и 4 цилиндра. А так конструкция такая же.
Montrell
Дмитрий а реально починить блок комфорта на шевроле круз? И какая цена примерная
Жорик
У меня на форде сзади вёсла, там такое же крепление ручки, я снимаю её с помощью спицы для вязания, цепляюсь крючком за стопорное кольцо и тяну вверх, собственно за 10 секунд результат тот же, кольцо вынимается, затем вставляется назад и ручка одевается назад
Isidora
Хорошо, что складки пыльника делают не на подобии резьбы. А то так бы и . ножницами до конца. Метод ваш хорош для СТО. Покупать домой эту приблуду? Ну его .
Штерн Кемцев
Если б еще трезвый снимал, было б норм)
Источник
Код ошибки аирбэга JAC T6
Благодаря этому видео я наконец смог разобраться со своей проблемой, а именно код ошибки аирбэга jac t6. Спасибо автору этого видео, без него пришлось бы ехать в автосервис.
Комментарии к теме код ошибки аирбэга jac t6
Warrick
Ремень наверное ослабляется роликом с ямы?
Памир Смологонов
а какое масло используете
Ethel
Хороший мотор.есть конечно свои заморочки.а в целом неприхотливый
Низами
Узбек
Даян
подскажИТЕ а вот этот фиксатор для валов который вы изготовили какой длины?
Касир Кулинин
эммм, а что никто не обратил внимание на оторванный от воздушного фильтра шланчик отвода картерных газов? Когда клемму снимали — этот шланчик в сторону отстегнули, а он там с пластиковым сломанным зубчиком торчал 🙂
Abda
Что-то у меня не получается. Толи адаптер китайский, толи программки кривые, толи руки)
Дункан Палишев
табличка говно на солнце отслоилась и в темноте не светиться
Гаджимурад Валагин
Молодец тв мне очень помог?
Добрый
а у меня соната до рестайлинг. там чутка по другому ремни идут. а двиг такой же.
Яхнов Таллин
уменя было проблема с этой же заслонкой как на видео,он заклинел проблема была в тросике от краника он заклинел на видео видно тросик приклепен на белой пласмаске
Злата
бам горит бам дальний горит бам бам и все готово!
Alessia
Салам алейкум ребята выручайте проблема такая патухли преборы и ближний свет с туманники немогу найти причину джили ск7 предохранители все целые
Катеринка
самое нормальное видео за полтора часа поиска по заднему подшипнику! спасибо!
Darron
Автор:а заказчик у которого вы разобрал двиг,на каком масле он ездиет?
Сталин
где можно, в алиэкспресе это страница ее найдена
Абубакр
Добрый день Toyota Camry v20 (1998г) Ошибка 38, ничего не нашел по ней. Не подскажите?
Bradshaw
Ещё один блогер, незнающий епонцев, прежде чем обзор снимать, нужно больше информации про модель читать. В отличии от немцев, японцы не ломаются, эти машины на века.
Чим
Можно подробнее фото сьемника и не понятно куда он упирался в вал чтоли?
Втехин Аму
Евгений доброго времени суток и еще кто отзоветься. Куда постучать или — куда подуть. ) Эксперт 3.2.0 hdi. Немогу завести не гор.ни хол! — только Эфир впускной патрубок — и все вери гуд. Холостой устойчивый, после завода прет нормально, провалов нет (немного поддымливает на полном газу) а так притензий нет — НО ЗАВЕСТИ. Снимал регулятор 4 раза — мыл (чистый) приходит напруга 6.3 v — вибрирует (клацает) но такого нет- что включил и стал в одном положении как то вибрирует, резинки в норме (не менял, но ели вытащил) код — ошибка давления в районе 100 бар. Помогите куда ещё полезть.
Мик
спасибо за видео. сегодня утром весь тосол ушел из бачка, будем протягивать вечером
Пристяжнов Арутюн
моторчик от рено на японском инфинити? 🙂
Arno
как проверить работу генератора на славуте(новичок в этом деле)?вроде генератор крутится,акуммул ятор нормальный,а машина не заводится.не пойму в чём причина.если можно сними видео про генератор на славуте
Саунов Кудин
Молодцы! Могёте! Но транспортир, что ли купите, чтобы углы крутить!?
Шахар
здрвствуите потскажите 21093 инжектор загорелся прочие опасности
Куфаков Башир
Движок грязный везде падает грязь. Не по хозяйски.Короче на отъе. сь
Salvino
Ржавые опоры стоек проходили 9 лет у меня, 130 тысяч пробега. Не нужны эти колпачки.
Уник
Ты кто такой чтоб писать мне как мне писать ты для начала научись снимать нармальные видео ролики
Ботир
Ну ты и свинот! Тормозуху под машину сливаешь. Масло прямо в землю сливаешь,а антифриз? Да вообще, видео говно. Темно и ни хрена невидно. Не засоряй интернет. Ничего нового не показал.
Мелюкова Заде
Идиот. Лампы по конструкции хлам. Но зато ни кто не моргал. А может кот за рулём в дождь ехал. С галогеном за Полторацкий видно не очень. А тут диодики
Друсаков Отар
Вы меняли башмак? Или цепь? На каком пробеге надо менять цепь, башмак?
Nalani
Yasmeen
Не 100%. Подшипники могут быть в идеале, а шум будет. Причина очень простая, секрет не скажу. Устранить поломку могу только Я.
Оразбай
не верно! при замене пружин — делать развал-схождение обязательно при любых условиях, т.к. кроме длины у пружин есть ещё жёсткость, которая может плавать от экземпляра к экземпляру даже в пределах одной партии, как следствие — изменятся углы установки рычагов, а значит и угол установки шкворня. а вот при замене сайлентблоков можно и не делать, если только до этого не сделали на убитых сайлентблоках. хотя к таким развальщикам ездить не стоит.
Задать вопрос
Остались вопросы? Задайте его в нашем сообществе в Telegram
Источник
Jac HFC4da1-2c china-IV diesel engines fault codes list
Fault Diagnosis
Electronic control unit continually monitors sensors, actuators, relevant circuits, MILs, battery voltage and even its self and carries out reliability tests to sensor output signals, actuator drive signals and internal signals. Once there are faults in certain link or certain signal is unreliable, electronic control unit sets fault information record in RAM fault memory immediately. Fault information record is stored in the form of diagnostic trouble code (DTC) and shown in the sequence of fault occurrence.
See also:
Jac HFC4da1-2c china-IV diesel engines
Faults can be divided into “steady fault” and “random fault” (such as faults caused by temporary open circuit of harness or poor contact of connectors) according to fault occurrence frequency.
Fault Condition
If duration of an identified fault exceeds set stabilization time for the first time, ECU identifies it as a steady fault and stores it as a “steady fault”. If the fault disappears, ECU identifies it as a “random fault” and “nonexistent”. If the fault is identified once again, it is still a “random fault”. However, “existent” historical faults will not influence normal application of engine.
Fault Type
Short to power supply positive pole
Short or open to ground (In the case of pull-up or pull-down resistor for input stage, ECU will identify open circuit failure of input port as the fault of input port short to power supply positive pole or short to ground)
Unreliable signal
Fault Frequency Counter
For every identified fault, there is an individual frequency counter value (HZ). Frequency counter value (Hz) determines storage time of corresponding fault information record in the memory after fault disappearance (fault elimination).
For the first time fault identification, it (Hz) is set to be its initial value as 40. If fault condition does not change, this value will maintain the same forever.
Once identified fault has disappeared and then the condition has been maintained for certain period of time, the value (Hz) is reduced by 1 after every successful engine start (engine speed exceeds that of engine start completion). At this moment, ECU recognizes the fault has disappeared but fault information record still exists.
If the fault (such as fault caused by poor contact) appears and disappears frequently, the value (Hz) is increased by 1 but the value will not exceed set upper limit of 100.
When the value (Hz) becomes zero, all fault information records in the fault memory are cleared completely.
Fault Alarm
In the case of electronic control system, when there are faults in some important components such as ECU, coolant temperature sensor, phase sensor, boost pressure sensor, revolution speed sensor, air flow meter, fuel injector, fan relay and etc, ECU will give alarms via MIL flashing until faults are eliminated.
Fault Reading
Fault information records can be brought out from electronic control unit via fault diagnostic apparatus. However, some faults can be detected only when vehicle reaches corresponding operation condition.
Elimination of Fault Information Record
Fault information records in memory should be cleared after fault elimination. DTC can be cleared with ways as follows:
- When value of ECU frequency counter (Hz) becomes 0, fault information records in fault memory are all cleared automatically.
- In the case of “Fault memory zero clearing” command, fault information records can be cleared with the application of fault diagnostic apparatus.
Fault Detection
After obtaining fault information records with means above, only suspicious positions for fault occurrence are known. However, this does not mean faults have been detected. Therefore, cause for one fault may be damaged electrical component (like sensor or actuator or ECU, etc), wire in open circuit, wire short to ground or battery positive pole and even mechanical failure.
Faults are internal with their external expressions as various symptoms. When symptoms are detected, check fault information record for existence with fault diagnostic apparatus or flash code first of all and then eliminate corresponding faults. Finally, detect faults according to engine symptoms.
| S/N | DTC | Meaning |
| 1 | P0030 | The linear oxygen sensor heater circuit is open. |
| 2 | P0031 | The linear oxygen sensor heater circuit is short to ground. |
| 3 | P0032 | The linear oxygen sensor heater circuit is short to battery. |
| 4 | P0045 | EGR valve circuit is open. |
| 5 | P0046 | Overtemperature of EGR valve bridge-H chip |
| 6 | P0047 | EGR valve circuit is short to ground. |
| 7 | P0048 | EGR valve circuit is short to power supply. |
| 8 | P0068 | Short-term drifting error in the process of throttle offset self-adaption |
| 9 | P0069 | The absolute difference between intercooler downstream air pressure and ambient pressure is unreliable. |
| 10 | P0070 | Reliability check function for ambient temperature |
| 11 | P0072 | Too low ambient temperature |
| 12 | P0073 | Too high ambient temperature |
| 13 | P0087 | The minimum rail pressure is below the lower limit. |
| 14 | P0088 | The maximum rail pressure is above the upper limit. |
| 15 | P0097 | The signal level of intercooler downstream temperature is too low. |
| 16 | P0098 | The signal level of intercooler downstream temperature is too high. |
| 17 | P00BE | The original value of fuel rail pressure is incoherent. |
| 18 | P0100 | The supply voltage of air flow sensor exceeds the limit. |
| 19 | P0101 | Timeout error of air flow sensor hardware signal |
| 20 | P0102 | The sensitivity deviation of air flow sensor is below the lower limit. |
| 21 | P0103 | The sensitivity deviation of air flow sensor is above the upper limit. |
| 22 | P010C | The signal level measured by air flow sensor is too low. |
| 23 | P010D | The signal level measured by air flow sensor is too high. |
| 24 | P0112 | The voltage is below the lower limit of intake air temperature sensor. |
| 25 | P0113 | The voltage is above the upper limit of intake air temperature sensor. |
| 26 | P0116 | Error reported in dynamic reliability test of coolant temperature sensor |
| 27 | P0117 | Coolant temperature signal level is too low (downstream). |
| 28 | P0118 | Coolant temperature signal level is too high (downstream). |
| 29 | P0119 | Error reported in static reliability test of coolant temperature sensor |
| 30 | P0122 | The signal level of accelerator pedal position sensor 1 is relatively low. |
| 31 | P0123 | The signal level of accelerator pedal position sensor 1 is relatively high. |
| 32 | P0127 | The signal level of air temperature sensor is relatively high. |
| S/N | DTC | Meaning |
| 33 | P0128 | Closed-loop control is actuated due to too low coolant temperature. |
| 34 | P0131 | Oxygen sensor IAIPUNVG point is short to ground. |
| 35 | P0132 | Oxygen sensor IAIPUNVG point is short to battery. |
| 36 | P0168 | The signal level of fuel temperature sensor is relatively high. |
| 37 | P0182 | The signal level of fuel temperature sensor is below the lower limit. |
| 38 | P0183 | The signal level of fuel temperature sensor is above the upper limit. |
| 39 | P0191 | The uncorrected rail pressure value is above the upper limit of drift. |
| 40 | P0192 | The voltage of fuel rail pressure sensor is below the lower limit. |
| 41 | P0193 | The voltage of fuel rail pressure sensor is above the upper limit. |
| 42 | P0194 | The uncorrected rail pressure value is below the lower limit of drift. |
| 43 | P0195 | Engine oil temperature signal fault on CAN |
| 44 | P0196 | The oil temperature signal is unreliable. |
| 45 | P0197 | The oil temperature signal level is too low. |
| 46 | P0198 | The oil temperature signal level is too high. |
| 47 | P0201 | The 1st cylinder fuel injector circuit is open. |
| 48 | P0202 | The 2nd cylinder fuel injector circuit is open. |
| 49 | P0203 | The 3rd cylinder fuel injector circuit is open. |
| 50 | P0204 | The 4th cylinder fuel injector circuit is open. |
| 51 | P0205 | The 5th cylinder fuel injector circuit is open. |
| 52 | P0206 | The 6th cylinder fuel injector circuit is open. |
| 53 | P020A | An error is reported when the time for electrifying the 1st cylinder reaches to the maximum. |
| 54 | P020B | An error is reported when the time for electrifying the 2nd cylinder reaches to the maximum. |
| 55 | P020C | An error is reported when the time for electrifying the 3rd cylinder reaches to the maximum. |
| 56 | P020D | An error is reported when the time for electrifying the 4th cylinder reaches to the maximum. |
| 57 | P020E | An error is reported when the time for electrifying the 5th cylinder reaches to the maximum. |
| 58 | P020F | An error is reported when the time for electrifying the 6th cylinder reaches to the maximum. |
| 59 | P0215 | Avoid resonance of double mass flywheel when stopping. |
| 60 | P0219 | Overspeed protection for engine parts |
| 61 | P0222 | The signal level of accelerator pedal position sensor 2 is relatively low. |
| 62 | P0223 | The signal level of accelerator pedal position sensor 2 is relatively high. |
| S/N | DTC | Meaning |
| 63 | P022A | EGR valve circuit is open. |
| 64 | P022B | EGR valve circuit is short to ground. |
| 65 | P022C | EGR valve circuit is short to power supply. |
| 66 | P022E | The signal level at the output position of EGR cooling bypass valve position sensor is below the lower limit. |
| 67 | P022F | The signal level at the output position of EGR cooling bypass valve position sensor is above the upper limit. |
| 68 | P0234 | The actual air intake flow is greater than the target set by system. |
| 69 | P0237 | The original voltage of intercooler downstream air pressure sensor is below the lower limit. |
| 70 | P0238 | The original voltage of intercooler downstream air pressure sensor is above the upper limit. |
| 71 | P023D | The long-term jitter of EGR valve exceeds the limit. |
| 72 | P023E | The short-term jitter of EGR valve exceeds the limit. |
| 73 | P024A | An error is reported when the temperature of EGR cooler bypass valve in electrifying phase is too high. |
| 74 | P024E | The signal level measured by EGR cooler bypass valve position sensor is below the limit. |
| 75 | P024F | The signal level measured by EGR cooler bypass valve position sensor is above the limit. |
| 76 | P0251 | The fuel metering unit circuit is open. |
| 77 | P0252 | The temperature of fuel metering unit driver module is too high. |
| 78 | P0253 | The fuel metering unit circuit is short to ground. |
| 79 | P0254 | The fuel metering unit circuit is short to power supply. |
| 80 | P0255 | Poor contact between ECU and fuel metering unit |
| 81 | P025C | The voltage of fuel metering unit is below the lower limit. |
| 82 | P025D | The voltage of fuel metering unit is above the upper limit. |
| 83 | P0263 | An error is reported when the electrifying time reaches to the maximum. |
| 84 | P0266 | An error is reported when the electrifying time reaches to the maximum. |
| 85 | P0269 | An error is reported when the electrifying time reaches to the maximum. |
| 86 | P0272 | An error is reported when the electrifying time reaches to the maximum. |
| 87 | P0275 | An error is reported when the electrifying time reaches to the maximum. |
| 88 | P0278 | An error is reported when the electrifying time reaches to the maximum. |
| 89 | P0299. | The positive deviation of pressure controller is above the upper limit. |
| 90 | P0335 | No signal from crankshaft |
| 91 | P0336 | Crankshaft speed signal is irrational. |
| 92 | P0339 | Camshaft speed signal is irrational. |
| S/N | DTC | Meaning |
| 93 | P0340 | No signal from camshaft |
| 94 | P0341 | The offset angle of camshaft is too large. |
| 95 | P0380 | The preheating indicator light output circuit is high. |
| 96 | P0382 | The preheating indicator light output circuit is low. |
| 97 | P0383 | EGR valve circuit is short to ground. |
| 98 | P0384 | EGR valve circuit is short to power supply. |
| 99 | P0401 | The actual air intake flow is greater than the target set by system. |
| 100 | P0402 | The actual air intake flow is less than the target set by system. |
| 101 | P0403 | Overtemperature of EGR valve bridge-H chip |
| 102 | P0404 | The short-term jitter of EGR valve exceeds the limit. |
| 103 | P0405 | The original voltage of EGR valve sensor signal is below the lower limit. |
| 104 | P0406 | The original voltage of EGR valve sensor signal is above the upper limit. |
| 105 | P0409 | EGR valve circuit is open. |
| 106 | P040C | The signal level of EGR cooler downstream temperature sensor is relatively low. |
| 107 | P040D | The signal level of EGR cooler downstream temperature sensor is relatively high. |
| 108 | P0426 | Upstream temperature fault of oxidation catalytic converter |
| 109 | P0427 | The signal level of upstream temperature of oxidation catalytic converter is relatively low. |
| 110 | P0428 | The signal level of upstream temperature of oxidation catalytic converter is relatively high. |
| 111 | P0480 | EGR valve circuit is open. |
| 112 | P0481 | EGR valve circuit is open. |
| 113 | P0483 | Overtemperature of EGR valve bridge-H chip |
| 114 | P0484 | Overtemperature of EGR valve bridge-H chip |
| 115 | P0487 | CJ945 Power level no-load fault |
| 116 | P0488 | CJ945 Overheating fault |
| 117 | P0489 | EGR valve circuit is short to ground. |
| 118 | P0490 | EGR valve circuit is short to power supply. |
| 119 | P0500 | Wheel fault |
| 120 | P0501 | Unreliable vehicle speed |
| 121 | P0503 | Signal of speed sensor exceeds the upper limit. |
| 122 | P0504 | Unreliable brake signal |
| 123 | P0520 | Engine oil pressure signal fault on CAN |
| 124 | P0521 | The maximum oil pressure signal is unreliable. |
| 125 | P0522 | The signal level of oil pressure sensor is relatively low. |
| S/N | DTC | Meaning |
| 126 | P0523 | The signal level of oil pressure sensor is relatively high. |
| 127 | P0524 | The minimum oil pressure signal is unreliable. |
| 128 | P0532 | The signal level measured by A/C coolant pressure sensor is too low. |
| 129 | P0533 | The signal level measured by A/C coolant pressure sensor is too high. |
| 130 | P0537 | The signal level of A/C evaporator’s temperature is relatively low. |
| 131 | P0538 | The signal level of A/C evaporator’s temperature is relatively high. |
| 132 | P0562 | The signal level of battery voltage sensor is too low. |
| 133 | P0563 | The signal level of battery voltage sensor is too high. |
| 134 | P0571 | False brake signal |
| 135 | P0575 | The analog cruise control signal is unreliable. |
| 136 | P0576 | The analog cruise control signal level is too low. |
| 137 | P0577 | The analog cruise control signal level is too high. |
| 138 | P0578 | The analog cruise control button is stuck. |
| 139 | P0607 | Cy320 Hardware error reported |
| 140 | P060A | Error reported in monitoring too high voltage |
| 141 | P060D | The accelerator pedal voltage signal is unreliable. |
| 142 | P0611 | The injection frequency is limited by system. |
| 143 | P061B | Error reported in torque comparison |
| 144 | P061C | The deviation difference between the engine speed signals obtained from the 1st level and the 2nd level is too large. |
| 145 | P061D | The set value of air system is limited by the torque limit of the function control unit. |
| 146 | P061F | Error reported in the process of throttle offset self-adaption |
| 147 | P0627 | The control line of priming fuel pump is open. |
| 148 | P0628 | The control line of priming fuel pump is short to ground. |
| 149 | P0629 | The control line of priming fuel pump is short to power supply. |
| 150 | P062A | Overheating of priming pump |
| 151 | P062B | The set value of fuel injection amount is limited by the torque limit of the function control unit. |
| 152 | P062F | Error reported in EEP read-write |
| 153 | P0643 | The sensor power supply monitoring fault 1 |
| 154 | P0645 | The compressor circuit is open. |
| 155 | P0646 | The compressor circuit is short to ground in electrifying phase. |
| 156 | P0647 | The compressor circuit is short to power supply in electrifying phase. |
| 157 | P0650 | EGR valve circuit is open. |
| 158 | P0653 | The sensor power supply monitoring fault 2 |
| S/N | DTC | Meaning |
| 159 | P0660 | The positive deviation of throttle controller exceeds the upper limit for a long time. |
| 160 | P0661 | The Port 1 of EGR valve bridge-H chip is short to ground. |
| 161 | P0662 | The Port 1 of EGR valve bridge-H chip is short to power supply. |
| 162 | P0663 | Short circuit / overload of EGR valve bridge-H |
| 163 | P0664 | The Port 2 of EGR valve bridge-H chip is short to ground. |
| 164 | P0665 | The Port 2 of EGR valve bridge-H chip is short to power supply. |
| 165 | P0668 | The voltage of ECU temperature sensor is below the lower limit. |
| 166 | P0669 | The voltage of ECU temperature sensor is above the upper limit. |
| 167 | P0670 | EGR valve circuit is open. |
| 168 | P0686 | The main relay opens too early. |
| 169 | P0687 | The main relay opens too late. |
| 170 | P0691 | EGR valve circuit is short to power supply. |
| 171 | P0692 | EGR valve circuit is short to ground. |
| 172 | P0693 | EGR valve circuit is short to power supply. |
| 173 | P0694 | EGR valve circuit is short to ground. |
| 174 | P0699 | The sensor power supply monitoring fault 3 |
| 175 | P0704 | Clutch signal error |
| 176 | P0737 | Then engine speed output signal circuit is open. |
| 177 | P0738 | Then engine speed output signal circuit is short to ground. |
| 178 | P0739 | Then engine speed output signal circuit is short to power supply. |
| 179 | P0A32 | Parking counter error |
| 180 | P1000 | The long-term jitter of EGR valve exceeds the limit. |
| 181 | P1001 | The relief valve reaches to the maximum permissible opening position. |
| 182 | P1002 | The relief valve reaches to the maximum permissible opening time. |
| 183 | P1003 | The average fuel rail pressure regulated by relief valve is out of the range. |
| 184 | P1004 | Check the flow equilibrium if the relief valve is opened normally. |
| 185 | P1005 | The relief valve opens. |
| 186 | P1006 | The relief valve is forced open to implement the pressure shock. |
| 187 | P1007 | The torque in MAP for torque and fuel conversion does not increase along the fuel direction strictly and monotonically. |
| 188 | P1008 | PhyMod_trq2qBas_MAP contains non-strict and non-monotonic Q curve. |
| 189 | P1011 | The positive deviation of rail pressure is above the upper limit. |
| 190 | P1012 | The negative deviation of rail pressure is below the lower limit. |
| 191 | P1013 | The maximum negative deviation of rail pressure is below the lower limit. |
| S/N | DTC | Meaning |
| 192 | P1020 | The heating drive circuit of fuel filter is open. |
| 193 | P1021 | The heating drive circuit of fuel filter is short to power supply. |
| 194 | P1022 | The heating drive circuit of fuel filter is short to ground. |
| 195 | P102A | The signal level of ambient pressure sensor is relatively high. |
| 196 | P102B | The signal level of ambient pressure sensor is relatively low. |
| 197 | P102C | The signal level of ambient temperature sensor is relatively high. |
| 198 | P102D | The signal level of ambient temperature sensor is relatively low. |
| 199 | P1030 | Overtemperature of EGR valve bridge-H chip |
| 200 | P1031 | Short circuit / overload of EGR valve bridge-H |
| 201 | P1032 | Overcurrent of EGR valve bridge-H based on temperature |
| 202 | P1033 | Under-voltage of EGR valve bridge-H |
| 203 | P1034 | The EGR valve in closed status is stuck. |
| 204 | P1035 | The EGR valve in open status is stuck. |
| 205 | P1036 | The long-term jitter of EGR valve exceeds the limit. |
| 206 | P1037 | An error is reported when the EGR valve is stuck in closing or opening. |
| 207 | P1038 | The physical value of EGR valve position sensor is too high. |
| 208 | P1039 | The physical value of EGR valve position sensor is too low. |
| 209 | P103A | The signal level of intercooler downstream temperature is relatively high. |
| 210 | P103B | The signal level of intercooler downstream temperature is relatively low. |
| 211 | P103C | EGR valve offset is unreliable. |
| 212 | P103D | The positive deviation of regeneration controller is above the limit. |
| 213 | P103E | The positive deviation of regeneration controller is below the limit. |
| 214 | P1040 | Overheating of throttle bridge-H |
| 215 | P1041 | Short circuit / overload of throttle bridge-H |
| 216 | P1042 | Overtemperature caused by overcurrent of throttle bridge-H |
| 217 | P1043 | Long-term deviation in the process of throttle self-adaption |
| 218 | P1044 | Output circuit 2 of throttle bridge-H is short to ground. |
| 219 | P1045 | Under-voltage of throttle bridge-H |
| 220 | P1046 | Output circuit 2 of throttle bridge-H is short to power supply. |
| 221 | P1047 | The physical value of throttle position is below the lower limit. |
| 222 | P1048 | The throttle circuit is short to ground. |
| 223 | P1049 | The physical value of throttle position is above the upper limit. |
| 224 | P104A | The throttle circuit is short to power supply. |
| 225 | P1060 | OBD General fault 1 |
| S/N | DTC | Meaning |
| 226 | P1061 | OBD General fault 10 |
| 227 | P1062 | OBD General fault 11 |
| 228 | P1063 | OBD General fault 12 |
| 229 | P1064 | OBD General fault 13 |
| 230 | P1065 | OBD General fault 14 |
| 231 | P1066 | OBD General fault 15 |
| 232 | P1067 | OBD General fault 16 |
| 233 | P1068 | OBD General fault 2 |
| 234 | P1069 | OBD General fault 3 |
| 235 | P106A | OBD General fault 4 |
| 236 | P106B | OBD General fault 5 |
| 237 | P106C | OBD General fault 6 |
| 238 | P106D | OBD General fault 7 |
| 239 | P106E | OBD General fault 8 |
| 240 | P106F | OBD General fault 9 |
| 241 | P1070 | Blockage of particulate filter |
| 242 | P1100 | The regulated idling value of air flow sensor is above the upper limit. |
| 243 | P1102 | The duty cycle of air temperature sensor on the air flow meter is above the upper limit. |
| 244 | P1103 | The duty cycle of air temperature sensor on the air flow meter is below the lower limit. |
| 245 | P1106 | The time interval measured by the air temperature sensor on the air flow meter is above the upper limit. |
| 246 | P1107 | The time interval measured by the air temperature sensor on the air flow meter is below the lower limit. |
| 247 | P110A | System degradation 0 |
| 248 | P110B | Level-1 degradation |
| 249 | P110C | Level-2 degradation |
| 250 | P110D | Level-3 degradation |
| 251 | P110E | Vehicle performance limit function is activated. |
| 252 | P1110 | The detected signal within physical range is relatively high. |
| 253 | P1111 | The engine coolant temperature signal level is relatively low. |
| 254 | P1120 | The correction of air flow sensor load exceeds the maximum deviation limit. |
| 255 | P1121 | The physical value of air flow meter is above the upper limit. |
| 256 | P1122 | The physical value of air flow meter is below the lower limit. |
| S/N | DTC | Meaning |
| 257 | P1123 | The signal level of intake air temperature sensor (integrated inside the air flow sensor) is relatively low. |
| 258 | P1130 | The signal level of fuel temperature sensor is relatively low. |
| 259 | P1131 | The signal of fuel temperature is unreliable. |
| 260 | P113A | The signal of too high oil temperature is unreliable. |
| 261 | P113B | The signal level of oil temperature sensor is relatively high. |
| 262 | P113C | The signal level of oil temperature sensor is relatively low. |
| 263 | P1200 | Short circuit between the high end and low end of the 1st cylinder fuel injector |
| 264 | P1201 | Short circuit between the high end and low end of the 2nd cylinder fuel injector |
| 265 | P1202 | Short circuit between the high end and low end of the 3rd cylinder fuel injector |
| 266 | P1203 | Short circuit between the high end and low end of the 4th cylinder fuel injector |
| 267 | P1204 | Short circuit between the high end and low end of the 5th cylinder fuel injector |
| 268 | P1205 | Short circuit between the high end and low end of the 6th cylinder fuel injector |
| 269 | P1207 | 1st cylinder special error |
| 270 | P1208 | 2nd cylinder special error |
| 271 | P1209 | 3rd cylinder special error |
| 272 | P120A | 4th cylinder special error |
| 273 | P120B | 5th cylinder special error |
| 274 | P120C | 6th cylinder special error |
| 275 | P1210 | An error is reported when the time for electrifying the 1st cylinder reaches to the minimum. |
| 276 | P1211 | An error is reported when the time for electrifying the 2nd cylinder reaches to the minimum. |
| 277 | P1212 | An error is reported when the time for electrifying the 3rd cylinder reaches to the minimum. |
| 278 | P1213 | An error is reported when the time for electrifying the 4th cylinder reaches to the minimum. |
| 279 | P1214 | An error is reported when the time for electrifying the 5th cylinder reaches to the minimum. |
| 280 | P1215 | An error is reported when the time for electrifying the 6th cylinder reaches to the minimum. |
| 281 | P1216 | Maximum deviation error in the inner control circuit of electronic throttle |
| 282 | P1217 | Minimum deviation error in the inner control circuit of electronic throttle |
| 283 | P1218 | Maximum deviation error in the outer control circuit of electronic throttle |
| 284 | P1219 | Minimum deviation error in the outer control circuit of electronic throttle |
| 285 | P121A | 1st cylinder IQA error |
| 286 | P121B | 2nd cylinder IQA error |
| S/N | DTC | Meaning |
| 287 | P121C | 3rd cylinder IQA error |
| 288 | P121D | 4th cylinder IQA error |
| 289 | P121E | 5th cylinder IQA error |
| 290 | P121F | 6th cylinder IQA error |
| 291 | P1220 | The signal level of intercooler downstream temperature sensor is relatively high. |
| 292 | P1221 | The signal level of intercooler downstream temperature sensor is relatively low. |
| 293 | P122A | The positive deviation of throttle controller exceeds the upper limit for a long time. |
| 294 | P122B | The negative deviation of throttle controller is below the lower limit for a long time. |
| 295 | P1230 | Error reported in monitoring the OBDII maximum threshold correction |
| 296 | P1231 | Error reported in monitoring the OBDII minimum threshold correction |
| 297 | P1245 | System degradation information |
| 298 | P1250 | An error is triggered when the ET time of the 1st cylinder reaches the maximum limit (when the ZEL comes into effect). |
| 299 | P1251 | An error is triggered when the ET time of the 2nd cylinder reaches the maximum limit (when the ZEL comes into effect). |
| 300 | P1252 | An error is triggered when the ET time of the 3rd cylinder reaches the maximum limit (when the ZEL comes into effect). |
| 301 | P1253 | An error is triggered when the ET time of the 4th cylinder reaches the maximum limit (when the ZEL comes into effect). |
| 302 | P1254 | An error is triggered when the ET time of the 1st cylinder reaches the minimum limit (when the ZEL comes into effect). |
| 303 | P1255 | An error is triggered when the ET time of the 2nd cylinder reaches the minimum limit (when the ZEL comes into effect). |
| 304 | P1256 | An error is triggered when the ET time of the 3rd cylinder reaches the minimum limit (when the ZEL comes into effect). |
| 305 | P1257 | An error is triggered when the ET time of the 4th cylinder reaches the minimum limit (when the ZEL comes into effect). |
| 306 | P1400 | EGR valve circuit is open. |
| 307 | P1401 | Overtemperature of EGR valve bridge-H chip |
| 308 | P1402 | EGR valve circuit is short to power supply. |
| 309 | P1403 | EGR valve circuit is short to ground. |
| 310 | P140A | The signal level of the EGR cooler downstream temperature is relatively high. |
| 311 | P140B | The signal level of the EGR cooler downstream temperature is relatively low. |
| 312 | P1410 | The positive deviation of throttle controller exceeds the upper limit for a long time. |
| 313 | P1411 | The negative deviation of throttle controller is below the lower limit for a long time. |
| 314 | P1415 | The time for transforming from RGN to NRM mode is too long. |
| 315 | P1418 | The indicator actuator circuit for EGR bypass regulating valve is open. |
| S/N | DTC | Meaning |
| 316 | P1419 | Overheating of indicator actuator for EGR bypass regulating valve |
| 317 | P141A | The indicator actuator circuit for EGR bypass regulating valve is short to battery. |
| 318 | P141B | The indicator actuator circuit for EGR bypass regulating valve is short to ground. |
| 319 | P141C | The relay actuator circuit for EGR bypass regulating valve is open. |
| 320 | P141D | Overheating of relay actuator for EGR bypass regulating valve |
| 321 | P141E | The relay actuator circuit for EGR bypass regulating valve is short to battery. |
| 322 | P141F | The relay actuator circuit for EGR bypass regulating valve is short to ground. |
| 323 | P1420 | The maximum exhaust temperature signal of the 1st cylinder is too strong. |
| 324 | P1421 | The maximum exhaust temperature signal of the 2nd cylinder is too strong. |
| 325 | P1422 | The maximum exhaust temperature signal of the 3rd cylinder is too strong. |
| 326 | P1423 | The maximum exhaust temperature signal of the 4th cylinder is too strong. |
| 327 | P1424 | The maximum exhaust temperature signal of the 5th cylinder is too strong. |
| 328 | P1425 | The maximum exhaust temperature signal of the 6th cylinder is too strong. |
| 329 | P1426 | The minimum exhaust temperature signal of the 1st cylinder is too strong. |
| 330 | P1427 | The minimum exhaust temperature signal of the 2nd cylinder is too strong. |
| 331 | P1428 | The minimum exhaust temperature signal of the 3rd cylinder is too strong. |
| 332 | P1429 | The minimum exhaust temperature signal of the 4th cylinder is too strong. |
| 333 | P142A | The minimum exhaust temperature signal of the 5th cylinder is too strong. |
| 334 | P142B | The minimum exhaust temperature signal of the 6th cylinder is too strong. |
| 335 | P1430 | The exhaust temperature T0 in cold start is unreliable. |
| 336 | P1431 | The exhaust temperature T1 in cold start is unreliable. |
| 337 | P1432 | The exhaust temperature T2 in cold start is unreliable. |
| 338 | P1433 | The exhaust temperature T3 in cold start is unreliable. |
| 339 | P1434 | The exhaust temperature T4 in cold start is unreliable. |
| 340 | P1435 | The exhaust temperature T5 in cold start is unreliable. |
| 341 | P1436 | The exhaust temperature signal is unreliable. |
| 342 | P1437 | Unreliable monitoring of the 1st cylinder exhaust temperature |
| 343 | P1438 | Unreliable monitoring of the 2nd cylinder exhaust temperature |
| 344 | P1439 | Unreliable monitoring of the 3rd cylinder exhaust temperature |
| 345 | P143A | Unreliable monitoring of the 4th cylinder exhaust temperature |
| 346 | P143B | Unreliable monitoring of the 5th cylinder exhaust temperature |
| 347 | P143C | Unreliable monitoring of the 6th cylinder exhaust temperature |
| 348 | P1440 | Negative deviation error of oxygen sensor regulator |
| 349 | P1441 | Positive deviation error of oxygen sensor regulator |
| S/N | DTC | Meaning |
| 350 | P1442 | Conversion failure of oxygen sensor regulator |
| 351 | P1450 | The particulate filter upstream temperature is unreliable. |
| 352 | P1451 | The signal level of particulate filter upstream temperature is relatively high. |
| 353 | P1452 | The signal level of particulate filter upstream temperature is relatively low. |
| 354 | P1453 | The signal level of particulate filter upstream temperature sensor is relatively high. |
| 355 | P1454 | The signal level of particulate filter upstream temperature sensor is relatively low. |
| 356 | P1455 | Connection failure of particulate filter differential pressure sensor hose |
| 357 | P1456 | The particulate filter differential pressure sensor is unreliable. |
| 358 | P1457 | Maximum characteristic differential pressure of particulate filter |
| 359 | P1458 | Minimum characteristic differential pressure of particulate filter |
| 360 | P1459 | Minimum deviation of particulate filter |
| 361 | P145A | The signal level of particulate filter flow impedance is high. |
| 362 | P145B | Maximum deviation of particulate filter smoke mass |
| 363 | P145C | Minimum deviation of particulate filter smoke mass |
| 364 | P145D | Maximum value of particulate filter smoke mass |
| 365 | P145E | The signal level of particulate filter flow impedance is relatively high. |
| 366 | P145F | The signal level of particulate filter flow impedance is relatively low. |
| 367 | P1460 | The maximum differential pressure signal of particulate filter is enhanced. |
| 368 | P1461 | The minimum differential pressure signal of particulate filter is enhanced. |
| 369 | P1462 | The dynamic differential pressure of particulate filter is unreliable. |
| 370 | P1463 | The differential pressure self-adaption of particulate filter hose is unreliable. |
| 371 | P1464 | Particulate filter differential pressure error |
| 372 | P146A | The physical value of differential pressure sensor for particulate oxidation catalyst exceeds the upper limit. |
| 373 | P146B | The physical value of differential pressure sensor for particulate oxidation catalyst falls below the lower limit. |
| 374 | P146C | CAN Signal error |
| 375 | P146D | CAN Signal error |
| 376 | P1470 | Nernst signal error of oxygen sensor |
| 377 | P1471 | The oxygen sensor is virtually grounded. |
| 378 | P1472 | The dynamic signal level of oxygen sensor is relatively low. |
| 379 | P1473 | Oxygen sensor heater coupling signal fault |
| 380 | P1474 | The oxygen sensor heater signal is unreliable. |
| 381 | P1475 | The oxygen sensor battery voltage is relatively low. |
| 382 | P1476 | The calibration signal level of oxygen sensor is relatively high. |
| S/N | DTC | Meaning |
| 383 | P1477 | The calibration signal level of oxygen sensor is relatively low. |
| 384 | P1478 | The oxygen concentration of oxygen sensor exceeds the maximum threshold. |
| 385 | P1479 | The oxygen concentration of oxygen sensor exceeds the minimum threshold. |
| 386 | P147A | Relatively high oxygen concentration is unreliable. |
| 387 | P147B | Relatively high oxygen concentration is unreliable. |
| 388 | P147C | Relatively high oxygen concentration is unreliable. |
| 389 | P147D | Relatively low oxygen concentration is unreliable. |
| 390 | P147E | Relatively low oxygen concentration is unreliable. |
| 391 | P147F | Relatively low oxygen concentration is unreliable. |
| 392 | P1480 | The calibration value of oxygen sensor internal impedance is too high. |
| 393 | P1481 | The calibration value of oxygen sensor internal impedance is too low. |
| 394 | P1482 | The SPI battery voltage of oxygen sensor is too low. |
| 395 | P1483 | The SPI signal of oxygen sensor is unreliable. |
| 396 | P1484 | The oxygen sensor temperature is above the upper limit. |
| 397 | P1485 | The oxygen sensor temperature is below the lower limit. |
| 398 | P1486 | The oxygen sensor voltage in shunting exceeds the threshold. |
| 399 | P148A | The signal level of turbocharger upstream temperature sensor is relatively high. |
| 400 | P148B | The signal level of turbocharger upstream temperature sensor is relatively low. |
| 401 | P1500 | The voltage signal level of vehicle speed sensor is relatively high. |
| 402 | P1501 | The voltage signal level of vehicle speed sensor is relatively low. |
| 403 | P150A | Power supply diagnosis is disabled in electrifying phase due to overvoltage of battery. |
| 404 | P150B | Power supply diagnosis is disabled in electrifying phase due to under-voltage of battery. |
| 405 | P1510 | The signal level measured by A/C coolant pressure sensor is too low. |
| 406 | P1511 | The signal level measured by A/C coolant pressure sensor is too low. |
| 407 | P1512 | The signal level measured by A/C coolant pressure sensor is too high. |
| 408 | P1513 | The signal level measured by A/C coolant pressure sensor is too high. |
| 409 | P1514 | Overtemperature of compressor torque reduction command circuit in electrifying phase |
| 410 | P1515 | A/C switch CAN input signal is unreliable. |
| 411 | P1516 | The compressor torque reduction command circuit in electrifying phase is short to ground. |
| 412 | P1517 | The compressor torque reduction command circuit in electrifying phase is short to power. |
| 413 | P1520 | Short circuit of turbocharger bridge-H |
| S/N | DTC | Meaning |
| 414 | P1521 | Under-voltage of turbocharger bridge-H |
| 415 | P1522 | Overcurrent of turbocharger bridge-H |
| 416 | P1523 | Overtemperature of turbocharger bridge-H |
| 417 | P1524 | Overcurrent of turbocharger bridge-H temperature sensor |
| 418 | P1525 | The valve is stuck in deviation learning process. |
| 419 | P1526 | Output circuit 1 of turbocharger bridge-H is short to ground. |
| 420 | P1527 | Output circuit 1 of turbocharger bridge-H is short to ground. |
| 421 | P1528 | Output circuit 1 of turbocharger bridge-H is short to battery. |
| 422 | P1529 | Output circuit 2 of turbocharger bridge-H is short to battery. |
| 423 | P1601 | EGR valve circuit is open. |
| 424 | P1602 | Too high downstream temperature of coolant temperature sensor is unreliable. |
| 425 | P1603 | EGR valve circuit is short to power supply. |
| 426 | P1604 | EGR valve circuit is short to ground. |
| 427 | P1608 | EGR valve circuit is short to power supply. |
| 428 | P1609 | EGR valve circuit is short to ground. |
| 429 | P160A | EGR valve circuit is open. |
| 430 | P160B | Overtemperature of EGR valve bridge-H chip |
| 431 | P160C | Overcurrent of turbocharger bridge-H temperature sensor |
| 432 | P1610 | Execute closing fuel injection under standard ICO mode. |
| 433 | P1613 | The electrifying time detected by galloping prevention monitor is too long. |
| 434 | P1614 | Several faults occur during SPI communication. |
| 435 | P1615 | Time-out when trying to set up or cancel alarm task |
| 436 | P1617 | Error reported in monitoring under-voltage |
| 437 | P1618 | WDA works abnormally. |
| 438 | P1619 | EGR valve circuit is short to power supply. |
| 439 | P161A | EGR valve circuit is short to ground. |
| 440 | P161B | EGR valve circuit is open. |
| 441 | P161C | EGR valve circuit is open. |
| 442 | P161D | Failure in software reset visibility |
| 443 | P161E | Failure in software reset visibility |
| 444 | P161F | Failure in software reset visibility |
| 445 | P1620 | TTLAMP drive circuit is open. |
| 446 | P1621 | The drive circuit for fuel consumption display is short to power supply. |
| 447 | P1622 | The drive circuit for fuel consumption display is short to ground. |
| S/N | DTC | Meaning |
| 448 | P1623 | The drive circuit for fuel consumption display is open. |
| 449 | P1624 | Overtemperature of the drive circuit for fuel consumption display |
| 450 | P1625 | TTLAMP drive circuit is short to power supply. |
| 451 | P1626 | TTLAMP drive circuit is short to ground. |
| 452 | P1627 | Overheating of TTLAMP drive circuit |
| 453 | P1633 | The signal level of ECU temperature sensor is relatively high. |
| 454 | P1634 | The signal level of ECU temperature sensor is relatively high. |
| 455 | P1635 | The signal level of ECU temperature sensor is relatively low. |
| 456 | P1636 | The signal level of ECU temperature sensor is relatively low. |
| 457 | P1637 | The power supply voltage is too high. |
| 458 | P1638 | The power supply voltage is too low. |
| 459 | P1639 | The physical value of ECU temperature sensor exceeds the upper limit. |
| 460 | P163A | The physical value of ECU temperature sensor falls below the lower limit. |
| 461 | P163B | ECU temperature sensor SPI fault (LM71) |
| 462 | P1640 | Compressor overtemperature in electrifying phase |
| 463 | P1643 | Signal safety checkout error |
| 464 | P1645 | The injection frequency is limited by the boosting electric quantity charging balance. |
| 465 | P1646 | The injection frequency is limited by the high pressure fuel pump fuel quantity balance. |
| 466 | P1647 | The injection frequency is limited by the runtime. |
| 467 | P164C | EGR valve circuit is open. |
| 468 | P164D | EGR valve circuit is short to power supply. |
| 469 | P164E | EGR valve circuit is short to ground. |
| 470 | P1650 | EEP Clear Error |
| 471 | P1651 | EEP Clear Error |
| 472 | P1652 | An error is reported when the module’s data-writing is disabled for three times. |
| 473 | P165A | Null dataset identifier |
| 474 | P165B | Dataset switchover fault |
| 475 | P165C | EEPROM data-reading error |
| 476 | P1660 | ADC open circuit pulse test fault |
| 477 | P1662 | The voltage being transformed by ADC module exceeds the set range of test voltage. |
| 478 | P1663 | The radiometry correction exceeds the set range. |
| 479 | P1664 | Monitoring control communication fault |
| 480 | P1665 | SPI Monitoring control communication fault |
| S/N | DTC | Meaning |
| 481 | P1666 | Several faults occur when testing the whole ROM zone. |
| 482 | P1667 | The number of responsive bytes obtained from CPU in monitoring mode is too small
/ Error of the set response time of monitoring mode |
| 483 | P1668 | Error of the set response time of monitoring mode |
| 484 | P166A | OFF-route test time-out |
| 485 | P166B | The electrifying time for injection is unreliable. |
| 486 | P166C | The initial electrifying angle (SO E) is unreliable. |
| 487 | P166D | ZFC is unreliable. |
| 488 | P166E | Fuel injection monitoring mode 1 |
| 489 | P166F | Fuel injection monitoring mode 2 |
| 490 | P1670 | Error reported in fuel injection correction |
| 491 | P1671 | Unreliable rail pressure |
| 492 | P1672 | The torque limit is set once any error is detected before the MoCSOP’s error is generated. |
| 493 | P1673 | Monitoring OFF-route forward test fault |
| 494 | P1674 | Monitoring fault mode 3 |
| 495 | P1675 | The negative deviation of throttle controller is below the lower limit for a long time. |
| 496 | P1676 | Open circuit of EGR valve bridge-H |
| 497 | P1677 | Overload of EGR valve bridge-H |
| 498 | P1678 | Overtemperature of EGR valve bridge-H chip |
| 499 | P167B | CY33X fault |
| 500 | P167C | The set value of rail pressure is limited by the torque limit of the function control unit. |
| 501 | P1680 | The cruise indicator drive circuit is open. |
| 502 | P1681 | Overtemperature of cruise indicator drive circuit |
| 503 | P1682 | The cruise indicator drive circuit is short to power supply or high level. |
| 504 | P1683 | The cruise indicator drive circuit is short to ground. |
| 505 | P1684 | The grill heater is always ON. |
| 506 | P1685 | DFC mechanical fault when turning on ignition switch |
| 507 | P1686 | Fuel filter heating power level temperature fault |
| 508 | P1687 | CJ945 Power level no load fault |
| 509 | P1688 | CJ945 Power level no load fault |
| 510 | P1689 | Overheating of intake air heater drive circuit |
| 511 | P168A | CJ945 Overheating fault |
| 512 | P168B | CJ945 Power level is short to battery. |
| S/N | DTC | Meaning |
| 513 | P168C | CJ945 Power level is short to battery. |
| 514 | P168D | CJ945 Power level is short to ground. |
| 515 | P168E | CJ945 Power level is short to ground. |
| 516 | P1700 | Unreliable clutch signal / Clutch signal error |
| 517 | P1710 | Overheating of engine speed sensor |
| 518 | P1720 | Transmission neutral position signal |
| 519 | P2002 | The particulate oxidation catalyst device is removed. |
| 520 | P2004 | Overcurrent of EGR valve bridge-H based on temperature |
| 521 | P2008 | EGR valve circuit is open. |
| 522 | P2009 | EGR valve circuit is short to ground. |
| 523 | P2010 | EGR valve circuit is short to power supply. |
| 524 | P2014 | Under-voltage of EGR valve bridge-H |
| 525 | P2015 | The turbocharger control valve is stuck. |
| 526 | P2072 | The throttle valve is frozen. |
| 527 | P2076 | An error is reported when the EGR valve is stuck in closing or opening. |
| 528 | P2077 | The signal level of swirl valve position sensor is relatively low. |
| 529 | P2078 | The signal level measured by the variable swirl valve position sensor is above the limit. |
| 530 | P207A | Overtemperature of EGR valve bridge-H chip |
| 531 | P207B | The short-term jitter of EGR valve exceeds the limit. |
| 532 | P2100 | Open circuit of throttle bridge-H |
| 533 | P2101 | Overcurrent of throttle bridge-H |
| 534 | P2102 | Output circuit 1 of throttle bridge-H is short to ground. |
| 535 | P2103 | Output circuit 1 of throttle bridge-H is short to battery. |
| 536 | P2135 | Signals of accelerator pedal position sensor 1 and 2 are unreliable. |
| 537 | P213A | Open circuit of EGR valve bridge-H |
| 538 | P213B | Overload of EGR valve bridge-H |
| 539 | P213C | The Port 2 of EGR valve bridge-H chip is short to ground. |
| 540 | P213D | The Port 2 of EGR valve bridge-H chip is short to ground. |
| 541 | P2141 | The Port 1 of EGR valve bridge-H chip is short to ground. |
| 542 | P2142 | The Port 1 of EGR valve bridge-H chip is short to power supply. |
| 543 | P2146 | Short circuit |
| 544 | P2149 | Short circuit |
| 545 | P2157 | Unreliable vehicle speed signal |
| S/N | DTC | Meaning |
| 546 | P2173 | False positive deviation of throttle regulator |
| 547 | P2175 | False negative deviation of throttle regulator |
| 548 | P2226 | Fault of signal obtained from CAN by air pressure sensor |
| 549 | P2228 | The signal value of ambient pressure is below the lower limit. |
| 550 | P2229 | The signal value of ambient pressure is above the upper limit. |
| 551 | P2264 | EGR valve circuit is open. |
| 552 | P2265 | An error is reported when the moisture content in fuel is detected. |
| 553 | P2266 | EGR valve circuit is short to ground. |
| 554 | P2267 | EGR valve circuit is short to power supply. |
| 555 | P2268 | EGR valve circuit is open. |
| 556 | P2269 | The sensor self-checking signal level is above the upper limit. |
| 557 | P2290 | The rail pressure is below the minimum set value. |
| 558 | P242F | The particulate filter smoke load exceeds the maximum. |
| 559 | P2454 | The signal level of particulate filter differential pressure sensor is relatively low. |
| 560 | P2455 | The signal level of particulate filter differential pressure sensor is relatively high. |
| 561 | P2458 | Particulate filter regeneration permanent fault |
| 562 | P245A | EGR cooler bypass valve fault |
| 563 | P245B | Too low EGR cooling efficiency |
| 564 | P245D | The signal level of EGR cooler sensor is relatively high. |
| 565 | P250F | Danger is caused by too low fuel level and air ingress into hydraulic system. |
| 566 | P2519 | A/C switch CAN input signal error |
| 567 | P2522 | The compressor torque reduction command circuit in electrifying phase is open. |
| 568 | P2562 | The turbocharger bridge-H chip circuit is open. |
| 569 | P2563 | The turbocharger control valve is stuck. |
| 570 | P2564 | The original voltage of EGR valve sensor signal is below the lower limit. |
| 571 | P2565 | The original voltage of EGR valve sensor signal is above the upper limit. |
| 572 | P2621 | The throttle signal level is relatively low. |
| 573 | P2622 | The throttle signal level is relatively high. |
| 574 | P2626 | The oxygen sensor pump current terminal IP is in open circuit. |
| 575 | B0020 | Airbag collision status |
| 576 | U0121 | ABS ECU main data loss |
| 577 | U0400 | CAN received frame BCM1 message length error |
| 578 | U0415 | CAN received frame ABS1 message length error |

Maintenance manual for sunray hfc4da1-2c china-IV diesel engines
114
S/N DTC
Meaning
226
P1061
OBD General fault 10
227
P1062
OBD General fault 11
228
P1063
OBD General fault 12
229
P1064
OBD General fault 13
230
P1065
OBD General fault 14
231
P1066
OBD General fault 15
232
P1067
OBD General fault 16
233
P1068
OBD General fault 2
234
P1069
OBD General fault 3
235
P106A
OBD General fault 4
236
P106B
OBD General fault 5
237
P106C
OBD General fault 6
238
P106D
OBD General fault 7
239
P106E
OBD General fault 8
240
P106F
OBD General fault 9
241 P1070 Blockage
of
particulate
filter
242
P1100
The regulated idling value of air flow sensor is above the upper limit.
243 P1102
The duty cycle of air temperature sensor on the air flow meter is above the upper
limit.
244 P1103
The duty cycle of air temperature sensor on the air flow meter is below the lower
limit.
245 P1106
The time interval measured by the air temperature sensor on the air flow meter is
above the upper limit.
246 P1107
The time interval measured by the air temperature sensor on the air flow meter is
below the lower limit.
247
P110A
System degradation 0
248 P110B Level-1
degradation
249 P110C Level-2
degradation
250 P110D Level-3
degradation
251
P110E
Vehicle performance limit function is activated.
252
P1110
The detected signal within physical range is relatively high.
253 P1111 The
engine
coolant temperature signal level is relatively low.
254
P1120
The correction of air flow sensor load exceeds the maximum deviation limit.
255
P1121
The physical value of air flow meter is above the upper limit.
256
P1122
The physical value of air flow meter is below the lower limit.
————————————————————————————————————————————————————-

Maintenance manual for sunray hfc4da1-2c china-IV diesel engines
115
S/N DTC
Meaning
257 P1123
The signal level of intake air temperature sensor (integrated inside the air flow
sensor) is relatively low.
258
P1130
The signal level of fuel temperature sensor is relatively low.
259
P1131
The signal of fuel temperature is unreliable.
260
P113A
The signal of too high oil temperature is unreliable.
261
P113B
The signal level of oil temperature sensor is relatively high.
262
P113C
The signal level of oil temperature sensor is relatively low.
263
P1200
Short circuit between the high end and low end of the 1
st
cylinder fuel injector
264
P1201
Short circuit between the high end and low end of the 2
nd
cylinder fuel injector
265
P1202
Short circuit between the high end and low end of the 3
rd
cylinder fuel injector
266
P1203
Short circuit between the high end and low end of the 4
th
cylinder fuel injector
267
P1204
Short circuit between the high end and low end of the 5
th
cylinder fuel injector
268
P1205
Short circuit between the high end and low end of the 6
th
cylinder fuel injector
269 P1207 1
st
cylinder special error
270 P1208 2
nd
cylinder special error
271 P1209 3
rd
cylinder special error
272 P120A 4
th
cylinder special error
273 P120B 5
th
cylinder special error
274 P120C 6
th
cylinder special error
275 P1210
An error is reported when the time for electrifying the 1
st
cylinder reaches to the
minimum.
276 P1211
An error is reported when the time for electrifying the 2
nd
cylinder reaches to the
minimum.
277 P1212
An error is reported when the time for electrifying the 3
rd
cylinder reaches to the
minimum.
278 P1213
An error is reported when the time for electrifying the 4
th
cylinder reaches to the
minimum.
279 P1214
An error is reported when the time for electrifying the 5
th
cylinder reaches to the
minimum.
280 P1215
An error is reported when the time for electrifying the 6
th
cylinder reaches to the
minimum.
281
P1216
Maximum deviation error in the inner control circuit of electronic throttle
282
P1217
Minimum deviation error in the inner control circuit of electronic throttle
283
P1218
Maximum deviation error in the outer control circuit of electronic throttle
284
P1219
Minimum deviation error in the outer control circuit of electronic throttle
285 P121A 1
st
cylinder IQA error
286 P121B 2
nd
cylinder IQA error
————————————————————————————————————————————————————-

Maintenance manual for sunray hfc4da1-2c china-IV diesel engines
116
S/N DTC
Meaning
287 P121C 3
rd
cylinder IQA error
288 P121D 4
th
cylinder IQA error
289 P121E 5
th
cylinder IQA error
290 P121F 6
th
cylinder IQA error
291
P1220
The signal level of intercooler downstream temperature sensor is relatively high.
292
P1221
The signal level of intercooler downstream temperature sensor is relatively low.
293
P122A
The positive deviation of throttle controller exceeds the upper limit for a long time.
294
P122B
The negative deviation of throttle controller is below the lower limit for a long time.
295
P1230
Error reported in monitoring the OBDII maximum threshold correction
296
P1231
Error reported in monitoring the OBDII minimum threshold correction
297
P1245
System degradation information
298 P1250
An error is triggered when the ET time of the 1
st
cylinder reaches the maximum limit
(when the ZEL comes into effect).
299 P1251
An error is triggered when the ET time of the 2
nd
cylinder reaches the maximum
limit (when the ZEL comes into effect).
300 P1252
An error is triggered when the ET time of the 3
rd
cylinder reaches the maximum limit
(when the ZEL comes into effect).
301 P1253
An error is triggered when the ET time of the 4
th
cylinder reaches the maximum limit
(when the ZEL comes into effect).
302 P1254
An error is triggered when the ET time of the 1
st
cylinder reaches the minimum limit
(when the ZEL comes into effect).
303 P1255
An error is triggered when the ET time of the 2
nd
cylinder reaches the minimum limit
(when the ZEL comes into effect).
304 P1256
An error is triggered when the ET time of the 3
rd
cylinder reaches the minimum limit
(when the ZEL comes into effect).
305 P1257
An error is triggered when the ET time of the 4
th
cylinder reaches the minimum limit
(when the ZEL comes into effect).
306
P1400
EGR valve circuit is open.
307
P1401
Overtemperature of EGR valve bridge-H chip
308
P1402
EGR valve circuit is short to power supply.
309
P1403
EGR valve circuit is short to ground.
310
P140A
The signal level of the EGR cooler downstream temperature is relatively high.
311
P140B
The signal level of the EGR cooler downstream temperature is relatively low.
312
P1410
The positive deviation of throttle controller exceeds the upper limit for a long time.
313
P1411
The negative deviation of throttle controller is below the lower limit for a long time.
314
P1415
The time for transforming from RGN to NRM mode is too long.
315
P1418
The indicator actuator circuit for EGR bypass regulating valve is open.
————————————————————————————————————————————————————-

Maintenance manual for sunray hfc4da1-2c china-IV diesel engines
117
S/N DTC
Meaning
316
P1419
Overheating of indicator actuator for EGR bypass regulating valve
317
P141A
The indicator actuator circuit for EGR bypass regulating valve is short to battery.
318
P141B
The indicator actuator circuit for EGR bypass regulating valve is short to ground.
319
P141C
The relay actuator circuit for EGR bypass regulating valve is open.
320
P141D
Overheating of relay actuator for EGR bypass regulating valve
321
P141E
The relay actuator circuit for EGR bypass regulating valve is short to battery.
322
P141F
The relay actuator circuit for EGR bypass regulating valve is short to ground.
323
P1420
The maximum exhaust temperature signal of the 1
st
cylinder is too strong.
324
P1421
The maximum exhaust temperature signal of the 2
nd
cylinder is too strong.
325
P1422
The maximum exhaust temperature signal of the 3
rd
cylinder is too strong.
326
P1423
The maximum exhaust temperature signal of the 4
th
cylinder is too strong.
327
P1424
The maximum exhaust temperature signal of the 5
th
cylinder is too strong.
328
P1425
The maximum exhaust temperature signal of the 6
th
cylinder is too strong.
329
P1426
The minimum exhaust temperature signal of the 1
st
cylinder is too strong.
330
P1427
The minimum exhaust temperature signal of the 2
nd
cylinder is too strong.
331
P1428
The minimum exhaust temperature signal of the 3
rd
cylinder is too strong.
332
P1429
The minimum exhaust temperature signal of the 4
th
cylinder is too strong.
333
P142A
The minimum exhaust temperature signal of the 5
th
cylinder is too strong.
334
P142B
The minimum exhaust temperature signal of the 6
th
cylinder is too strong.
335
P1430
The exhaust temperature T0 in cold start is unreliable.
336
P1431
The exhaust temperature T1 in cold start is unreliable.
337
P1432
The exhaust temperature T2 in cold start is unreliable.
338
P1433
The exhaust temperature T3 in cold start is unreliable.
339
P1434
The exhaust temperature T4 in cold start is unreliable.
340
P1435
The exhaust temperature T5 in cold start is unreliable.
341
P1436
The exhaust temperature signal is unreliable.
342
P1437
Unreliable monitoring of the 1
st
cylinder exhaust temperature
343
P1438
Unreliable monitoring of the 2
nd
cylinder exhaust temperature
344
P1439
Unreliable monitoring of the 3
rd
cylinder exhaust temperature
345
P143A
Unreliable monitoring of the 4
th
cylinder exhaust temperature
346
P143B
Unreliable monitoring of the 5
th
cylinder exhaust temperature
347
P143C
Unreliable monitoring of the 6
th
cylinder exhaust temperature
348
P1440
Negative deviation error of oxygen sensor regulator
349
P1441
Positive deviation error of oxygen sensor regulator
————————————————————————————————————————————————————-

Maintenance manual for sunray hfc4da1-2c china-IV diesel engines
118
S/N DTC
Meaning
350
P1442
Conversion failure of oxygen sensor regulator
351
P1450
The particulate filter upstream temperature is unreliable.
352
P1451
The signal level of particulate filter upstream temperature is relatively high.
353
P1452
The signal level of particulate filter upstream temperature is relatively low.
354
P1453
The signal level of particulate filter upstream temperature sensor is relatively high.
355
P1454
The signal level of particulate filter upstream temperature sensor is relatively low.
356 P1455 Connection
failure
of particulate filter differential pressure sensor hose
357
P1456
The particulate filter differential pressure sensor is unreliable.
358
P1457
Maximum characteristic differential pressure of particulate filter
359
P1458
Minimum characteristic differential pressure of particulate filter
360
P1459
Minimum deviation of particulate filter
361
P145A
The signal level of particulate filter flow impedance is high.
362
P145B
Maximum deviation of particulate filter smoke mass
363
P145C
Minimum deviation of particulate filter smoke mass
364
P145D
Maximum value of particulate filter smoke mass
365
P145E
The signal level of particulate filter flow impedance is relatively high.
366
P145F
The signal level of particulate filter flow impedance is relatively low.
367
P1460
The maximum differential pressure signal of particulate filter is enhanced.
368
P1461
The minimum differential pressure signal of particulate filter is enhanced.
369
P1462
The dynamic differential pressure of particulate filter is unreliable.
370
P1463
The differential pressure self-adaption of particulate filter hose is unreliable.
371
P1464
Particulate filter differential pressure error
372 P146A
The physical value of differential pressure sensor for particulate oxidation catalyst
exceeds the upper limit.
373 P146B
The physical value of differential pressure sensor for particulate oxidation catalyst
falls below the lower limit.
374 P146C CAN
Signal
error
375 P146D CAN
Signal
error
376
P1470
Nernst signal error of oxygen sensor
377
P1471
The oxygen sensor is virtually grounded.
378
P1472
The dynamic signal level of oxygen sensor is relatively low.
379
P1473
Oxygen sensor heater coupling signal fault
380
P1474
The oxygen sensor heater signal is unreliable.
381
P1475
The oxygen sensor battery voltage is relatively low.
382
P1476
The calibration signal level of oxygen sensor is relatively high.
————————————————————————————————————————————————————-

Maintenance manual for sunray hfc4da1-2c china-IV diesel engines
119
S/N DTC
Meaning
383
P1477
The calibration signal level of oxygen sensor is relatively low.
384
P1478
The oxygen concentration of oxygen sensor exceeds the maximum threshold.
385
P1479
The oxygen concentration of oxygen sensor exceeds the minimum threshold.
386
P147A
Relatively high oxygen concentration is unreliable.
387
P147B
Relatively high oxygen concentration is unreliable.
388
P147C
Relatively high oxygen concentration is unreliable.
389
P147D
Relatively low oxygen concentration is unreliable.
390
P147E
Relatively low oxygen concentration is unreliable.
391
P147F
Relatively low oxygen concentration is unreliable.
392
P1480
The calibration value of oxygen sensor internal impedance is too high.
393
P1481
The calibration value of oxygen sensor internal impedance is too low.
394
P1482
The SPI battery voltage of oxygen sensor is too low.
395
P1483
The SPI signal of oxygen sensor is unreliable.
396
P1484
The oxygen sensor temperature is above the upper limit.
397
P1485
The oxygen sensor temperature is below the lower limit.
398
P1486
The oxygen sensor voltage in shunting exceeds the threshold.
399
P148A
The signal level of turbocharger upstream temperature sensor is relatively high.
400
P148B
The signal level of turbocharger upstream temperature sensor is relatively low.
401
P1500
The voltage signal level of vehicle speed sensor is relatively high.
402
P1501
The voltage signal level of vehicle speed sensor is relatively low.
403 P150A
Power supply diagnosis is disabled in electrifying phase due to overvoltage of
battery.
404 P150B
Power supply diagnosis is disabled in electrifying phase due to under-voltage of
battery.
405
P1510
The signal level measured by A/C coolant pressure sensor is too low.
406
P1511
The signal level measured by A/C coolant pressure sensor is too low.
407
P1512
The signal level measured by A/C coolant pressure sensor is too high.
408
P1513
The signal level measured by A/C coolant pressure sensor is too high.
409 P1514
Overtemperature of compressor torque reduction command circuit in electrifying
phase
410
P1515
A/C switch CAN input signal is unreliable.
411 P1516
The compressor torque reduction command circuit in electrifying phase is short to
ground.
412 P1517
The compressor torque reduction command circuit in electrifying phase is short to
power.
413
P1520
Short circuit of turbocharger bridge-H
————————————————————————————————————————————————————-

Maintenance manual for sunray hfc4da1-2c china-IV diesel engines
120
S/N DTC
Meaning
414
P1521
Under-voltage of turbocharger bridge-H
415 P1522 Overcurrent
of
turbocharger
bridge-H
416
P1523
Overtemperature of turbocharger bridge-H
417
P1524
Overcurrent of turbocharger bridge-H temperature sensor
418
P1525
The valve is stuck in deviation learning process.
419
P1526
Output circuit 1 of turbocharger bridge-H is short to ground.
420
P1527
Output circuit 1 of turbocharger bridge-H is short to ground.
421
P1528
Output circuit 1 of turbocharger bridge-H is short to battery.
422
P1529
Output circuit 2 of turbocharger bridge-H is short to battery.
423
P1601
EGR valve circuit is open.
424
P1602
Too high downstream temperature of coolant temperature sensor is unreliable.
425
P1603
EGR valve circuit is short to power supply.
426
P1604
EGR valve circuit is short to ground.
427
P1608
EGR valve circuit is short to power supply.
428
P1609
EGR valve circuit is short to ground.
429
P160A
EGR valve circuit is open.
430
P160B
Overtemperature of EGR valve bridge-H chip
431
P160C
Overcurrent of turbocharger bridge-H temperature sensor
432
P1610
Execute closing fuel injection under standard ICO mode.
433
P1613
The electrifying time detected by galloping prevention monitor is too long.
434
P1614
Several faults occur during SPI communication.
435
P1615
Time-out when trying to set up or cancel alarm task
436
P1617
Error reported in monitoring under-voltage
437 P1618 WDA
works
abnormally.
438
P1619
EGR valve circuit is short to power supply.
439
P161A
EGR valve circuit is short to ground.
440
P161B
EGR valve circuit is open.
441
P161C
EGR valve circuit is open.
442
P161D
Failure in software reset visibility
443
P161E
Failure in software reset visibility
444
P161F
Failure in software reset visibility
445
P1620
TTLAMP drive circuit is open.
446
P1621
The drive circuit for fuel consumption display is short to power supply.
447
P1622
The drive circuit for fuel consumption display is short to ground.
————————————————————————————————————————————————————-

Maintenance manual for sunray hfc4da1-2c china-IV diesel engines
121
S/N DTC
Meaning
448
P1623
The drive circuit for fuel consumption display is open.
449
P1624
Overtemperature of the drive circuit for fuel consumption display
450
P1625
TTLAMP drive circuit is short to power supply.
451
P1626
TTLAMP drive circuit is short to ground.
452
P1627
Overheating of TTLAMP drive circuit
453
P1633
The signal level of ECU temperature sensor is relatively high.
454
P1634
The signal level of ECU temperature sensor is relatively high.
455
P1635
The signal level of ECU temperature sensor is relatively low.
456
P1636
The signal level of ECU temperature sensor is relatively low.
457
P1637
The power supply voltage is too high.
458
P1638
The power supply voltage is too low.
459
P1639
The physical value of ECU temperature sensor exceeds the upper limit.
460
P163A
The physical value of ECU temperature sensor falls below the lower limit.
461
P163B
ECU temperature sensor SPI fault (LM71)
462
P1640
Compressor overtemperature in electrifying phase
463
P1643
Signal safety checkout error
464
P1645
The injection frequency is limited by the boosting electric quantity charging balance.
465 P1646
The injection frequency is limited by the high pressure fuel pump fuel quantity
balance.
466
P1647
The injection frequency is limited by the runtime.
467
P164C
EGR valve circuit is open.
468
P164D
EGR valve circuit is short to power supply.
469
P164E
EGR valve circuit is short to ground.
470 P1650 EEP
Clear
Error
471 P1651 EEP
Clear
Error
472
P1652
An error is reported when the module’s data-writing is disabled for three times.
473 P165A Null
dataset
identifier
474
P165B
Dataset switchover fault
475
P165C
EEPROM data-reading error
476
P1660
ADC open circuit pulse test fault
477
P1662
The voltage being transformed by ADC module exceeds the set range of test voltage.
478
P1663
The radiometry correction exceeds the set range.
479
P1664
Monitoring control communication fault
480
P1665
SPI Monitoring control communication fault
————————————————————————————————————————————————————-

Maintenance manual for sunray hfc4da1-2c china-IV diesel engines
122
S/N DTC
Meaning
481
P1666
Several faults occur when testing the whole ROM zone.
482 P1667
The number of responsive bytes obtained from CPU in monitoring mode is too small
/ Error of the set response time of monitoring mode
483
P1668
Error of the set response time of monitoring mode
484
P166A
OFF-route test time-out
485
P166B
The electrifying time for injection is unreliable.
486
P166C
The initial electrifying angle (SO E) is unreliable.
487
P166D
ZFC is unreliable.
488
P166E
Fuel injection monitoring mode 1
489
P166F
Fuel injection monitoring mode 2
490
P1670
Error reported in fuel injection correction
491
P1671
Unreliable rail pressure
492 P1672
The torque limit is set once any error is detected before the MoCSOP’s error is
generated.
493
P1673
Monitoring OFF-route forward test fault
494
P1674
Monitoring fault mode 3
495
P1675
The negative deviation of throttle controller is below the lower limit for a long time.
496
P1676
Open circuit of EGR valve bridge-H
497
P1677
Overload of EGR valve bridge-H
498
P1678
Overtemperature of EGR valve bridge-H chip
499 P167B CY33X
fault
500 P167C
The set value of rail pressure is limited by the torque limit of the function control
unit.
501
P1680
The cruise indicator drive circuit is open.
502
P1681
Overtemperature of cruise indicator drive circuit
503
P1682
The cruise indicator drive circuit is short to power supply or high level.
504
P1683
The cruise indicator drive circuit is short to ground.
505
P1684
The grill heater is always ON.
506
P1685
DFC mechanical fault when turning on ignition switch
507
P1686
Fuel filter heating power level temperature fault
508
P1687
CJ945 Power level no load fault
509
P1688
CJ945 Power level no load fault
510
P1689
Overheating of intake air heater drive circuit
511
P168A
CJ945 Overheating fault
512
P168B
CJ945 Power level is short to battery.
————————————————————————————————————————————————————-

Maintenance manual for sunray hfc4da1-2c china-IV diesel engines
123
S/N DTC
Meaning
513
P168C
CJ945 Power level is short to battery.
514
P168D
CJ945 Power level is short to ground.
515
P168E
CJ945 Power level is short to ground.
516
P1700
Unreliable clutch signal / Clutch signal error
517
P1710
Overheating of engine speed sensor
518 P1720 Transmission
neutral
position
signal
519
P2002
The particulate oxidation catalyst device is removed.
520
P2004
Overcurrent of EGR valve bridge-H based on temperature
521
P2008
EGR valve circuit is open.
522
P2009
EGR valve circuit is short to ground.
523
P2010
EGR valve circuit is short to power supply.
524
P2014
Under-voltage of EGR valve bridge-H
525
P2015
The turbocharger control valve is stuck.
526
P2072
The throttle valve is frozen.
527
P2076
An error is reported when the EGR valve is stuck in closing or opening.
528
P2077
The signal level of swirl valve position sensor is relatively low.
529 P2078
The signal level measured by the variable swirl valve position sensor is above the
limit.
530
P207A
Overtemperature of EGR valve bridge-H chip
531
P207B
The short-term jitter of EGR valve exceeds the limit.
532
P2100
Open circuit of throttle bridge-H
533
P2101
Overcurrent of throttle bridge-H
534
P2102
Output circuit 1 of throttle bridge-H is short to ground.
535
P2103
Output circuit 1 of throttle bridge-H is short to battery.
536
P2135
Signals of accelerator pedal position sensor 1 and 2 are unreliable.
537
P213A
Open circuit of EGR valve bridge-H
538
P213B
Overload of EGR valve bridge-H
539
P213C
The Port 2 of EGR valve bridge-H chip is short to ground.
540
P213D
The Port 2 of EGR valve bridge-H chip is short to ground.
541
P2141
The Port 1 of EGR valve bridge-H chip is short to ground.
542
P2142
The Port 1 of EGR valve bridge-H chip is short to power supply.
543 P2146 Short
circuit
544 P2149 Short
circuit
545
P2157
Unreliable vehicle speed signal
————————————————————————————————————————————————————-

Maintenance manual for sunray hfc4da1-2c china-IV diesel engines
124
S/N DTC
Meaning
546
P2173
False positive deviation of throttle regulator
547
P2175
False negative deviation of throttle regulator
548
P2226
Fault of signal obtained from CAN by air pressure sensor
549
P2228
The signal value of ambient pressure is below the lower limit.
550
P2229
The signal value of ambient pressure is above the upper limit.
551
P2264
EGR valve circuit is open.
552
P2265
An error is reported when the moisture content in fuel is detected.
553
P2266
EGR valve circuit is short to ground.
554
P2267
EGR valve circuit is short to power supply.
555
P2268
EGR valve circuit is open.
556
P2269
The sensor self-checking signal level is above the upper limit.
557
P2290
The rail pressure is below the minimum set value.
558
P242F
The particulate filter smoke load exceeds the maximum.
559
P2454
The signal level of particulate filter differential pressure sensor is relatively low.
560
P2455
The signal level of particulate filter differential pressure sensor is relatively high.
561 P2458 Particulate
filter
regeneration permanent fault
562
P245A
EGR cooler bypass valve fault
563
P245B
Too low EGR cooling efficiency
564
P245D
The signal level of EGR cooler sensor is relatively high.
565
P250F
Danger is caused by too low fuel level and air ingress into hydraulic system.
566
P2519
A/C switch CAN input signal error
567
P2522
The compressor torque reduction command circuit in electrifying phase is open.
568
P2562
The turbocharger bridge-H chip circuit is open.
569
P2563
The turbocharger control valve is stuck.
570
P2564
The original voltage of EGR valve sensor signal is below the lower limit.
571
P2565
The original voltage of EGR valve sensor signal is above the upper limit.
572
P2621
The throttle signal level is relatively low.
573
P2622
The throttle signal level is relatively high.
574
P2626
The oxygen sensor pump current terminal IP is in open circuit.
575 B0020 Airbag
collision
status
576
U0121
ABS ECU main data loss
577
U0400
CAN received frame BCM1 message length error
578
U0415
CAN received frame ABS1 message length error
————————————————————————————————————————————————————-

Maintenance manual for sunray hfc4da1-2c china-IV diesel engines
125
Section V. Fault Diagnosis for Electronic-Controlled Common Rail Diesel Engines
z Prior to disconnecting or reconnecting the power cord of engine control module (ECM), be sure to turn off the
ignition switch, in order not to damage the ECM.
z All types of engine DTCs are stored in the ECM memory.
z The engine DTCs should be cleared after the maintenance.
Common DTCs and Troubleshooting Methods for Electronic Control Systems of Diesel Engines
1.
DTC
P0475
The exhaust brake valve control line is open.
P0476
The ECU internal driver module of exhaust brake valve control line is
overheating.
P0477
The exhaust brake valve control line is short to ground.
P0478
The exhaust brake valve control line is short to high level.
Fault Description: The engine control unit (ECU) shall actuate the exhaust braking after processing the signal
received from the exhaust brake switch and also check if the exhaust brake feedback signal matches with the ECU
control command. If not, DTC shall be reported.
Diagnosis Hint: The intermittent failure may be caused by poor contact of wire, abrasion of the insulation or damage
of the wire inside insulation.
Check for the following conditions:
z Poor contact of ECU or exhaust brake valve – Check the harness connector
– Loose terminal
– Poor matching and connection
– Breakage of keeper
– Distortion or damage of terminal
– Poor contact between terminal and wire
z Damage of harness – Check the harness for any damage
Terminal ECU
K29 Exhaust
brake
actuator
Exhaust brake actuator
————————————————————————————————————————————————————-

Maintenance manual for sunray hfc4da1-2c china-IV diesel engines
126
Fault Tree:
检查制动阀连接
检修或更换
制动阀问题
更换制动阀
对制动阀外观检测
插接件问题
更换ECU
Y
N
N
Y
检查ECU插接件
Y
检修或更换
N
联系技术支持
N
Check the connection of brake valve.
Connector fault
Repair or replace it.
Check the appearance of brake valve.
Fault of brake valve
Replace the brake valve.
Check the ECU connector.
Repair or replace it.
Replace the ECU.
Get the Technical Support.
————————————————————————————————————————————————————-

Maintenance manual for sunray hfc4da1-2c china-IV diesel engines
127
2.
DTC
P0069
The boost pressure sensor drift
P0237
The boost pressure sensor output voltage is below the lower limit (the wiring
is short to ground).
P0238
The boost pressure sensor output voltage is above the upper limit (the wiring
is open or short to high level).
P0097
The voltage of intake air temperature sensor is too low (the wiring is short to
ground).
P0098
The voltage of intake air temperature sensor is too high (the wiring is open
or short to high level).
Fault Description: The boost pressure sensor shall make response to the pressure change of intake manifold. The
pressure changes with the engine load. The ECU shall supply 5V voltage to the 5V reference voltage circuit of boost
pressure sensor and also supply grounding for the low reference voltage circuit. The boost pressure sensor shall
provide a signal that is related to the pressure change of intake manifold to ECU via the boost pressure sensor signal
circuit. When the intake manifold pressure is relatively low (for example: during idling period), the low level signal
voltage shall be detected by the ECU. When it is relatively high (for example: with the accelerator pedal fully open
(WOT)), the high level signal voltage shall be detected. The boost pressure sensor is also for determining the
barometric pressure (BARO). When the ignition switch is turned on without starting the engine, the following
condition shall occur. As long as the accelerator pedal position sensor signal is more than 28%, the barometric
pressure reading shall be updated. The boost pressure sensor includes the following circuits:
z A 5V reference voltage circuit
z A low reference voltage circuit
z A MAP sensor signal circuit
If the boost pressure sensor signal detected by ECU is beyond the set range, relevant DTC shall be generated.
The intake air temperature (IAT) sensor is a kind of variable resistor that can measure the temperature of air into the
engine. The ECU shall supply 5V voltage to the signal circuit of IAT sensor and also supply grounding for the
reference voltage circuit of IAT sensor. When the IAT sensor is in cold state, the sensor resistance is relatively high.
When the air temperature increases, the sensor resistance shall decrease. When the sensor resistance is relatively high,
the voltage of IAT sensor signal circuit detected by ECU shall be relatively high. With the decrease of sensor
resistance, the voltage of IAT sensor signal circuit detected by ECU shall decrease also. If the signal voltage of IAT
sensor detected by ECU is too low (indicating the temperature is too high), or too high (indicating the temperature is
too low), relevant DTC shall be generated.
Boost pressure /
intake air
temperature sensor
5V power supply
Pressure signal
Ground
Temperature signal
————————————————————————————————————————————————————-

Maintenance manual for sunray hfc4da1-2c china-IV diesel engines
128
Diagnosis Hint:
The normal boost pressure sensor shall make quick response to the change of accelerator pedal position, so its slow
action should not appear or it should not act slower than the change of accelerator pedal position.
For poor contact inspection between ECU and IAT sensor, please check the ECU harness connector for the following
conditions:
− Loose terminal
− Poor matching and connection
− Breakage of keeper
− Distortion or damage of terminal
− Poor contact between terminal and wire
Terminal ECU
A07
Power supply terminal of sensor
A53
Temperature signal terminal
A54 Pressure
signal
terminal
A28
Ground terminal of sensor
————————————————————————————————————————————————————-

Maintenance manual for sunray hfc4da1-2c china-IV diesel engines
129
Fault Tree:
Check the component connector.
Connector fault
Repair or replace it.
Repair or replace it.
Detect the sensor.
Sensor fault
Replace the sensor.
Fault of ECU connector
Get the Technical Support.
Repair the harness.
Check continuity and insulating
property.
Electrical fault
Replace the component.
Does the problem still exist?
————————————————————————————————————————————————————-
By Brian Wong, Reviewed by: Kurt Niebuhr, Updated on September 21, 2023
1. Introduction
1.1 Overview of the issue: Car not starting
When faced with the frustrating issue of a car not starting, it’s important to understand the potential causes and solutions to get your vehicle back on the road. In the case of the JAC T6, there are several factors that could contribute to this problem. By examining various aspects such as the electrical system, fuel system, and engine components, you can diagnose and address the issue effectively.
One common cause of a car failing to start is an electrical problem. In the JAC T6, this may manifest as a dead battery, a faulty starter motor, or problems with the ignition switch. A dead battery can be due to various reasons, including age, lack of maintenance, or a parasitic drain. A malfunctioning starter motor may prevent the engine from turning over, while issues with the ignition switch can disrupt the flow of electrical power to the necessary components.
Another potential culprit is the fuel system. In the JAC T6, an empty fuel tank or a clogged fuel filter can prevent the proper flow of fuel to the engine. If the fuel tank is empty, refilling it should be the first step. However, if the tank is adequately filled, a clogged fuel filter could be the issue. A clogged filter restricts fuel flow and can impede engine startup. Additionally, a malfunctioning fuel pump can also prevent the delivery of fuel to the engine, causing starting problems.
Engine mechanical issues can also contribute to a car not starting, and the JAC T6 is no exception. Problems such as a failed timing belt or chain, ignition system failure, or engine compression issues can disrupt the combustion process. A worn-out timing belt or chain can lead to improper valve timing, resulting in a no-start situation. Faulty ignition components, such as spark plugs or ignition coils, may fail to generate the necessary spark to ignite the air-fuel mixture. Engine compression problems, such as worn piston rings or valves, can reduce the engine’s ability to generate sufficient power for starting.
To troubleshoot the issue, a visual inspection is often the first step. Check the battery connections for any loose or corroded terminals. Inspect the fuses and relays to ensure they are not blown or damaged. Examine the wiring and cables for any signs of wear or disconnection. Moving on to diagnostic tools and techniques, using a multimeter can help test the battery voltage and assess the electrical system’s health. An OBD-II scanner can be used to retrieve error codes that may provide insights into the underlying problem. Conducting a fuel pressure test can help determine if the fuel system is delivering adequate pressure to start the engine.
Narrowing down the problem requires testing specific components. Measure the battery voltage to determine if it has sufficient power for starting. Check for fuel delivery by listening for the fuel pump’s operation or inspecting the fuel lines for any signs of leaks. Verifying ignition spark can be done by removing a spark plug and checking for a strong, visible spark when cranking the engine.
Once the problem has been diagnosed, appropriate solutions and repairs can be implemented. For instance, replacing the battery or jump-starting the car may be necessary if the battery is dead. Repairing or replacing the starter motor can address issues related to the starting system. Faulty ignition switches may require replacement to restore proper electrical flow. In the case of fuel system problems, refilling the fuel tank or replacing a clogged fuel filter may solve the issue. Repairing or replacing a malfunctioning fuel pump can restore fuel delivery. Engine mechanical problems may call for replacing the timing belt or chain, repairing the ignition system, or addressing compression issues through repairs or component replacements.
In conclusion, troubleshooting a JAC T6 that won’t start involves examining various systems, such as the electrical, fuel, and engine components. By following diagnostic steps and implementing the appropriate solutions, you can effectively resolve the underlying issues and get your JAC T6 back on the road. Remember, it’s always beneficial to refer to the vehicle’s manual or seek professional assistance when dealing with complex automotive problems.
1.2 Importance of diagnosing the problem accurately
Accurately diagnosing the problem when a JAC T6 fails to start is of utmost importance to ensure efficient and effective repairs. Identifying the root cause of the issue allows for targeted troubleshooting and prevents unnecessary part replacements or repairs. Understanding the significance of accurate diagnosis can save time, money, and frustration in resolving the problem promptly.
By properly diagnosing the problem, you can avoid replacing functioning components and focus on addressing the underlying issue. This prevents unnecessary expenses and ensures that the repair efforts are directed towards resolving the actual cause of the no-start condition. Whether it’s an electrical, fuel, or engine-related problem, accurate diagnosis helps streamline the repair process, leading to a quicker resolution.
A precise diagnosis enables you to identify and prioritize the necessary repairs or part replacements. It allows you to distinguish between major and minor issues, ensuring that critical components are addressed first. This approach prevents delays caused by misdiagnosis or overlooking crucial aspects that may impact the starting problem. With accurate diagnosis, you can create a systematic plan to tackle the specific issues, minimizing downtime and inconvenience.
Moreover, accurate diagnosis provides a better understanding of the overall health of the vehicle. While troubleshooting a no-start problem, you may uncover additional issues or potential maintenance requirements. By thoroughly inspecting the various systems and components involved in starting the JAC T6, you can identify other areas that may require attention. This comprehensive approach helps address any underlying issues, contributing to the overall reliability and performance of the vehicle.
In addition to cost savings and efficient repairs, accurate diagnosis ensures safety. Some starting problems may be caused by faulty electrical components or fuel system malfunctions, which can pose safety hazards if left unattended. By pinpointing the precise cause of the no-start issue, you can address any safety-related concerns promptly, mitigating potential risks and ensuring the well-being of both the vehicle occupants and other road users.
Accurate diagnosis also aids in maintaining the vehicle’s resale value. When the time comes to sell or trade-in the JAC T6, having a documented history of accurate diagnosis and repairs enhances its marketability. Prospective buyers or dealerships will appreciate the comprehensive understanding of the vehicle’s condition and the confidence that the starting problem has been correctly addressed.
In conclusion, accurately diagnosing a JAC T6 that fails to start is crucial for efficient and effective repairs. It saves time, money, and frustration by targeting the actual cause of the problem and avoiding unnecessary repairs or part replacements. Accurate diagnosis ensures proper prioritization of repairs, identifies additional issues, enhances safety, and maintains the vehicle’s resale value. Taking the time to diagnose the problem accurately is a worthwhile investment that leads to a reliable and well-functioning JAC T6.
2. Common Causes for a Car Not Starting
2.1 Electrical Issues
2.1.1 Dead Battery
One of the common causes for a car not starting, including the JAC T6, is a dead battery. A dead battery can occur due to various reasons and can leave you stranded and unable to start your vehicle. Understanding the causes and solutions related to a dead battery can help you diagnose and resolve the issue promptly.
Several factors can contribute to a dead battery in the JAC T6. One of the primary reasons is the age of the battery. Over time, batteries naturally degrade and lose their ability to hold a charge effectively. If your JAC T6 has an older battery that has reached the end of its lifespan, it may struggle to provide the necessary power for starting the vehicle.
Another common cause of a dead battery is a lack of maintenance. Failure to regularly inspect and maintain the battery can lead to issues such as corrosion on the battery terminals or loose connections. Corrosion can inhibit the flow of electrical current, while loose connections can result in poor contact and decreased battery performance.
Parasitic drains are also a potential cause of a dead battery. Parasitic drains occur when certain electrical components or systems continue to draw power from the battery even when the vehicle is turned off. These drains can include features like interior lights, radios, or faulty electrical components that fail to power down when they should. Over time, parasitic drains can deplete the battery’s charge and prevent the vehicle from starting.
To address a dead battery issue in the JAC T6, several solutions are available. The most straightforward solution is to jump-start the vehicle using jumper cables and a functioning battery from another vehicle. This allows the dead battery to receive a temporary boost of power to start the engine. However, it’s essential to identify and address the underlying cause of the dead battery to prevent future occurrences.
If the battery is old and no longer holds a charge effectively, replacing the battery is often necessary. It’s advisable to choose a battery that meets the manufacturer’s specifications and has the appropriate capacity for your JAC T6. Additionally, ensuring proper battery maintenance can prevent future dead battery issues. Regularly inspect the battery terminals for any signs of corrosion and clean them if necessary. Verify that the connections are tight and secure to ensure proper contact.
In cases where parasitic drains are causing the dead battery, it may be necessary to perform a parasitic drain test. This test involves disconnecting various electrical components and systems to identify the source of the excessive power draw. Once the culprit is identified, appropriate repairs or component replacements can be undertaken to rectify the issue.
In conclusion, a dead battery is a common cause of a car not starting, including the JAC T6. Understanding the causes and solutions related to a dead battery is essential for effective troubleshooting. Factors such as battery age, lack of maintenance, and parasitic drains can contribute to a dead battery. Jump-starting the vehicle, replacing the battery, and addressing maintenance issues or parasitic drains are some of the solutions available to resolve a dead battery problem in the JAC T6.
2.1.2 Faulty Starter Motor
Another common cause for a car not starting, including the JAC T6, is a faulty starter motor. The starter motor is responsible for initiating the engine’s cranking process, and if it malfunctions, it can prevent the engine from starting. Understanding the causes and solutions related to a faulty starter motor can help diagnose and resolve the issue effectively.
There are a few potential causes for a faulty starter motor in the JAC T6. One possibility is wear and tear over time. Like any mechanical component, the starter motor can experience degradation due to frequent use. Components such as the starter solenoid, starter drive, or brushes may wear out, leading to a malfunctioning starter motor.
Another cause of a faulty starter motor can be electrical issues. Loose or corroded connections between the starter motor and the battery can disrupt the flow of electrical current, preventing the motor from receiving the necessary power. Additionally, issues with the ignition switch, such as a faulty or worn-out switch, can prevent the starter motor from engaging.
To diagnose a faulty starter motor in the JAC T6, several steps can be taken. Initially, checking the battery is crucial to ensure it has sufficient charge. A weak or dead battery can mimic symptoms of a faulty starter motor. If the battery is in good condition, inspecting the connections between the battery and the starter motor is necessary. Loose or corroded terminals should be tightened or cleaned to ensure proper electrical contact.
If the electrical connections are secure, testing the starter motor itself may be required. This can involve using a multimeter to measure voltage at various points in the starter motor circuit. If there is no voltage reaching the starter motor when the ignition key is turned, it indicates a potential issue with the ignition switch or a related electrical component.
To resolve a faulty starter motor issue, several solutions are available. One option is to repair the starter motor if the problem is related to specific components within it. This can involve replacing faulty brushes, solenoids, or other worn-out parts. Another solution is to replace the entire starter motor with a new or remanufactured unit. When replacing the starter motor, it’s essential to ensure compatibility with the JAC T6 and choose a high-quality component.
It’s worth noting that professional assistance may be necessary for diagnosing and repairing a faulty starter motor, especially if electrical knowledge or specialized tools are required. Seeking the help of a qualified mechanic or automotive technician ensures that the problem is accurately diagnosed and resolved, minimizing the risk of further complications.
In conclusion, a faulty starter motor is a common cause of a car not starting, including the JAC T6. Wear and tear over time, as well as electrical issues, can contribute to a malfunctioning starter motor. Diagnosing the problem involves checking the battery, inspecting electrical connections, and testing the starter motor itself. Repairing or replacing the starter motor with a compatible component is the recommended solution. Seeking professional assistance can ensure an accurate diagnosis and proper resolution of the faulty starter motor issue in the JAC T6.
2.1.3 Ignition Switch Problems
The ignition switch is a critical component in the starting process of a car, including the JAC T6. When the ignition switch malfunctions, it can result in a no-start condition. Understanding the causes and solutions related to ignition switch problems is essential for diagnosing and resolving the issue effectively.
There are several potential causes for ignition switch problems in the JAC T6. One common cause is wear and tear over time. The ignition switch is subject to frequent use, and its internal components can degrade or become damaged, leading to malfunctions. Additionally, exposure to moisture, dust, or other contaminants can affect the switch’s performance and lead to problems.
Another cause of ignition switch problems is electrical issues. Loose or corroded electrical connections at the ignition switch can disrupt the flow of electrical current, preventing the switch from functioning properly. Over time, these issues can worsen and result in a complete failure of the ignition switch.
Diagnosing ignition switch problems in the JAC T6 requires thorough testing and inspection. It’s important to rule out other potential causes, such as a dead battery or faulty starter motor, before focusing on the ignition switch. Checking the battery voltage and ensuring proper connections are necessary initial steps.
If other potential causes have been eliminated, testing the ignition switch itself is crucial. This can be done using a multimeter to measure voltage at different terminals of the switch while turning the key. If there is no voltage or an inconsistent voltage reading, it indicates a potential problem with the ignition switch.
To resolve ignition switch problems, several solutions are available. If the issue is due to loose or corroded connections, cleaning and tightening the electrical connections can restore proper functionality. In some cases, replacing the ignition switch may be necessary, especially if it is worn out or damaged. It’s important to use a compatible ignition switch that matches the specifications of the JAC T6 to ensure proper fit and performance.
It’s worth noting that diagnosing and repairing ignition switch problems may require expertise and specialized tools. Seeking the assistance of a qualified mechanic or automotive technician is advisable to accurately diagnose and resolve the issue. They can provide professional guidance and ensure the ignition switch is repaired or replaced correctly.
In conclusion, ignition switch problems can cause a car not to start, including the JAC T6. Wear and tear, as well as electrical issues, can contribute to malfunctions in the ignition switch. Diagnosing the problem involves checking the battery and other potential causes before focusing on the ignition switch itself. Cleaning and tightening connections or replacing the ignition switch with a compatible component are the recommended solutions. Seeking professional assistance can ensure an accurate diagnosis and proper resolution of ignition switch problems in the JAC T6.
2.2 Fuel System Problems
2.2.1 Empty Fuel Tank
One of the common causes for a car not starting, including the JAC T6, is an empty fuel tank. While it may seem obvious, overlooking the fuel level can happen to anyone, and it can lead to a frustrating no-start situation. Understanding the causes and solutions related to an empty fuel tank can help diagnose and resolve the issue promptly.
The most straightforward cause of an empty fuel tank is simply running out of fuel. If the fuel gauge indicates an empty tank or if you have been driving for an extended period without refueling, it’s possible that there is not enough fuel in the tank to start the engine. This can occur due to oversight or miscalculation, especially when drivers are busy or distracted.
Another cause of an empty fuel tank can be a malfunctioning fuel gauge or sender unit. The fuel gauge provides an indication of the fuel level in the tank, and if it is faulty, it may display an inaccurate reading. This can lead to the driver mistakenly believing there is sufficient fuel when, in fact, the tank is empty. Similarly, a malfunctioning sender unit can provide inaccurate information to the fuel gauge, leading to an incorrect fuel level display.
To diagnose an empty fuel tank issue in the JAC T6, checking the fuel gauge is the first step. Ensure that the fuel gauge is functioning properly and accurately reflects the fuel level. If the gauge appears to be faulty or provides inconsistent readings, further inspection may be necessary. This can involve testing the sender unit or consulting a professional to determine if there are any underlying issues with the fuel level detection system.
To resolve an empty fuel tank problem, the obvious solution is to refuel the JAC T6. Ensure that you have a sufficient amount of fuel in the tank to allow the engine to start and run smoothly. It’s important to use the appropriate fuel type recommended by the vehicle manufacturer to ensure optimal performance.
If the issue persists even after refueling, it may indicate a problem with the fuel gauge, sender unit, or other components of the fuel system. In such cases, seeking the assistance of a qualified mechanic or automotive technician is advisable. They can perform further diagnostics, inspect the fuel system, and address any potential malfunctions or repairs that may be necessary.
In conclusion, an empty fuel tank is a common cause of a car not starting, including the JAC T6. Running out of fuel or relying on a malfunctioning fuel gauge can lead to a no-start situation. Diagnosing the problem involves checking the fuel gauge for accuracy and ensuring that the tank has sufficient fuel. Refueling the vehicle is the primary solution. However, if the issue persists, it may indicate underlying problems with the fuel gauge or other fuel system components, requiring professional assistance for further diagnostics and repairs.
2.2.2 Clogged Fuel Filter
A clogged fuel filter can be a common cause for a car not starting, including the JAC T6. The fuel filter plays a crucial role in maintaining the cleanliness of the fuel entering the engine. When it becomes clogged, it can restrict fuel flow and hinder the starting process. Understanding the causes and solutions related to a clogged fuel filter can help diagnose and resolve the issue effectively.
The primary cause of a clogged fuel filter is the accumulation of debris, dirt, and contaminants in the fuel system. Over time, particles and impurities present in the fuel can get trapped in the fuel filter. As the filter becomes clogged, it restricts the flow of fuel to the engine, causing issues with starting and running smoothly.
Another potential cause of a clogged fuel filter is using poor quality or contaminated fuel. Low-quality fuel or fuel contaminated with dirt, water, or other substances can accelerate the clogging process and reduce the filter’s effectiveness. Additionally, if the fuel filter has not been replaced at the recommended intervals, it can become clogged due to normal wear and tear.
Diagnosing a clogged fuel filter in the JAC T6 involves considering the symptoms exhibited by the vehicle. If the engine struggles to start, experiences poor acceleration, or stalls frequently, it may indicate a clogged fuel filter. It’s important to rule out other potential causes such as a weak battery or faulty spark plugs before focusing on the fuel filter.
To resolve a clogged fuel filter issue, the recommended solution is to replace the fuel filter. The frequency of replacement varies depending on the manufacturer’s recommendations and the driving conditions. It’s advisable to consult the vehicle’s manual or seek professional advice to determine the appropriate replacement interval for the JAC T6.
Replacing the fuel filter involves locating the filter, typically along the fuel line, and disconnecting it from the fuel system. It’s important to relieve fuel system pressure and take necessary safety precautions before proceeding. Installing a new, high-quality fuel filter that matches the specifications of the JAC T6 ensures proper filtration and fuel flow.
Regular maintenance practices can help prevent future occurrences of a clogged fuel filter. This includes using high-quality fuel from reputable sources and avoiding fueling from questionable or contaminated sources. Additionally, following the recommended fuel filter replacement interval and adhering to proper vehicle maintenance schedules can contribute to a healthier fuel system.
In conclusion, a clogged fuel filter can cause a car not to start, including the JAC T6. Accumulation of debris and contaminants, as well as using poor quality or contaminated fuel, can lead to a clogged fuel filter. Diagnosing the problem involves considering the vehicle’s symptoms and ruling out other potential causes. Replacing the fuel filter at the recommended intervals is the primary solution. Practicing regular maintenance and using high-quality fuel can help prevent future occurrences of a clogged fuel filter in the JAC T6.
2.2.3 Fuel Pump Failure
Fuel pump failure is another common cause for a car not starting, including the JAC T6. The fuel pump is responsible for delivering fuel from the fuel tank to the engine, and when it malfunctions, it can disrupt the fuel supply, leading to starting issues. Understanding the causes and solutions related to fuel pump failure can help diagnose and resolve the issue effectively.
There are a few potential causes for fuel pump failure in the JAC T6. One common cause is wear and tear over time. The fuel pump consists of mechanical components such as bearings, seals, and brushes that can degrade over extended use. Additionally, the fuel pump motor can fail, leading to a loss of fuel delivery.
Another cause of fuel pump failure is fuel contamination. If the fuel tank contains impurities, such as dirt, rust, or debris, they can enter the fuel pump and cause damage to its components. Additionally, using poor quality or contaminated fuel can accelerate the wear and failure of the fuel pump.
Diagnosing fuel pump failure in the JAC T6 requires a thorough inspection and testing process. Initially, it’s important to rule out other potential causes such as a dead battery, clogged fuel filter, or faulty ignition system. Checking the fuel pump relay and fuse can also help determine if there is an electrical issue related to the fuel pump.
If other potential causes have been eliminated, further testing of the fuel pump itself may be necessary. This can involve using a fuel pressure gauge to measure the pressure in the fuel system. If the pressure is below the manufacturer’s specifications or there is no pressure at all, it indicates a potential problem with the fuel pump.
To resolve fuel pump failure, the recommended solution is to replace the fuel pump. In some cases, the entire fuel pump assembly may need to be replaced, while in others, only specific components such as the fuel pump motor or housing may require replacement. It’s important to use a high-quality fuel pump that is compatible with the JAC T6 to ensure proper fit and performance.
Preventive measures can help reduce the risk of fuel pump failure. This includes using high-quality fuel from reputable sources, regularly replacing the fuel filter to prevent debris from reaching the fuel pump, and avoiding running the vehicle with a low fuel level, as it can cause the fuel pump to overheat.
It’s worth noting that diagnosing and replacing a fuel pump may require expertise and specialized tools. Seeking the assistance of a qualified mechanic or automotive technician is advisable to accurately diagnose and resolve the issue. They can perform the necessary tests, inspect the fuel system, and ensure the fuel pump is repaired or replaced correctly.
In conclusion, fuel pump failure can cause a car not to start, including the JAC T6. Wear and tear over time, as well as fuel contamination, can contribute to fuel pump failure. Diagnosing the problem involves ruling out other potential causes and testing the fuel pump itself. Replacing the fuel pump with a compatible and high-quality component is the recommended solution. Practicing preventive measures can help reduce the risk of fuel pump failure in the JAC T6. Seeking professional assistance ensures an accurate diagnosis and proper resolution of fuel pump failure.
2.3 Engine Mechanical Issues
2.3.1 Timing Belt or Chain Failure
Timing belt or chain failure can be a common cause for a car not starting, including the JAC T6. The timing belt or chain plays a crucial role in synchronizing the movement of the engine’s internal components, such as the camshaft and crankshaft. If the timing belt or chain breaks or becomes damaged, it can disrupt the engine’s timing and prevent it from starting. Understanding the causes and solutions related to timing belt or chain failure can help diagnose and resolve the issue effectively.
One of the primary causes of timing belt or chain failure is age and mileage. Over time, the timing belt or chain can deteriorate due to wear and tear. The rubber components of a timing belt can degrade, become brittle, or develop cracks, while a timing chain can stretch or experience excessive wear. If the timing belt or chain is not replaced at the recommended intervals, it becomes more susceptible to failure.
Another cause of timing belt or chain failure is inadequate tension. If the timing belt or chain is not properly tensioned, it can cause excessive slack or looseness. This can result in improper synchronization between the camshaft and crankshaft, leading to engine misfires, loss of power, and ultimately a no-start condition.
Diagnosing timing belt or chain failure in the JAC T6 requires careful inspection and assessment. If the engine cranks but does not start, or if there is a noticeable lack of power and unusual engine noises, it may indicate a timing belt or chain problem. Checking the condition of the timing belt or chain is necessary to determine if it has broken, become loose, or shows signs of wear.
To resolve timing belt or chain failure, the recommended solution is to replace the timing belt or chain. The timing belt replacement interval varies depending on the vehicle manufacturer’s recommendations and the type of engine. It’s crucial to follow the manufacturer’s guidelines and replace the timing belt or chain at the recommended mileage or time intervals to prevent potential failures.
Replacing the timing belt or chain requires precision and expertise. It involves removing various engine components, such as the timing belt cover or timing chain tensioner, to gain access to the timing system. It’s important to ensure that the new timing belt or chain is properly installed, aligned, and tensioned according to the manufacturer’s specifications.
Preventive maintenance is essential to avoid timing belt or chain failure. Regularly inspecting the timing belt or chain for signs of wear, such as cracks, fraying, or excessive slack, can help identify potential issues before they lead to a complete failure. Following the manufacturer’s recommended maintenance schedule and replacing the timing belt or chain proactively can significantly reduce the risk of a no-start situation due to timing belt or chain failure.
In conclusion, timing belt or chain failure can cause a car not to start, including the JAC T6. Age, mileage, and inadequate tension are common causes of timing belt or chain failure. Diagnosing the problem involves checking for engine symptoms and inspecting the timing belt or chain. Replacing the timing belt or chain at the recommended intervals is the recommended solution. Practicing preventive maintenance and following the manufacturer’s guidelines help reduce the risk of timing belt or chain failure in the JAC T6. Seeking professional assistance ensures proper installation and alignment of the timing belt or chain.
2.3.2 Ignition System Failure
Ignition system failure can be a common cause for a car not starting, including the JAC T6. The ignition system is responsible for generating the spark that ignites the air-fuel mixture in the engine’s cylinders. If any component of the ignition system malfunctions, it can disrupt the spark production and prevent the engine from starting. Understanding the causes and solutions related to ignition system failure can help diagnose and resolve the issue effectively.
One of the primary causes of ignition system failure is a faulty ignition coil. The ignition coil is responsible for transforming the low voltage from the battery into high voltage, which is necessary for generating a strong spark. If the ignition coil fails, it can result in a weak or no spark, leading to starting issues.
Another cause of ignition system failure is a faulty ignition switch. The ignition switch controls the flow of electrical power to various components of the ignition system, including the ignition coil. If the ignition switch is faulty or worn out, it may not provide the necessary power to the ignition coil, resulting in a lack of spark and engine starting problems.
Additionally, a worn-out or faulty spark plug can contribute to ignition system failure. Spark plugs are responsible for igniting the air-fuel mixture in the cylinders. Over time, spark plugs can become worn, covered in deposits, or develop electrode wear. If the spark plugs are not able to produce a strong spark, it can lead to difficulties in starting the engine.
Diagnosing ignition system failure in the JAC T6 involves assessing the symptoms exhibited by the vehicle. If the engine cranks but does not start or if there is a lack of power and rough idling, it may indicate a problem with the ignition system. Testing the ignition coil, ignition switch, and spark plugs using specialized tools can help determine the exact cause of the failure.
To resolve ignition system failure, the recommended solution depends on the specific component that is faulty. If the ignition coil is the culprit, replacing the faulty coil with a new one is necessary. Similarly, if the ignition switch is at fault, replacing the switch can restore proper functionality. In the case of worn-out or faulty spark plugs, replacing them with new ones that match the manufacturer’s specifications is necessary.
Regular maintenance practices can help prevent ignition system failure. This includes replacing the spark plugs at the recommended intervals, inspecting and cleaning the spark plug contacts, and ensuring the ignition switch is in good working condition. It’s also important to use high-quality spark plugs and ignition components to ensure reliable ignition system performance.
In conclusion, ignition system failure can cause a car not to start, including the JAC T6. Faulty ignition coils, ignition switches, and spark plugs are common causes of ignition system failure. Diagnosing the problem involves considering the vehicle’s symptoms and testing the ignition components. Replacing the faulty component with a new one that meets the manufacturer’s specifications is the recommended solution. Regular maintenance and using high-quality components help prevent ignition system failure in the JAC T6. Seeking professional assistance ensures accurate diagnosis and proper resolution of ignition system failure.
2.3.3 Engine Compression Problems
Engine compression problems can be a common cause for a car not starting, including the JAC T6. Engine compression refers to the pressure created inside the engine’s cylinders during the combustion process. If there is a loss of compression, it can result in a weak or non-existent power stroke, leading to starting difficulties. Understanding the causes and solutions related to engine compression problems can help diagnose and resolve the issue effectively.
One of the primary causes of engine compression problems is a blown head gasket. The head gasket is a crucial component that seals the cylinder head to the engine block, ensuring proper compression and preventing coolant and oil leaks. If the head gasket fails, it can lead to compression loss between cylinders or between the combustion chamber and coolant passages, resulting in starting issues.
Another cause of engine compression problems is worn piston rings. Piston rings are responsible for maintaining a tight seal between the pistons and the cylinder walls, allowing for efficient compression. Over time, piston rings can wear down, resulting in decreased compression levels and reduced engine performance. If the compression loss is significant, it can prevent the engine from starting altogether.
Additionally, damaged or worn-out valves can contribute to engine compression problems. The intake and exhaust valves play a vital role in allowing air and fuel into the cylinders and facilitating the escape of exhaust gases. If the valves are bent, burned, or not seating properly, it can result in compression leakage and difficulty starting the engine.
Diagnosing engine compression problems in the JAC T6 requires a comprehensive inspection and testing process. Conducting a compression test using a specialized gauge can help measure the compression levels in each cylinder. Significant variations in compression between cylinders or abnormally low compression readings indicate potential engine compression issues.
To resolve engine compression problems, the recommended solution depends on the specific cause of the problem. If a blown head gasket is the culprit, replacing the head gasket and inspecting for any underlying issues such as a warped cylinder head is necessary. In the case of worn piston rings, an engine overhaul or piston ring replacement may be required. If damaged valves are the cause, valve repair or replacement may be necessary to restore proper compression.
Preventive maintenance practices can help reduce the risk of engine compression problems. Regularly changing the engine oil and coolant at the recommended intervals, maintaining proper engine temperature, and avoiding excessive engine loads can help prolong the life of the head gasket, piston rings, and valves. Performing regular inspections and addressing any signs of engine problems promptly can also help prevent severe compression issues.
In conclusion, engine compression problems can cause a car not to start, including the JAC T6. Blown head gaskets, worn piston rings, and damaged valves are common causes of engine compression problems. Diagnosing the issue involves conducting a compression test and inspecting the engine components. Resolving engine compression problems may require replacing the head gasket, piston rings, or valves, depending on the specific cause. Regular maintenance and proactive inspection help prevent engine compression problems in the JAC T6. Seeking professional assistance ensures accurate diagnosis and proper resolution of engine compression issues.
3. Troubleshooting Steps
3.1 Visual Inspection
3.1.1 Check Battery Connections
When troubleshooting a car that won’t start, it’s important to begin with a visual inspection of the battery connections. The battery connections play a critical role in providing power to the vehicle’s electrical system and starting the engine. Loose, corroded, or damaged battery connections can disrupt the flow of electricity and prevent the car from starting. Conducting a visual inspection of the battery connections is a simple yet essential step in diagnosing the problem.
To check the battery connections in the JAC T6, follow these steps:
1. Safety First: Ensure that the engine is off and the key is removed from the ignition. It’s also a good practice to wear protective gloves and safety glasses when working with the battery.
2. Open the Hood: Locate the hood release lever inside the vehicle and pull it to open the hood. Secure the hood with the prop rod to keep it open.
3. Locate the Battery: The battery is typically located in the engine compartment. It is a rectangular or square-shaped box with two terminals, usually covered with plastic or rubber caps. In the JAC T6, the battery is usually positioned towards the front of the engine bay.
4. Inspect the Battery Terminals: Examine the battery terminals, which are the metal posts on top of the battery. Check for any signs of corrosion, such as a white or greenish powdery substance. Corrosion can hinder the electrical connection and lead to starting issues.
5. Check for Loose Connections: Gently try to move the battery terminals with your hand. They should be secure and not move easily. Loose connections can cause intermittent power loss and prevent the car from starting.
6. Clean Corroded Terminals: If you notice corrosion on the battery terminals, it’s important to clean them. Prepare a solution of baking soda and water (one tablespoon of baking soda per cup of water) and use a brush or an old toothbrush to scrub the terminals and remove the corrosion. Rinse with clean water and dry the terminals thoroughly.
7. Tighten Loose Connections: If you find any loose battery connections, use a wrench or a socket to tighten them securely. Ensure that the connections are tight but be cautious not to overtighten, as it may damage the terminals.
8. Inspect Battery Cables: Follow the battery cables, which are connected to the battery terminals. Check for any signs of damage or fraying along the cables. If you notice any significant damage, the cables may need to be replaced.
By conducting a visual inspection of the battery connections, you can identify and resolve potential issues that may be causing the car not to start. Corroded or loose connections can be a common culprit, and addressing these problems can often restore the proper electrical flow and allow the car to start.
However, it’s important to note that a visual inspection alone may not reveal all potential issues. If the battery connections appear to be in good condition, but the car still doesn’t start, further troubleshooting and diagnostic steps may be necessary. Consulting a professional mechanic or referring to the vehicle’s user manual for specific troubleshooting procedures can help identify and resolve the underlying problem effectively.
3.1.2 Inspect Fuses and Relays
When troubleshooting a JAC T6 that won’t start, it’s important to inspect the fuses and relays as part of the visual inspection process. Fuses and relays play a crucial role in protecting and controlling the electrical circuits in the vehicle. If a fuse blows or a relay malfunctions, it can disrupt the flow of electricity and prevent the car from starting. Conducting a visual inspection of the fuses and relays is a fundamental step in diagnosing potential electrical issues.
To inspect the fuses and relays in the JAC T6, follow these steps:
1. Safety First: Ensure that the engine is off and the key is removed from the ignition. It’s also recommended to wear protective gloves and safety glasses when working with fuses and relays.
2. Locate the Fuse Box: The fuse box is typically located in the engine compartment or inside the vehicle’s cabin. In the JAC T6, the fuse box is usually positioned in the engine compartment. Consult the vehicle’s user manual or fuse box cover for the exact location.
3. Identify the Fuse Box Cover: The fuse box is covered with a lid or panel. Locate and remove the cover by either unlatching it or using a screwdriver to remove any screws holding it in place.
4. Inspect the Fuses: Inside the fuse box, you will find a series of fuses. Each fuse is a small, colored plastic component with metal prongs at each end. Visually inspect each fuse for signs of damage, such as a broken filament or a burned appearance. If a fuse appears to be blown, it will need to be replaced with a new one of the same amperage rating.
5. Check the Relay Box: Some vehicles have a separate relay box, which houses the relays. Locate the relay box, which is often near the fuse box. The JAC T6 may have a relay box in the engine compartment or under the dashboard.
6. Inspect the Relays: In the relay box, you will find various relays, typically larger than fuses. Inspect the relays for any signs of damage, such as melted plastic or loose connections. If a relay appears faulty, it may need to be replaced with a new one of the same type.
7. Test Relays (if applicable): In some cases, relays can be tested using a multimeter or relay tester. Refer to the vehicle’s user manual or a reliable automotive resource for the specific testing procedure.
8. Reinstall Fuse and Relay Covers: Once you have completed the inspection and any necessary replacements, securely reinstall the fuse box and relay box covers.
Inspecting the fuses and relays in the JAC T6 can help identify any blown fuses or faulty relays that may be causing the starting issue. If a fuse is blown, replacing it with a new one of the appropriate rating can restore the electrical circuit. Similarly, if a relay is found to be faulty, replacing it with a new one can ensure proper functioning of the electrical system.
However, it’s important to note that a visual inspection alone may not uncover all potential issues. If all fuses and relays appear to be in good condition, but the car still doesn’t start, further diagnostic steps may be required. Consulting a professional mechanic or referring to the vehicle’s user manual for specific troubleshooting procedures can help identify and resolve the underlying electrical problem effectively.
3.1.3 Examine Wiring and Cables
When troubleshooting a JAC T6 that won’t start, it’s important to examine the wiring and cables as part of the visual inspection process. The wiring and cables in the vehicle play a critical role in delivering electrical power to various components, including the starter motor and ignition system. Damaged or loose wiring, as well as faulty cables, can disrupt the electrical flow and prevent the car from starting. Conducting a thorough visual inspection of the wiring and cables is essential to identify potential issues.
To examine the wiring and cables in the JAC T6, follow these steps:
1. Safety First: Ensure that the engine is off, and the key is removed from the ignition. It’s also recommended to wear protective gloves and safety glasses when working with wiring and cables.
2. Open the Hood: Locate the hood release lever inside the vehicle and pull it to open the hood. Secure the hood with the prop rod to keep it open.
3. Locate Wiring Harnesses: Look for the wiring harnesses in the engine compartment. These are bundles of wires that are typically wrapped in a protective covering. Carefully inspect the wiring harnesses for any signs of damage, such as frayed or exposed wires, cuts, or melted insulation.
4. Check Engine Grounds: Locate the engine grounds, which are metal connections that provide a pathway for electrical current to flow to the vehicle’s frame. Ensure that the engine grounds are securely connected and free from corrosion or damage.
5. Inspect Battery Cables: Examine the battery cables that connect the battery to the vehicle’s electrical system. Check for any signs of damage, such as fraying, corrosion, or loose connections. Ensure that the battery cables are securely attached to the battery terminals.
6. Check Starter Motor Wiring: Locate the wiring connected to the starter motor. Inspect the wiring for any visible damage or loose connections. Ensure that the wires are securely connected to the starter motor and are not corroded or frayed.
7. Inspect Ignition System Wiring: Examine the wiring connected to the ignition system components, such as the ignition coil and spark plugs. Look for any signs of damage or loose connections. Ensure that the wires are securely connected and are not damaged or worn.
8. Check Other Electrical Connections: Inspect other electrical connections in the engine compartment, such as sensors, relays, and switches. Look for any loose or corroded connections that could disrupt the electrical flow.
By carefully examining the wiring and cables in the JAC T6, you can identify potential issues that may be causing the starting problem. Damaged or loose wiring can lead to electrical malfunctions and prevent the car from starting. In some cases, repairing or replacing the damaged wiring or cables may be necessary to restore the proper electrical flow.
However, it’s important to note that a visual inspection alone may not uncover all potential issues. If all wiring and cables appear to be in good condition, but the car still doesn’t start, further diagnostic steps may be required. Consulting a professional mechanic or referring to the vehicle’s user manual for specific troubleshooting procedures can help identify and resolve the underlying electrical problem effectively.
3.2 Diagnostic Tools and Techniques
3.2.1 Using a Multimeter
When troubleshooting a JAC T6 that won’t start, using a multimeter can be a valuable diagnostic tool. A multimeter is a handheld device that measures electrical voltage, current, and resistance. It allows you to test various electrical components and circuits in the vehicle to identify potential issues. By using a multimeter, you can gather more precise and accurate readings to aid in diagnosing the problem.
To use a multimeter for troubleshooting the JAC T6, follow these steps:
1. Safety First: Ensure that the engine is off, and the key is removed from the ignition. Take necessary safety precautions, such as wearing protective gloves and safety glasses, when working with electrical components.
2. Select the Proper Settings: Set the multimeter to the appropriate settings based on the type of measurement you need to make. For voltage measurement, select the DC (Direct Current) voltage mode. Refer to the multimeter’s user manual for specific instructions on setting up the device.
3. Test the Battery: Attach the multimeter’s probes to the battery terminals. The red probe connects to the positive terminal, and the black probe connects to the negative terminal. The multimeter will display the battery voltage. A healthy battery typically shows around 12.6 volts or higher. If the voltage is significantly lower, it may indicate a weak or discharged battery.
4. Check Voltage at the Starter: With the help of a helper, turn the ignition key to the «Start» position while simultaneously measuring the voltage at the starter motor. Connect the red probe of the multimeter to the positive terminal of the starter motor, and the black probe to a good ground connection. The multimeter should display a voltage reading close to the battery voltage. If there is a significant drop in voltage, it could indicate a faulty starter motor or a wiring issue.
5. Test Fuses and Relays: Use the multimeter’s resistance (ohms) mode to test the continuity of fuses and relays. Remove the fuse or relay you want to test and place the probes on the terminals or pins. The multimeter should display a low resistance value (close to zero ohms) if the fuse or relay is intact. If the reading is infinite (OL or open loop), it indicates a blown fuse or a faulty relay.
6. Measure Continuity: Continuity testing helps identify breaks or interruptions in wiring or circuits. Set the multimeter to the continuity mode (often represented by a sound wave symbol). Touch the probes together to ensure the multimeter produces an audible beep indicating continuity. Then, probe the wiring or connectors you suspect might be faulty. If there is no continuity or the multimeter does not produce a beep, it suggests a break in the circuit.
7. Test Sensors and Components: You can use the multimeter to test various sensors and components in the JAC T6, such as the ignition coil, crankshaft position sensor, and camshaft position sensor. Consult the vehicle’s service manual for specific testing procedures and the expected readings for each component.
By using a multimeter during the troubleshooting process, you can obtain precise measurements and determine if electrical components are functioning correctly. It helps pinpoint potential issues with voltage drops, faulty fuses or relays, and breaks in wiring or circuits. However, it’s important to note that using a multimeter requires knowledge and understanding of electrical systems. If you’re not experienced or unsure, it’s recommended to consult a professional mechanic who can perform the necessary tests and interpret the results accurately.
3.2.2 OBD-II Scanner for Error Codes
When diagnosing issues with a JAC T6 that won’t start, using an OBD-II scanner can be a valuable tool. The On-Board Diagnostics II (OBD-II) system is a standardized system in modern vehicles that monitors and reports information about the vehicle’s performance and detects any malfunctions. An OBD-II scanner is a device that can connect to the vehicle’s OBD-II port and retrieve error codes stored in the vehicle’s computer system. These error codes can provide valuable insights into the underlying problem causing the starting issue.
To use an OBD-II scanner for troubleshooting the JAC T6, follow these steps:
1. Locate the OBD-II Port: The OBD-II port is usually located under the dashboard on the driver’s side of the vehicle. It is a 16-pin connector that allows communication between the vehicle’s computer system and the OBD-II scanner. Consult the vehicle’s user manual or look for the OBD-II port diagram to find its exact location.
2. Connect the OBD-II Scanner: Plug the OBD-II scanner’s connector into the OBD-II port. Ensure that the connection is secure.
3. Turn on the Ignition: Turn the vehicle’s ignition key to the «On» position without starting the engine. This provides power to the OBD-II system and allows the scanner to establish a connection with the vehicle’s computer.
4. Access the Diagnostic Menu: On the OBD-II scanner’s display, navigate through the menu options to access the diagnostic functions. Look for an option like «Read Codes» or «Scan for Errors.»
5. Scan for Error Codes: Initiate the scanning process on the OBD-II scanner. The scanner will communicate with the vehicle’s computer system and retrieve any stored error codes. This process may take a few seconds.
6. Interpret the Error Codes: Once the scanning is complete, the OBD-II scanner will display the retrieved error codes. Each code consists of a combination of letters and numbers, such as P0123 or C0567. Refer to the scanner’s user manual or online resources to interpret the specific error codes related to the JAC T6.
7. Research the Error Codes: Take note of the error codes and their descriptions provided by the scanner. Use online resources, vehicle-specific forums, or consult the vehicle’s service manual to research the meaning and possible causes of the identified error codes. This information will help you understand the specific issues affecting the starting system.
8. Address the Underlying Problems: Based on the identified error codes, follow the recommended troubleshooting steps to address the underlying problems. This may involve replacing faulty sensors, repairing wiring issues, or addressing other specific malfunctions related to the error codes.
Using an OBD-II scanner allows you to access valuable diagnostic information stored in the vehicle’s computer system. It helps pinpoint specific issues affecting the starting system and provides a starting point for further troubleshooting and repairs. However, it’s important to note that error codes are not always definitive proof of the exact problem. They serve as a guide and require further investigation to determine the root cause accurately. If you’re unsure about interpreting or addressing the error codes, it’s advisable to seek the assistance of a qualified mechanic who can provide expert guidance and perform the necessary repairs based on the identified error codes.
3.2.3 Fuel Pressure Test
Performing a fuel pressure test is a diagnostic technique that can help identify fuel system issues in a JAC T6 that won’t start. This test measures the pressure of the fuel system to ensure it is within the manufacturer’s specified range. A fuel pressure test can reveal problems such as a weak fuel pump, clogged fuel filter, or faulty fuel pressure regulator. Here’s how to conduct a fuel pressure test:
1. Gather the Necessary Tools: You will need a fuel pressure gauge, a set of wrenches, safety goggles, and gloves. Make sure the fuel pressure gauge is compatible with the JAC T6’s fuel system.
2. Locate the Schrader Valve: The fuel pressure test is conducted at the Schrader valve, which is typically located on the fuel rail or fuel line. Consult the vehicle’s service manual or online resources to determine the exact location of the Schrader valve in the JAC T6.
3. Relieve Fuel Pressure: Before performing the test, relieve the fuel pressure to ensure safety. Locate the fuel pump relay or fuse and remove it. Then, attempt to start the engine to relieve any remaining pressure in the fuel system.
4. Connect the Fuel Pressure Gauge: Attach the fuel pressure gauge to the Schrader valve. Ensure a secure connection and verify that there are no fuel leaks.
5. Turn the Ignition Key: Turn the ignition key to the «On» position without starting the engine. This will activate the fuel pump and allow fuel pressure to build up in the system.
6. Read the Fuel Pressure: Observe the fuel pressure gauge and note the reading. Compare it to the specifications provided by the vehicle manufacturer. If the fuel pressure is within the recommended range, the fuel system is functioning properly. If the pressure is too low or too high, it indicates a potential problem that needs further investigation.
7. Inspect for Pressure Drop: After noting the initial fuel pressure, turn off the ignition and monitor the gauge for any significant drop in pressure. A sudden drop in pressure suggests a potential fuel leak or a failing component within the fuel system.
8. Test with Engine Running (Optional): Some fuel pressure tests also involve running the engine while monitoring the fuel pressure. This can help identify issues that only occur under engine operating conditions. Follow the specific instructions provided in the vehicle’s service manual for conducting a running fuel pressure test, if applicable.
By performing a fuel pressure test, you can assess the functionality of the fuel system in the JAC T6. The test results can help pinpoint issues such as a weak fuel pump, clogged fuel filter, or faulty pressure regulator. If the fuel pressure is not within the specified range, further troubleshooting and repairs may be necessary to address the underlying problem. It’s important to exercise caution and follow proper safety procedures when working with fuel systems. If you are uncertain about performing the fuel pressure test or interpreting the results, it is recommended to consult a professional mechanic with experience in diagnosing and repairing fuel system issues.
3.3 Narrowing Down the Problem
3.3.1 Testing the Battery Voltage
Testing the battery voltage is an essential step in troubleshooting a JAC T6 that won’t start. The battery provides the necessary electrical power to start the engine, and a weak or dead battery can prevent the vehicle from starting. Testing the battery voltage helps determine if the battery is the cause of the problem. Here’s how to test the battery voltage:
1. Prepare for Testing: Put on safety goggles and gloves before working with the battery. Ensure the vehicle is parked in a well-ventilated area, and the engine is turned off.
2. Locate the Battery: The battery is typically located under the hood of the JAC T6. It is a rectangular box with two terminals, usually marked as positive (+) and negative (-).
3. Inspect the Battery: Visually inspect the battery for any signs of damage, such as cracks, leaks, or corrosion. If you notice any damage, it may indicate a problem with the battery that needs to be addressed.
4. Check Battery Connections: Ensure the battery terminals are clean and securely tightened. Loose or corroded connections can affect the battery’s performance. Use a wrench to tighten the terminals if necessary.
5. Set the Multimeter: Set a digital multimeter to the DC voltage setting. The voltage range should be set to a value higher than the expected battery voltage, typically 20 volts.
6. Connect the Multimeter: Connect the multimeter’s red lead to the positive terminal of the battery and the black lead to the negative terminal. Make sure the connections are secure and there is no contact between the leads.
7. Read the Battery Voltage: With the multimeter connected, observe the reading displayed on the multimeter. A fully charged battery typically measures around 12.6 volts. If the voltage is significantly lower, it indicates a weak or discharged battery.
8. Interpret the Results: Compare the measured battery voltage to the manufacturer’s specifications or consult a battery reference chart. If the voltage is below the recommended range, the battery may need to be recharged or replaced.
It’s important to note that a battery’s voltage can vary depending on factors such as temperature and the battery’s state of charge. If the battery voltage appears to be within the normal range, it does not necessarily rule out the battery as the cause of the starting issue. In such cases, additional tests and inspections of other components, such as the starter motor or ignition system, may be necessary to pinpoint the problem accurately.
Testing the battery voltage provides valuable information about the battery’s condition and helps narrow down the possible causes of a starting problem. If the battery voltage is low, recharging the battery or replacing it with a new one can resolve the issue. However, if the battery voltage is normal, further troubleshooting steps and diagnostic tests will be required to identify and resolve the underlying problem. If you are unsure about the battery testing process or interpreting the results, it is recommended to seek the assistance of a qualified mechanic or automotive technician.
3.3.2 Checking for Fuel Delivery
Checking for fuel delivery is an important step in troubleshooting a JAC T6 that is experiencing starting issues. If the engine is not receiving an adequate supply of fuel, it may fail to start or run poorly. By verifying fuel delivery, you can narrow down the possible causes of the problem. Here’s how to check for fuel delivery:
1. Ensure Safety Precautions: Prior to working on the fuel system, it is crucial to wear safety goggles and gloves. Perform the fuel delivery check in a well-ventilated area, away from open flames or sparks.
2. Locate the Fuel Rail: The fuel rail is a metal pipe or tube that distributes fuel to the engine’s injectors. It is usually located on the top or side of the engine. Consult the vehicle’s service manual or online resources to identify the exact location of the fuel rail in the JAC T6.
3. Depressurize the Fuel System: To safely work on the fuel system, it is necessary to relieve the pressure. Locate the fuel pump relay or fuse in the vehicle’s fuse box and remove it. Then, attempt to start the engine to release any remaining pressure in the fuel lines.
4. Connect a Fuel Pressure Gauge: Attach a fuel pressure gauge to the fuel rail’s Schrader valve. Ensure a secure connection and make sure there are no fuel leaks.
5. Turn the Ignition Key: Turn the ignition key to the «On» position without starting the engine. This will activate the fuel pump and pressurize the fuel system.
6. Check Fuel Pressure: Read the fuel pressure displayed on the gauge. Compare the reading to the specifications provided by the manufacturer. If the fuel pressure is within the recommended range, the fuel delivery is likely not the cause of the starting problem. If the pressure is too low or too high, it indicates a potential issue with the fuel pump, fuel filter, or fuel pressure regulator.
7. Inspect Fuel Lines: Visually inspect the fuel lines for any signs of leaks, kinks, or damage. Ensure that the lines are properly connected and secure. Damaged or disconnected fuel lines can lead to insufficient fuel delivery.
8. Verify Fuel Pump Operation: If the fuel pressure is low or there are other indications of a fuel delivery problem, it may be necessary to verify the operation of the fuel pump. This can be done by listening for a buzzing sound from the fuel tank when the ignition is turned on. If no sound is heard, it may indicate a faulty fuel pump that needs to be replaced.
By checking for fuel delivery, you can determine if the engine is receiving the required amount of fuel for proper operation. If the fuel pressure is within the specified range and there are no signs of fuel line issues, the problem may lie elsewhere in the vehicle’s starting system. However, if the fuel pressure is low or there are indications of a fuel delivery problem, further investigation and repair may be necessary to address the underlying issue. If you are unsure about performing the fuel delivery check or interpreting the results, it is recommended to consult a professional mechanic with experience in diagnosing and repairing fuel system problems.
3.3.3 Verifying Ignition Spark
Verifying ignition spark is an essential step in troubleshooting a JAC T6 that is having starting issues. A lack of spark in the ignition system can prevent the engine from starting or cause it to run poorly. By checking for ignition spark, you can narrow down the possible causes of the problem. Here’s how to verify ignition spark:
1. Ensure Safety Precautions: Before working on the ignition system, make sure the vehicle is in park or neutral with the parking brake engaged. Also, wear safety goggles and gloves to protect yourself from potential hazards.
2. Locate the Ignition Components: The ignition system components, such as the ignition coil, spark plugs, and spark plug wires, are typically located on the engine. Consult the vehicle’s service manual or online resources to identify the exact locations of these components in the JAC T6.
3. Inspect Spark Plug Wires: Visually inspect the spark plug wires for any signs of damage, such as cracks, burns, or worn-out insulation. Damaged wires can cause a weak or intermittent spark. If any issues are found, replace the affected spark plug wires.
4. Remove a Spark Plug: Select one spark plug and carefully remove it from the engine using a spark plug socket and ratchet. Note its position to avoid mixing up the spark plugs during reinstallation.
5. Connect the Spark Plug: Reattach the spark plug wire to the spark plug and ensure it is securely connected. Make sure there is no contact between the spark plug and any metal surfaces.
6. Ground the Spark Plug: Locate a metal part of the engine, such as the engine block, and carefully touch the metal electrode of the spark plug to the metal surface. Ensure that you are not in contact with any moving parts or electrical components.
7. Observe for Spark: Have an assistant attempt to start the engine while you observe the spark plug electrode. Look for a bright blue spark jumping across the electrode gap. A strong spark indicates that the ignition system is functioning correctly.
8. Repeat the Process: Repeat steps 4 to 7 for each spark plug in the engine, checking for spark on each one.
9. Assess Spark Quality: Evaluate the quality and intensity of the spark observed. A weak or inconsistent spark may indicate a problem with the ignition coil or other ignition system components. If no spark is observed, it could point to an issue with the ignition coil, ignition module, crankshaft position sensor, or other related components.
By verifying ignition spark, you can determine if the ignition system is generating the necessary spark for combustion. If a weak or no spark is present, further investigation and repair of the ignition system components may be required to address the underlying issue. It’s important to note that diagnosing and repairing ignition system problems can be complex, and it may be beneficial to consult a professional mechanic or automotive technician with experience in ignition system troubleshooting. They have the knowledge and tools necessary to accurately diagnose and repair the issue with the ignition system of the JAC T6.
4. Solutions and Repairs
4.1 Battery Replacement or Jump-Start
If your JAC T6 is experiencing starting issues due to a dead or weak battery, one of the solutions is to replace the battery or perform a jump-start. Here’s what you need to know about these solutions and repairs:
Battery Replacement:
1. Assess Battery Condition: Before replacing the battery, check its physical condition. Look for signs of damage, corrosion, or leaking acid. If the battery appears damaged or is more than a few years old, it’s likely time for a replacement.
2. Choose the Right Battery: Ensure you select a battery that is compatible with your JAC T6 in terms of size, capacity, and terminal configuration. Refer to the vehicle’s owner’s manual or consult an automotive parts store for the correct battery specifications.
3. Disconnect the Old Battery: Start by turning off the engine, removing the key from the ignition, and applying the parking brake. Then, locate the battery in the engine bay and carefully disconnect the negative (black) cable first, followed by the positive (red) cable. Take note of the cable positions or mark them to ensure proper reconnection later.
4. Remove the Old Battery: Loosen and remove any brackets or clamps holding the battery in place. Lift the old battery out of the battery tray and set it aside in a safe location.
5. Clean the Battery Tray and Terminals: Use a wire brush or battery terminal cleaner to remove any corrosion or debris from the battery tray and terminals. Ensure a clean connection for the new battery.
6. Install the New Battery: Place the new battery into the battery tray, making sure it sits securely. Reattach any brackets or clamps to hold it in place.
7. Reconnect the Cables: Begin by connecting the positive (red) cable to the positive terminal of the new battery. Then, connect the negative (black) cable to the negative terminal. Ensure the connections are tight and secure.
Jump-Start:
1. Verify Safety: If jump-starting your JAC T6, ensure you have a set of jumper cables and a running vehicle with a fully charged battery for the process. Safety goggles and gloves are recommended.
2. Position the Vehicles: Park the functioning vehicle close enough to the JAC T6 for the jumper cables to reach both batteries. Ensure both vehicles are in park or neutral with their engines turned off. Engage the parking brakes.
3. Connect the Jumper Cables: Open the hoods of both vehicles and locate the batteries. Attach one end of the positive (red) jumper cable to the positive terminal of the dead battery. Attach the other end of the same cable to the positive terminal of the working battery. Then, connect one end of the negative (black) jumper cable to the negative terminal of the working battery. Finally, attach the other end of the same cable to a grounded metal part of the JAC T6, such as a bolt or bracket.
4. Start the Engine: Start the engine of the functioning vehicle and let it idle for a few minutes to provide some charge to the dead battery.
5. Start the JAC T6: Attempt to start the engine of the JAC T6. If successful, allow both vehicles to run for a few more minutes to stabilize the charge.
6. Disconnect the Jumper Cables: Once the JAC T6 is running smoothly, carefully disconnect the jumper cables in the reverse order of attachment, starting with the negative (black) cable from the grounded metal part, followed by the negative cable from the working battery, the positive (red) cable from the working battery, and finally the positive cable from the dead battery.
Remember that a jump-start is a temporary solution, and it is recommended to have the battery tested and potentially replaced to prevent future starting issues. If the battery replacement or jump-start doesn’t resolve the starting problem, it may be necessary to further diagnose other potential causes, such as faulty starter motor or ignition system issues. In such cases, seeking the assistance of a qualified mechanic or automotive technician is advisable for a thorough inspection and accurate repair.
4.2 Starter Motor Repair or Replacement
If your JAC T6 is experiencing starting issues and the battery is in good condition, a potential solution is to repair or replace the starter motor. The starter motor is responsible for initiating the engine’s rotation, and if it malfunctions, the engine may not start at all or exhibit difficulties in starting. Here’s what you need to know about starter motor repair or replacement:
1. Diagnose the Problem: Before proceeding with repairs or replacement, it’s important to confirm that the starter motor is the source of the starting issue. This can be done through visual inspection and testing with diagnostic tools. Look for any visible signs of damage, such as corrosion, loose connections, or worn-out components.
2. Inspect Electrical Connections: Start by examining the electrical connections to the starter motor. Ensure that the battery cables and solenoid connections are tight and free from corrosion. Loose or corroded connections can impede the flow of electrical current and affect the starter motor’s performance.
3. Test the Starter Motor: Use a multimeter or a similar diagnostic tool to measure the voltage at the starter motor terminals. This can help determine if the motor is receiving adequate power. If the voltage is within the appropriate range, but the starter motor doesn’t engage, it may indicate a faulty motor that requires repair or replacement.
4. Remove the Starter Motor: If the starter motor is determined to be the problem, disconnect the negative battery cable before proceeding. Locate the starter motor, typically mounted on the engine block, and carefully remove it by disconnecting the electrical connections and removing any mounting bolts or brackets.
5. Evaluate Repair or Replacement: Inspect the starter motor for any obvious signs of damage or wear. If the motor exhibits severe damage or has reached the end of its lifespan, replacement is often the most practical solution. However, some starter motor issues can be repaired by replacing faulty components such as solenoids, brushes, or drive gears. Evaluate the extent of the damage and consider the cost-effectiveness of repair versus replacement.
6. Install the Replacement or Repaired Starter Motor: If replacing the starter motor, ensure that the new motor is compatible with the JAC T6 model and engine specifications. Install the new motor in the reverse order of removal, making sure all connections are secure. If repairing the starter motor, follow the manufacturer’s instructions or consult a professional to replace the faulty components.
7. Test the Starting System: Once the starter motor is repaired or replaced, reconnect the negative battery cable. Test the starting system by attempting to start the engine. If the engine starts smoothly without any issues, it indicates a successful repair or replacement.
8. Further Troubleshooting: If the starting problem persists even after repairing or replacing the starter motor, there may be underlying issues with the ignition system, fuel delivery, or engine mechanical components. It is advisable to consult a qualified mechanic or automotive technician for further diagnosis and repair.
Repairing or replacing the starter motor can often resolve starting issues in the JAC T6. However, it’s essential to diagnose the problem accurately and consider other potential causes if the problem persists. Seeking professional assistance ensures a thorough evaluation and appropriate repairs, leading to a reliable and functional starting system.
4.3 Ignition Switch Replacement
If your JAC T6 is experiencing difficulties starting, and other components like the battery and starter motor are in good condition, a possible solution is to replace the ignition switch. The ignition switch is responsible for controlling the flow of electrical power to various components of the vehicle, including the starter motor and ignition system. Here’s what you need to know about ignition switch replacement:
1. Diagnose the Problem: Before proceeding with the replacement, it’s crucial to ensure that the ignition switch is the cause of the starting issue. Inspect the switch for any visible signs of damage or wear, such as loose connections, broken wires, or a worn-out key cylinder. Additionally, testing with diagnostic tools like a multimeter can help confirm the functionality of the switch.
2. Disconnect the Battery: To work on the ignition switch, start by disconnecting the negative battery cable. This step is necessary to prevent any accidental electrical discharge during the replacement process.
3. Remove the Steering Column Covers: Access to the ignition switch is typically gained by removing the steering column covers. These covers are usually held in place by screws or clips. Carefully detach them to expose the ignition switch assembly.
4. Disconnect Wiring and Components: Once the ignition switch assembly is visible, locate the wiring harness and connectors attached to the switch. Disconnect these connections, ensuring that you take note of their positions or label them to aid reassembly.
5. Remove the Ignition Switch: The ignition switch is often secured in place by mounting screws or bolts. Remove these fasteners to detach the switch from the steering column. Pay attention to any additional components, such as the key cylinder or immobilizer module, that may need to be removed along with the switch.
6. Install the Replacement Ignition Switch: Take the new ignition switch and align it properly with the steering column. Secure it in place using the mounting screws or bolts removed earlier. Reconnect the wiring harness and connectors, ensuring they are properly seated and secured.
7. Test the Ignition System: Reconnect the negative battery cable and test the ignition system by turning the key to the «ON» position. Verify that the electrical power is properly distributed to the various vehicle components and that the engine can be started without any issues.
8. Reassemble the Steering Column: Put the steering column covers back into their original positions and secure them with the appropriate screws or clips. Ensure that all connections and components are properly reinstalled.
9. Further Troubleshooting: If the starting problem persists even after replacing the ignition switch, there may be underlying issues with other components of the starting system or electrical system. In such cases, it is recommended to consult a qualified mechanic or automotive technician for further diagnosis and repair.
Replacing the ignition switch can resolve starting issues in the JAC T6, particularly if the switch is found to be faulty. However, it’s important to diagnose the problem accurately and consider other potential causes if the issue persists. Seeking professional assistance ensures a proper evaluation and appropriate repairs, leading to a reliable starting system for your vehicle.
4.4 Fuel System Repairs
4.4.1 Refilling the Fuel Tank
If your JAC T6 is not starting, one of the common and easily overlooked causes could be an empty fuel tank. It may seem obvious, but it’s worth checking the fuel level before delving into more complicated troubleshooting steps. Here’s what you need to know about refilling the fuel tank:
1. Check the Fuel Gauge: Start by checking the fuel gauge on your vehicle’s dashboard. The fuel gauge indicates the approximate amount of fuel in the tank. If the gauge shows an empty or near-empty reading, it’s likely that the fuel tank needs to be refilled.
2. Locate a Fuel Station: Find a nearby fuel station where you can refill your JAC T6. It’s recommended to choose a reputable station that provides quality fuel.
3. Purchase the Correct Fuel Type: Determine the appropriate fuel type for your JAC T6. Check the vehicle’s owner’s manual or consult the manufacturer’s recommendations. Most vehicles run on gasoline, but some may require diesel or alternative fuels. Using the wrong fuel type can cause damage to the engine.
4. Park in a Safe Area: Once you arrive at the fuel station, park your vehicle in a safe area near the fuel pump. Make sure the engine is turned off, and engage the parking brake.
5. Open the Fuel Cap: Locate the fuel cap on the side of your JAC T6 and twist it counterclockwise to loosen it. Remove the cap completely and set it aside in a safe place.
6. Refill the Fuel Tank: Insert the fuel pump nozzle into the fuel tank opening. Hold the nozzle firmly and squeeze the trigger to start the fuel flow. Be cautious not to overfill the tank, as it can lead to fuel spillage or damage to the evaporative emission system.
7. Monitor the Fuel Level: Keep an eye on the fuel gauge or observe the fuel tank through the designated fuel level window, if available. Stop filling once the tank reaches the recommended level or when the fuel pump automatically shuts off.
8. Secure the Fuel Cap: After refilling, securely place the fuel cap back onto the fuel tank opening. Ensure it is tightened properly to prevent any fuel leaks or evaporative emissions.
9. Restart the Engine: Once the fuel tank is refilled, get back into your JAC T6 and start the engine. The vehicle should now start without any issues, assuming that an empty fuel tank was the cause of the starting problem.
Refilling the fuel tank is a straightforward solution to address starting issues related to an empty fuel tank. However, if refilling the tank doesn’t resolve the problem, it’s recommended to further investigate other potential causes such as fuel system components, fuel delivery issues, or mechanical problems. Seeking assistance from a qualified mechanic or automotive technician can help diagnose and repair more complex fuel system issues, ensuring reliable performance of your JAC T6.
4.4.2 Replacing the Fuel Filter
If your JAC T6 is experiencing starting issues or poor engine performance, a clogged fuel filter could be the culprit. The fuel filter plays a vital role in keeping contaminants and debris from entering the engine and fuel injectors. Over time, the filter can become clogged, restricting fuel flow and affecting the vehicle’s performance. Here’s what you need to know about replacing the fuel filter:
1. Confirm the Need for Replacement: Before proceeding with the fuel filter replacement, it’s important to confirm that a clogged filter is causing the issue. Symptoms of a clogged fuel filter include engine misfires, hesitation during acceleration, decreased fuel efficiency, and difficulty starting the vehicle. Consulting a qualified mechanic or using diagnostic tools can help confirm the need for replacement.
2. Locate the Fuel Filter: The fuel filter is typically located along the fuel line, either in the engine compartment or underneath the vehicle near the fuel tank. Refer to the vehicle’s owner’s manual or consult with a professional to locate the specific position of the fuel filter in your JAC T6.
3. Relieve Fuel System Pressure: Before starting the replacement process, it’s crucial to relieve the fuel system pressure to prevent any fuel spray or leakage. This can be done by removing the fuel pump relay or fuse and allowing the engine to run until it stalls.
4. Disconnect the Fuel Lines: Once the fuel system pressure is relieved, use caution to disconnect the fuel lines connected to the fuel filter. Ensure that you have a catch basin or suitable container to collect any fuel that may spill during the disconnection.
5. Remove the Old Fuel Filter: With the fuel lines disconnected, carefully remove the old fuel filter from its mounting bracket. Depending on the design, the filter may be held in place by mounting clamps or securing bolts. Take note of the filter’s orientation and the direction of fuel flow for proper installation of the new filter.
6. Install the New Fuel Filter: Take the new fuel filter and insert it into the mounting bracket, ensuring it is properly aligned with the fuel lines. Follow the manufacturer’s instructions or markings on the filter to ensure correct installation.
7. Reconnect the Fuel Lines: Once the new fuel filter is securely in place, reconnect the fuel lines, ensuring they are properly seated and tightened. Pay attention to any directional markings on the filter and ensure the fuel flow is in the correct direction.
8. Test for Leaks: Before starting the engine, double-check all connections and fuel lines for any signs of leakage. It’s essential to address any leaks before proceeding further. Once confident in the connections, start the engine and monitor for any fuel leaks or abnormalities.
9. Verify Proper Operation: After replacing the fuel filter, take your JAC T6 for a test drive to verify that the starting issues or performance problems have been resolved. Monitor the engine’s behavior, acceleration, and overall performance to ensure everything is functioning optimally.
Replacing the fuel filter can improve fuel flow and address starting issues or performance problems related to a clogged filter. However, if the starting issue persists or other fuel system components are suspected to be faulty, it is advisable to seek the expertise of a qualified mechanic or automotive technician. They can perform further diagnostics and repairs to ensure the reliable operation of your JAC T6’s fuel system.
4.4.3 Repairing or Replacing the Fuel Pump
If your JAC T6 is experiencing issues with starting or maintaining fuel pressure, a faulty fuel pump could be the underlying cause. The fuel pump is responsible for delivering fuel from the tank to the engine at the appropriate pressure. Over time, the fuel pump can wear out or fail, resulting in fuel delivery problems. Here’s what you need to know about repairing or replacing the fuel pump:
1. Confirm the Need for Repair or Replacement: Before proceeding with fuel pump repairs, it’s important to diagnose the issue accurately. Symptoms of a faulty fuel pump include difficulty starting the vehicle, engine sputtering or stalling, decreased fuel efficiency, and loss of power during acceleration. Consult with a qualified mechanic or use diagnostic tools to confirm if the fuel pump is the root cause of the problem.
2. Relieve Fuel System Pressure: Before working on the fuel pump, it’s crucial to relieve the fuel system pressure to prevent any fuel spray or leakage. This can be done by removing the fuel pump relay or fuse and allowing the engine to run until it stalls.
3. Access the Fuel Pump: The location of the fuel pump can vary depending on the vehicle’s make and model. In the JAC T6, the fuel pump is typically located inside the fuel tank. Accessing the fuel pump usually involves removing the fuel tank or accessing it through an access panel, which may require raising the vehicle or removing certain components. Refer to the vehicle’s service manual or consult with a professional to ensure the proper steps are followed.
4. Inspect and Test the Fuel Pump: Once the fuel pump is accessible, visually inspect it for any signs of damage or wear. Additionally, a fuel pressure test can be performed using a fuel pressure gauge to determine if the pump is delivering fuel at the correct pressure. If the pump is damaged or not functioning correctly, it will need to be repaired or replaced.
5. Repairing the Fuel Pump: In some cases, certain components of the fuel pump, such as the electrical connectors or fuel lines, may be repairable. These repairs can involve replacing faulty components or addressing any leaks or electrical issues. It’s essential to follow the manufacturer’s instructions or consult with a professional for specific repair procedures.
6. Replacing the Fuel Pump: If the fuel pump is severely damaged or cannot be repaired, replacement is necessary. This typically involves disconnecting the fuel lines and electrical connectors attached to the pump, removing the old pump from the tank, and installing a new pump. Ensure that the replacement pump is compatible with your JAC T6’s model and specifications.
7. Reassembly and Testing: Once the fuel pump repair or replacement is complete, reassemble any components that were removed and ensure all connections are secure. Before starting the engine, double-check for any fuel leaks. Once confident in the repairs, start the engine and monitor the fuel pressure and overall performance to verify that the fuel pump is operating correctly.
Repairing or replacing the fuel pump can resolve fuel delivery issues and restore the proper functioning of your JAC T6’s fuel system. However, if the starting or fuel-related problems persist, it is advisable to consult with a qualified mechanic or automotive technician. They can perform further diagnostics and repairs to ensure the reliable operation of your vehicle’s fuel system.
4.5 Engine Mechanical Solutions
4.5.1 Timing Belt or Chain Replacement
In the JAC T6, the timing belt or timing chain plays a crucial role in synchronizing the engine’s internal components. Over time, these components can wear out or become damaged, leading to timing issues and potentially causing the car not to start. Here’s what you need to know about timing belt or chain replacement:
1. Determine the Timing Belt or Chain Type: The JAC T6 may be equipped with either a timing belt or a timing chain. It’s important to know which one your vehicle has, as the replacement process and maintenance requirements can differ between the two.
2. Follow Manufacturer Recommendations: Refer to the vehicle’s service manual or consult with a qualified mechanic to determine the recommended replacement interval for the timing belt or chain. It’s crucial to adhere to these guidelines to prevent potential engine damage and ensure reliable operation.
3. Assess Timing Belt or Chain Condition: Before replacement, visually inspect the timing belt or chain for any signs of damage, such as cracks, fraying, or excessive wear. Additionally, listen for any unusual noises coming from the engine, as this could indicate a problem with the timing components.
4. Replace Timing Belt: If your JAC T6 is equipped with a timing belt, replacement is generally necessary at the recommended interval or if any signs of damage or wear are present. The replacement process involves removing any components blocking access to the timing belt cover, such as the engine covers or accessory belts. Once the cover is exposed, carefully align the timing marks on the crankshaft and camshaft pulleys, release the tensioner, and remove the old timing belt. Install the new timing belt following the manufacturer’s instructions, making sure the timing marks remain aligned. Finally, re-tension the belt according to the specified torque and reassemble any removed components.
5. Replace Timing Chain: If your JAC T6 is equipped with a timing chain, it typically has a longer lifespan and may not require replacement as frequently as a timing belt. However, if the timing chain shows signs of excessive wear, stretching, or has developed slack, replacement is necessary. The replacement process involves removing the timing chain cover, timing chain tensioner, and any other components obstructing access to the timing chain. Once the old timing chain is removed, install the new timing chain, ensuring proper alignment with the camshaft and crankshaft sprockets. Follow the manufacturer’s instructions for tensioning the chain and reassemble any removed components.
6. Proper Timing Adjustment: After replacing the timing belt or chain, it’s crucial to verify that the engine’s timing is correctly set. This can be done by aligning the timing marks on the crankshaft and camshaft pulleys or using specialized timing tools, depending on the vehicle’s design. Incorrect timing can result in poor engine performance, misfires, or even severe engine damage.
7. Additional Maintenance: Along with timing belt or chain replacement, it’s often recommended to replace related components such as the timing belt tensioner, idler pulleys, and water pump. These components can contribute to the overall longevity and reliability of the timing system.
Timing belt or chain replacement is a critical maintenance procedure that ensures the proper operation and longevity of your JAC T6’s engine. If you’re unsure about performing the replacement yourself, it’s advisable to seek the assistance of a qualified mechanic or automotive technician. They have the expertise and tools necessary to carry out the procedure accurately and ensure the optimal performance of your vehicle’s engine.
4.5.2 Ignition System Repairs
The ignition system in the JAC T6 is responsible for initiating the combustion process in the engine, which allows the car to start and run smoothly. If there are issues with the ignition system, it can result in the car not starting or experiencing performance problems. Here are some solutions and repairs for common ignition system issues:
1. Spark Plug Replacement: Faulty or worn-out spark plugs can cause misfires, rough idling, and difficulty starting the engine. It’s recommended to inspect and replace the spark plugs according to the manufacturer’s recommendations. Use the appropriate spark plug type and ensure they are properly gapped for optimal performance.
2. Ignition Coil Inspection: The ignition coil converts the low voltage from the battery into a high voltage that ignites the fuel mixture in the engine cylinders. If the ignition coil is faulty or damaged, it can lead to weak or no spark, resulting in starting issues. Inspect the ignition coil for signs of damage, such as cracks or corrosion, and replace it if necessary.
3. Distributor Cap and Rotor Replacement: Some older models of the JAC T6 may be equipped with a distributor ignition system. In such cases, a faulty distributor cap or rotor can cause problems with spark distribution to the spark plugs. Inspect these components for signs of wear or damage and replace them if needed.
4. Ignition Switch Repair or Replacement: The ignition switch is responsible for controlling the power to the ignition system. If the switch is faulty, it can prevent the engine from starting. Inspect the ignition switch for any signs of wear, damage, or loose connections. If necessary, repair or replace the ignition switch to restore proper operation.
5. Wiring and Connection Checks: Examine the ignition system wiring and connections for loose or corroded terminals. Faulty wiring or poor connections can disrupt the flow of electrical current and affect the ignition system’s performance. Repair or replace any damaged wiring and ensure secure connections.
6. Ignition Control Module Replacement: The ignition control module regulates the timing and duration of the ignition spark. If it malfunctions, it can cause starting problems or engine misfires. Consult the vehicle’s service manual or seek professional assistance to diagnose and replace the ignition control module if needed.
7. Engine Computer (ECU) Diagnosis: In modern vehicles, the engine control unit (ECU) plays a crucial role in managing the ignition system. If the ECU is experiencing issues or malfunctions, it can affect the ignition timing and overall engine performance. Use specialized diagnostic tools to scan the ECU for error codes and perform any necessary repairs or reprogramming.
8. Regular Maintenance: To prevent ignition system problems, it’s important to follow the manufacturer’s recommended maintenance schedule. This may include periodic inspections, cleaning, and adjustments of ignition system components to ensure optimal performance and reliability.
When encountering ignition system issues with your JAC T6, it’s essential to address them promptly to avoid further complications. If you’re unsure about diagnosing or repairing the ignition system yourself, it’s recommended to consult a qualified mechanic or automotive technician who can accurately diagnose the problem and perform the necessary repairs.
4.5.3 Engine Compression Testing and Repairs
Engine compression refers to the pressure generated within the cylinders of the JAC T6’s engine during the combustion process. Adequate compression is crucial for proper engine performance and starting. If there are issues with engine compression, it can result in power loss, misfires, and difficulty starting the vehicle. Here are some solutions and repairs related to engine compression:
1. Compression Testing: Engine compression can be measured using a compression tester. This diagnostic tool allows you to assess the compression levels in each cylinder. By comparing the readings to the manufacturer’s specifications, you can identify any cylinders with low compression.
2. Identifying Low Compression Causes: Low compression can be caused by several factors, including worn piston rings, damaged cylinder walls, worn valve seals, or a blown head gasket. Determining the root cause is essential to perform the appropriate repairs.
3. Piston Ring Replacement: Worn or damaged piston rings can result in low compression levels. If the compression test indicates low compression in one or more cylinders, it may be necessary to replace the piston rings. This repair involves disassembling the engine and installing new rings to restore proper compression.
4. Cylinder Leakdown Test: A cylinder leakdown test provides more detailed information about the condition of the engine’s internal components. It helps identify specific areas where compression may be leaking, such as valves, piston rings, or the head gasket. This test aids in diagnosing the exact cause of low compression.
5. Cylinder Head Inspection and Repairs: If the cylinder leakdown test indicates a problem with the cylinder head, it may require inspection and repairs. Common issues include worn valve seats, damaged valves, or a faulty head gasket. Depending on the specific problem, the cylinder head may need to be resurfaced, valves replaced, or the head gasket repaired.
6. Engine Rebuilding: In severe cases of low compression or extensive engine damage, an engine rebuild may be necessary. This involves disassembling the engine, replacing worn or damaged components, and reassembling the engine to factory specifications. Engine rebuilding is a complex process and is typically performed by experienced mechanics or engine rebuild specialists.
7. Regular Maintenance: Proper maintenance, including regular oil changes, using the recommended fuel and lubricants, and following the manufacturer’s maintenance schedule, can help prevent premature engine wear and maintain optimal compression. Routine maintenance helps identify potential issues early on and allows for timely repairs, minimizing the risk of significant compression problems.
When encountering engine compression issues with your JAC T6, it is recommended to consult a qualified mechanic or automotive technician. They can accurately diagnose the problem and recommend the necessary repairs. Engine compression problems can vary in severity, and it’s essential to address them promptly to prevent further damage and ensure the longevity of your vehicle’s engine.
5. Conclusion
5.1 Importance of Regular Maintenance
Regular maintenance is of utmost importance for keeping your JAC T6 in optimal condition and ensuring its longevity. By following the manufacturer’s recommended maintenance schedule and conducting routine inspections, you can prevent potential problems and address issues before they become more severe. Here are the key reasons why regular maintenance is crucial:
1. Performance and Reliability: Regular maintenance helps maintain the performance and reliability of your JAC T6. It includes tasks such as oil changes, filter replacements, and fluid checks, which keep the engine and other components functioning properly. When all parts are in good condition, the vehicle performs optimally and is less likely to experience breakdowns or unexpected issues.
2. Safety: Keeping your JAC T6 properly maintained enhances safety for both you and other road users. Regular maintenance includes inspecting and maintaining crucial safety components such as brakes, tires, and lights. By ensuring these systems are in good working order, you can reduce the risk of accidents and ensure your vehicle operates safely on the road.
3. Cost Savings: While regular maintenance may incur some upfront costs, it can save you money in the long run. Routine inspections and preventive repairs help identify and address minor issues before they escalate into major and costly problems. Additionally, well-maintained vehicles tend to have better fuel efficiency, reducing your overall fuel expenses.
4. Extended Lifespan: Vehicles that receive regular maintenance have a higher chance of lasting longer. By addressing wear and tear, replacing worn-out parts, and keeping the engine properly lubricated, you can extend the lifespan of your JAC T6. Regular maintenance allows you to catch potential problems early and take proactive measures to prevent major failures that could lead to the premature retirement of your vehicle.
5. Warranty Compliance: Following the recommended maintenance schedule is often a requirement to keep your vehicle’s warranty valid. If you neglect regular maintenance, it could void your warranty, leaving you responsible for the costs of repairs or replacements that would otherwise be covered.
6. Resale Value: A well-maintained vehicle retains its value better than one that has been neglected. If you plan to sell or trade-in your JAC T6 in the future, having a complete and up-to-date maintenance record demonstrates to potential buyers that the vehicle has been cared for. This can help you negotiate a higher resale value.
In conclusion, regular maintenance plays a vital role in keeping your JAC T6 in top condition. It ensures performance, reliability, safety, and cost savings, while also extending the lifespan of your vehicle. By following the manufacturer’s maintenance schedule and conducting routine inspections, you can enjoy a smooth and trouble-free driving experience while protecting your investment. Make maintenance a priority to reap these benefits and keep your JAC T6 operating at its best.
5.2 Seeking Professional Help when Needed
While regular maintenance and troubleshooting steps can resolve many issues with your JAC T6, there may be times when seeking professional help becomes necessary. Professional assistance ensures that complex problems are accurately diagnosed and effectively resolved. Here are some situations where seeking professional help is crucial:
1. Advanced Diagnostics: If you have exhausted all troubleshooting steps and are still unable to identify the root cause of the problem, it is advisable to consult a professional. They have access to advanced diagnostic equipment and tools that can pinpoint specific issues within the vehicle’s systems.
2. Complex Repairs: Certain repairs require specialized knowledge, expertise, and equipment. Tasks such as engine rebuilds, transmission repairs, or electrical system troubleshooting are best handled by trained professionals who have the necessary skills and experience to carry out these complex repairs correctly.
3. Warranty Coverage: If your JAC T6 is still under warranty, it is essential to consult an authorized service center for repairs and maintenance. This ensures that the warranty remains valid, and any necessary repairs are performed according to the manufacturer’s specifications.
4. Safety Concerns: If you encounter safety-related issues, such as problems with the braking system, steering, or suspension, it is crucial to have these concerns addressed by a professional. Safety should never be compromised, and seeking expert help ensures that these critical systems are in proper working order.
5. Specialized Knowledge: Professional technicians have extensive training and knowledge about specific vehicle models, including the JAC T6. They stay updated with the latest technical information, service bulletins, and recalls related to your vehicle. This expertise allows them to provide accurate diagnoses and effective solutions tailored to your car’s specific needs.
6. Time and Convenience: While DIY troubleshooting can be rewarding, it may require significant time and effort. If you are short on time or lack the necessary tools and resources, it is more practical to take your JAC T6 to a professional. They can efficiently diagnose and repair the issue, saving you valuable time and ensuring a reliable fix.
Remember, seeking professional help when needed ensures that your JAC T6 receives the expertise it requires, minimizing the risk of further damage and ensuring the best possible outcome. Professional technicians have the skills, knowledge, and resources to tackle complex repairs and keep your vehicle running smoothly. Don’t hesitate to reach out to trusted automotive professionals for assistance when DIY efforts fall short or when dealing with critical issues that require specialized attention.
Frequently Asked Questions (FAQ) about Jac T6 Starting Issues
Why won’t my Jac T6 from 2015 start?
There could be various reasons why your 2015 Jac T6 won’t start. It could be due to a dead battery, faulty starter motor, ignition switch problems, or even engine mechanical issues like a timing belt or chain failure. It is essential to diagnose the specific problem to determine the appropriate solution.
What should I do if my Jac T6 won’t start and it’s a 2018 model?
If your 2018 Jac T6 won’t start, start by checking the battery connections to ensure they are secure. Additionally, inspect the fuses and relays to rule out any electrical issues. If the problem persists, it might be necessary to use diagnostic tools like an OBD-II scanner to retrieve error codes and further narrow down the problem.
I own a Jac T6 with a 2.0L diesel engine, and it won’t start. What could be the cause?
If your Jac T6 with a 2.0L diesel engine won’t start, the issue could be related to fuel system problems. Check if the fuel tank is empty and refill it if necessary. Another possible cause could be a clogged fuel filter, which can restrict fuel flow. Consider inspecting the fuel filter and replacing it if needed. Additionally, ensure the fuel pump is functioning correctly.
My Jac T6, a second-generation model, won’t start. What could be the problem?
If your second-generation Jac T6 won’t start, it could be due to issues with the ignition system. Check if there is a spark in the ignition system by inspecting the spark plugs and ignition coils. Faulty ignition components can prevent the spark needed for ignition. If necessary, consider repairing or replacing the ignition system components.
What can cause a Jac T6 from 2017 with a 2.4L petrol engine to not start?
A 2017 Jac T6 with a 2.4L petrol engine may not start due to several factors. It is important to check the battery voltage to ensure it is providing sufficient power. Additionally, examine the wiring and cables for any damage or loose connections. Using a multimeter, you can measure voltage at various points in the electrical system to identify any potential issues.
I have a Jac T6 with the «Luxury» complectation, and it won’t start. What steps can I take?
If your Jac T6 with the «Luxury» complectation won’t start, begin by checking the battery voltage and connections. Ensure the battery is in good condition and fully charged. If the battery is fine, proceed to inspect the fuel delivery system, including the fuel pump, fuel lines, and injectors. It’s also advisable to verify ignition spark by examining the ignition system components.
My Jac T6 won’t start, and it’s a third-generation model with a 1.5L turbocharged engine. What could be the issue?
If your third-generation Jac T6 with a 1.5L turbocharged engine won’t start, it is recommended to start with basic troubleshooting steps like checking the battery connections and examining the fuses and relays. If these checks do not reveal the problem, further diagnostic steps such as using a multimeter to test electrical components and conducting a fuel pressure test may be necessary.
|
Brian Wong / AuthorBrian Wong is an accomplished automotive journalist and editor with a passion for cars. With over a decade of experience in the industry, he has established himself as a trusted voice in the automotive community. Brian has written extensively about a wide range of topics in the field, from the latest trends in car design to innovative safety features and emerging technologies. As a senior reviews editor, he is responsible for test driving and analyzing the latest cars on the market, providing readers with accurate and objective reviews. His articles are widely read and respected for their depth of knowledge and analysis. Brian is committed to staying at the forefront of the latest developments in the automotive industry, and is dedicated to sharing his expertise and insights with his readers. |
|

Updated on September 21, 2023