Download Windows Speedup Tool to fix errors and make PC run faster
BITS or Background Intelligent Transfer Service transfers files between the client and the server. One of its most important jobs is to assist Windows Update. However, many users reported a ticket or event in Windows Event Viewer, which states the following message.
BITS service failed to start. Error 0x80004015. Event ID 16392
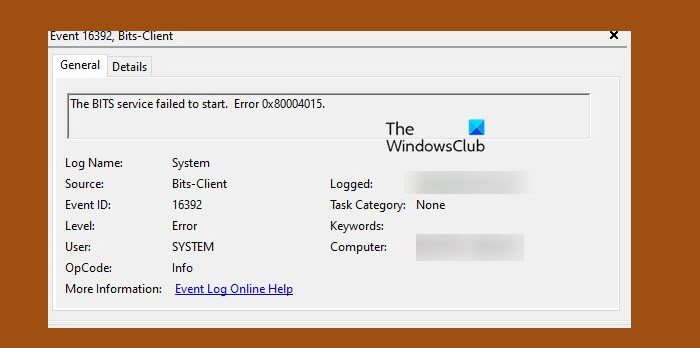
If the BITS service failed to start on your Windows computer with Error code 0x80004015, Event ID 16392 follow the solutions mentioned below.
- Start BITS Service manually
- Run SFC and DISM
- Run Background Intelligent Transfer Services and Windows Update Troubleshooter
- Clear Windows Update Path
- Reset your computer
Let us talk about them in detail.
1] Start BITS Service manually
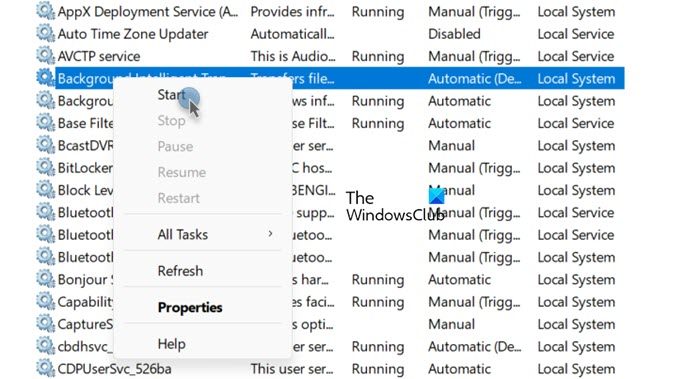
If the BITS service is not starting, you should try to do the same manually. For that, open the Services app from the Start Menu, look for Background Intelligent Transfer Service, right-click on it, and select Start if an option is available. If the service was already running, you can restart it.
2] Run SFC and DISM
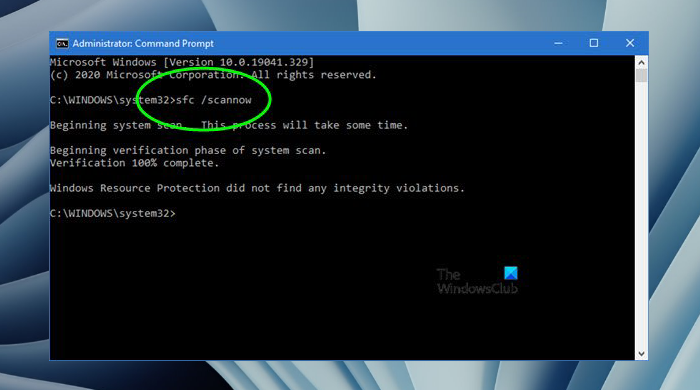
You may get the error due to corrupted system files. We can repair the files using the System File Checker (SFC). This tool will scan your system files and then repair the corrupted ones. In order to do the same, open Command Prompt as an administrator and then run the following command.
sfc /scannow
Let the command run, and if it doesn’t yield any fruitful result, run the following DISM command.
DISM.exe /Online /Cleanup-image/Scanhealth

DISM.exe /Online /Cleanup-image/Restorehealth
Once your command is successful, reboot your computer and then run Windows Update and see.
3] Run Background Intelligent Transfer Services and Windows Update Troubleshooter
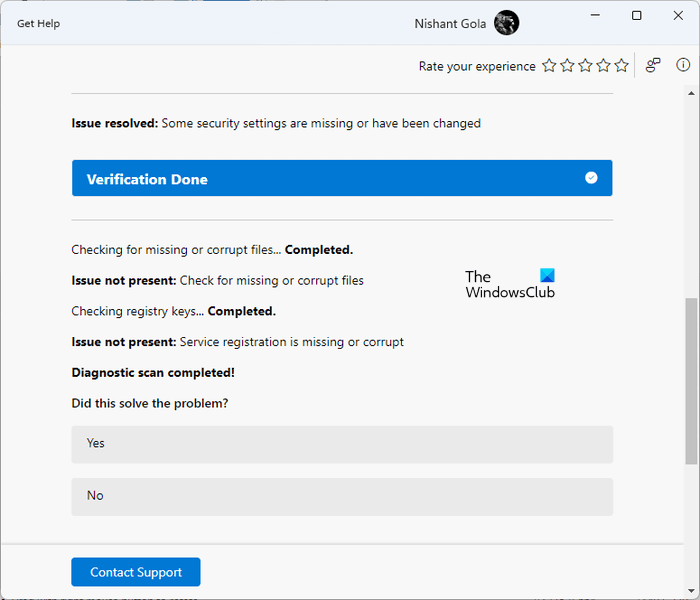
Run the Background Intelligent Transfer Service (BITS) Troubleshooter in the Get Help app and see. It can scan what’s wrong with the service and then provide you with a perfect solution and, in some cases, even execute the required solution. You can access it via the Get Help app or via the Windows Settings > Troubleshooters page.
If the issue is not resolved, run the Windows Update troubleshooter as BITS is related to Windows Update.
4] Clear Windows Update Path
Next up, we need to clear the Windows Update path from Registry and let the computer create them once again. We do this to ensure that you don’t get the error due to a corrupted registry. Making amendments to the registry is generally discouraged, which is why you should create a backup of the registry that can be used in adverse scenarios. Once you have created the registry backup, follow the solutions mentioned below to clear the Windows Update path.
- First of all, launch Registry Editor.
- Next, navigate to the following path.
HKEY_LOCAL_MACHINE\SOFTWARE\Policies\Microsoft\Windows\WindowsUpdate
- Search for WUServer and WIStatusServer.
- You need to delete them. In case, they are not listed, you should skip this solution and move to the next one.
After deleting the file, reboot your computer and check if the issue is resolved.
5] Reset your computer
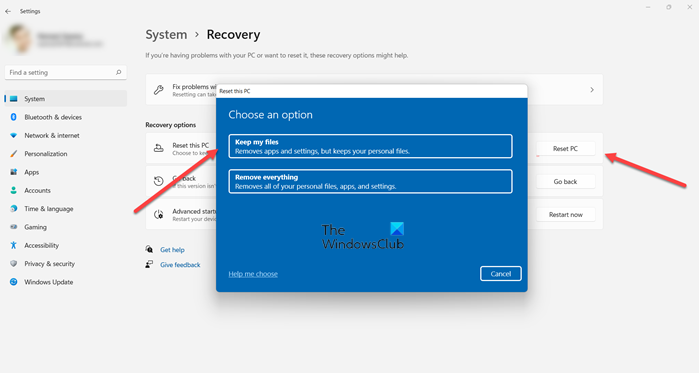
If nothing works, and if this causes your Windows Update to fail, your last resort is to reset your computer. We are not going to delete your files but reconfigure your device. So, use the Reset this PC option from Settings, making sure you opt to Keep your files, and then check if the issue is resolved.
How do I start BITS service in Windows 11?
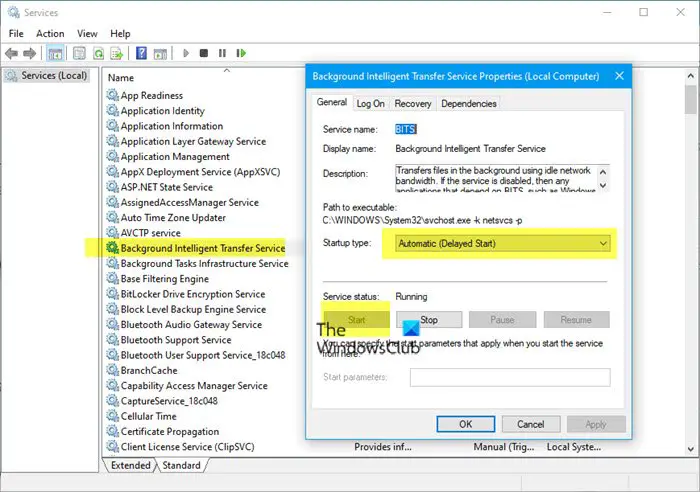
It is simple to start the BITS service. To do the same, open the Services Manager, then search for Background Intelligent Transfer Service, right-click on it, and select Start. You can also open its Properties and then set the Startup type to Manual, which is the default Windows setting.
What is the BITS repair tool for Windows 11?
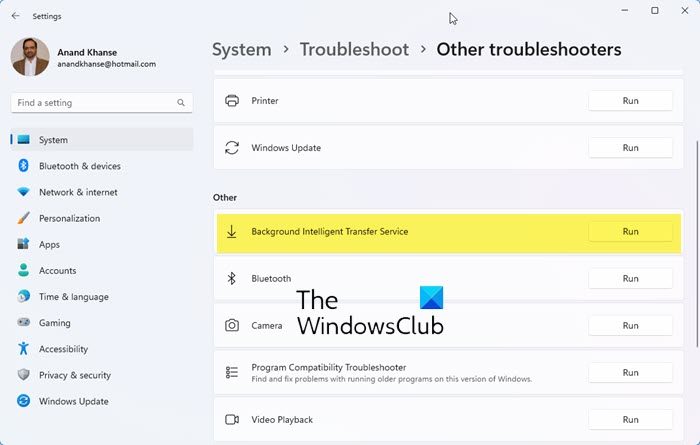
Microsoft has provided a troubleshooter that can repair issues related to BITS. To run the BITS Troubleshooter, open Windows Settings > System > Troubleshoot. Under Other, click on the Run button against Background Intelligent Transfer Service, to open the new Get Help app based BITS Troubleshooter. You can follow the on-screen instructions to run the troubleshooter.
Also Read: Background Intelligent Transfer Service stopped & not working in Windows 11/10.
Yusuf is an Engineering graduate from Delhi. He has written over 1000 technical articles and has knowledge of programming languages including Java, and C++, and technologies such as Oracle 12C and MsSQL. Troubleshooting Windows is his favorite past-time.
Фоновая интеллектуальная служба передачи (BITS) – одна из важнейших служб Windows, особенно для таких процессов, как Центр обновления Windows, которые зависят от нее. Кроме того, от этой важной службы будет зависеть ваше подключение к Интернету или Bluetooth. Это одна из основных причин, по которой важно исправить эту ошибку как можно скорее, поскольку неизбежно последуют другие проблемы.

Эту ошибку можно решить множеством различных методов, и мы постараемся представить наиболее признанные и подтвержденные пользователями со всего Интернета. Внимательно следуйте этим методам и удачи!
Содержание
- Решение 1. Сканируйте компьютер на наличие вредоносных программ
- Решение 2. Настройка редактора реестра
- Решение 3. Включите две важные службы
- Решение 4. Используйте msconfig для изменения запуска
- Решение 5. R eset Your PC
Решение 1. Сканируйте компьютер на наличие вредоносных программ
Поскольку BITS является одной из наиболее важных служб Windows, поскольку она обеспечивает надлежащую связь между вашим компьютером и другими сетями на ее основе, вирусы часто нацелены на нее и препятствуют ее правильному запуску. Кроме того, вы можете никогда не узнать, действительно ли ваш компьютер заражен, пока не запустите хотя бы пару сканирований с помощью лучших доступных инструментов.
Здесь мы покажем вам, как сканировать ваш компьютер с помощью Malwarebytes, поскольку он часто показывает лучшие результаты, учитывая тот факт, что у него действительно обширная база данных. Удачи!
- Malwarebytes Anti-Malware – отличный инструмент для защиты от вредоносных программ с бесплатной пробной версией. К счастью, после решения этой проблемы программа вам не понадобится (если только вы не захотите ее купить и подготовить к дальнейшим проблемам), поэтому обязательно загрузите бесплатную пробную версию отсюда.
- Найдите только что загруженный исполняемый файл и дважды щелкните его, чтобы открыть.
- Выберите, куда вы хотите установить Malwarebytes, и следуйте инструкциям, которые появятся на экране, чтобы завершить установку. процесс.

- Откройте Malwarebytes и выберите опцию «Сканировать», доступную на главном экране приложения.
- Инструмент, вероятно, запустит службу обновления для обновления своей вирусной базы данных, а затем продолжит сканирование. Подождите, пока процесс не завершится, что определенно может занять некоторое время.

- Перезагрузите компьютер после завершения процесса сканирования и проверьте, по-прежнему ли у вас возникают проблемы с тем, что BITS не запускается.
Примечание . Вам также следует использовать другие инструменты безопасности, если вы точно можете определить тип вредоносного ПО, установленного на вашем компьютере (программы-вымогатели, нежелательные программы и т. д.), поскольку один инструмент не сможет зарегистрировать все типы вредоносных программ. apps.
Решение 2. Настройка редактора реестра
Это одно из самых популярных решений в Интернете и у многих пользователей извлекли выгоду из этого, так как ошибка впервые начала появляться. Если вы уверены, что на вашем компьютере нет вредоносных программ, вам обязательно стоит ознакомиться с приведенным ниже решением, которое включает в себя определенные изменения реестра.
Поскольку вы собираетесь редактировать реестр, мы рекомендуем вам проверить Эту статью мы подготовили для того, чтобы сделать резервную копию реестра и предотвратить дальнейшие проблемы. Тем не менее, ничего плохого не произойдет, если вы будете внимательно следовать инструкциям.
- Откройте интерфейс редактора реестра, набрав «regedit» либо в строке поиска, либо в диалоговом окне «Выполнить». Перейдите к следующему разделу в редакторе реестра на левой панели:
HKEY_LOCAL_MACHINE SYSTEM CurrentControlSet Control BackupRestore FilesNotToBackup

- Если запись FilesNotToBackup не существует в ключ BackupRestore, вам нужно будет его создать. Оставайтесь в ключе BackupRestore, нажмите кнопку «Изменить» в верхнем правом меню и выберите «Новый >> ключ».
- Переименуйте это значение в «FilesNotToBackup» без кавычек и нажмите Enter для подтверждения. Ключ должен оставаться пустым. Обратите особое внимание на то, чтобы его имя соответствовало инструкциям, чтобы решение работало должным образом.
Перейдем к службам:
- Закройте редактор реестра и перезагрузите компьютер, чтобы сохранить внесенные изменения. Откройте диалоговое окно «Выполнить», используя комбинацию клавиш Windows + R на клавиатуре. Введите «services.msc» в поле без кавычек и нажмите «ОК», чтобы открыть «Службы».

- Найдите службу передачи фоновой информации, щелкните ее правой кнопкой мыши и выберите” Свойства “в появившемся контекстном меню.
- Если служба запущена (вы можете проверить это рядом с сообщением о состоянии службы), вы должны оставить ее как есть (но, вероятно, она остановлена). Если он остановлен, нажмите кнопку «Пуск» в середине окна.

- Перед тем, как выйти из режима подтверждения изменений, убедитесь, что для параметра в разделе Тип запуска в свойствах Background Intelligence Transfer Service установлено значение «Автоматически». Подтвердите все диалоговые окна, которые могут появиться при установке типа запуска.
При нажатии на кнопку «Стоп» может появиться следующее сообщение об ошибке:
«Windows не может запустить службу передачи фоновой информации на локальном компьютере. Ошибка 1079: учетная запись, указанная для этой службы, отличается от учетной записи, указанной для других служб, работающих в том же процессе ».
В этом случае следуйте инструкциям ниже, чтобы исправить это.
- Выполните шаги 1-3 из приведенных выше инструкций, чтобы открыть свойства IP Helper. Перейдите на вкладку «Вход в систему» и нажмите кнопку «Обзор…».

- В поле« Введите имя объекта для выбора »введите имя своей учетной записи, нажмите« Проверить имена »и подождите, пока имя не распознается.
- Нажмите OK, когда закончите, и введите пароль в поле Пароль, когда вам будет предложено его ввести, если вы установили пароль. Теперь он должен запуститься без проблем!
Решение 3. Включите две важные службы
Службы Windows обычно зависят от других служб, которые можно увидеть из окна служб, когда вы нажмите на различные службы, расположенные внутри. Однако следующие две службы не отображаются при нажатии на BITS, но служба BITS запускается правильно только тогда, когда эти службы работают правильно.
- Открыть в диалоговом окне «Выполнить», используя комбинацию клавиш Windows + R на клавиатуре. Введите «services.msc» в поле без кавычек и нажмите «ОК», чтобы открыть «Службы».
- Найдите две службы: Network Location Awareness и Network List. Щелкните правой кнопкой мыши по каждому из них и убедитесь, что вы запускаете их так же, как в приведенном выше решении для службы передачи фоновой информации.
- Если служба запущена (вы можете проверить это рядом с сообщение о статусе службы), вы должны оставить его как есть (но, вероятно, он остановлен). Если он остановлен, нажмите кнопку «Пуск» в середине окна.
В конце убедитесь, что вы также запускаете службу BITS таким же образом. Все настройки запуска служб должны быть установлены на автоматический.
Решение 4. Используйте msconfig для изменения запуска
Даже если это Исправление может показаться некоторым пользователям странным, оно действительно может решить проблему, и пользователь подтвердил, что оно работает. Настройкой по умолчанию должен быть Обычный запуск или Выборочный запуск на других компьютерах. Вы должны открыть msconfig и изменить настройку выбора Statup на Нормальный запуск, чтобы решить проблему.
- Используйте комбинацию клавиш Windows + R на клавиатуре, чтобы открыть в диалоговом окне «Выполнить» и введите «msconfig» перед тем, как нажать «ОК». Если вы используете Windows 10, вы также можете выполнить поиск «msconfig» в меню «Пуск» или в строке поиска рядом с ним. Первым результатом должна быть конфигурация системы, поэтому обязательно нажмите на нее.
- Оставайтесь на вкладке «Общие» и измените переключатель в разделе «Выбор при запуске» с предыдущего параметра на «Обычный запуск» и «Применить изменения перед выходом». . Перезагрузите компьютер и проверьте, исчезла ли проблема.

- На вкладке «Общие» щелкните, чтобы выбрать параметр «Выборочный запуск», а затем щелкните, чтобы снять флажок «Загружать элементы запуска».
http://www.tomshardware.co.uk/forum/id-2744582/windows-update-background-intelligent-service-start. html
Решение 5. R eset Your PC
Если вы используете Windows 10 , перезагрузка компьютера – это несложный процесс, который определенно решит большинство проблем. Те, кто может возразить, что этот метод используется слишком часто и не подходит, должны согласиться с тем, что Windows 10 позволяет вам сохранить все ваши файлы и приложения, позволяя просто сбрасывать настройки. Кроме того, это последнее решение в нашем списке, а это значит, что вам обязательно стоит попробовать все другие методы перед этим.
- Перейдите в Настройки в Windows 10. Вы можете попасть туда, щелкнув значок значок шестеренки в меню “Пуск”. Выберите раздел «Обновление и безопасность» и нажмите «Восстановление» на левой панели.
- Windows покажет вам три основных варианта: сбросить этот компьютер, вернуться к более ранней сборке и расширенный запуск. Сбросить этот компьютер – лучший вариант, чтобы начать заново с минимальными потерями для ваших файлов, если вы выберете правильный вариант. Нажмите “Начать” в разделе “Сбросить этот компьютер”.

- Щелкните «Сохранить мои файлы» или «Удалить все» в зависимости от того, хотите ли вы сохранить файлы данных в целости. В любом случае все ваши настройки вернутся к значениям по умолчанию, а приложения будут удалены. Мы рекомендуем вам выбрать «Сохранить мои файлы».

- Выберите «Просто удалите мои файлы» или «Удалить файлы и очистить диск», если вы выбрали «удалить все» на предыдущем шаге. Очистка диска занимает намного больше времени, но она гарантирует, что, если вы отдадите компьютер или продадите его, следующему человеку будет сложно восстановить ваши стертые файлы. Если вы оставляете компьютер себе, выберите «Просто удалите мои файлы».
- Нажмите «Далее», если Windows предупредит вас, что вы не сможете выполнить откат к предыдущей версии ОС. Нажмите «Сброс», когда вас попросят сделать это, и дождитесь, пока Windows завершит процесс сброса. При появлении запроса нажмите «Продолжить» и загрузите компьютер. Проверьте, нормально ли запускаются BITS.

- Remove From My Forums
-
Вопрос
-
ошибка 0x80004015 на клиентских машинах при запуске службы автоматическое обновление, BITS и брендмауэр.
проблема решается запуском батника с содержымым:
sc sdset bits «D
A;;CCLCSWRPWPDTLOCRRC;;;SY)(A;;CCDCLCSWRPWPDTLOCRSDRCWDWO;;;BA)(A;;CCLCSWLOCRRC;;;AU)(A;;CCLCSWRPWPDTLOCRRC;;;PU)»
sc sdset wuauserv «D A;;CCLCSWRPWPDTLOCRRC;;;SY)(A;;CCDCLCSWRPWPDTLOCRSDRCWDWO;;;BA)(A;;CCLCSWLOCRRC;;;AU)(A;;CCLCSWRPWPDTLOCRRC;;;PU)»
sc sdset alg «DA;;CCLCSWRPWPDTLOCRRC;;;SY)(A;;CCDCLCSWRPWPDTLOCRSDRCWDWO;;;BA)(A;;CCLCSWLOCRRC;;;AU)(A;;CCLCSWRPWPDTLOCRRC;;;PU)»но после перезагрузки компьютера проблема возвращается.
данная ситуация возникает после создания груповой политики где прописаны настройки обновлений
если же настройки осуществлять путем ипорта данных в реестр все работает нормально.
вопрос что нужно зделать чтоб при настройке через групповые политики не возникала такая проблема
 A;;CCLCSWRPWPDTLOCRRC;;;SY)(A;;CCDCLCSWRPWPDTLOCRSDRCWDWO;;;BA)(A;;CCLCSWLOCRRC;;;AU)(A;;CCLCSWRPWPDTLOCRRC;;;PU)»
 Question
Issue: How to fix «BITS service failed to start. Error 0x80004015» in Windows?
Hello. I can’t manage to install any Windows updates because the system is giving me the “BITS service failed to start. Error 0x80004015”. Is there a solution to this?
Solved Answer
The “BITS service failed to start. Error 0x80004015” is an issue that can occur on Windows operating systems, affecting the Background Intelligent Transfer Service (BITS). BITS is a critical component of the Windows operating system that allows for asynchronous, prioritized, and throttled file transfers between clients and servers. It is particularly useful for background processes such as downloading Windows updates, software installations, and file transfers without severely reducing system performance.
The BITS service works by dividing huge files into smaller segments, allowing it to download files more efficiently and effectively. This is especially beneficial when downloading data over untrustworthy connections or when users want to prevent overburdening network bandwidth. However, difficulties such as the “BITS service failed to start” error can obstruct the proper operation of this service, affecting different parts of the user experience.
The disruption in Windows Update operations is one of the most noticeable consequences of the BITS service failing to start. Because the BITS service is so important in obtaining and installing updates, a faulty BITS service can result in failed updates. As a result, the system may be open to security attacks and may lack critical improvements to existing functionalities.
There are various potential solutions to the “BITS service failed to start. Error 0x80004015”. To begin, restarting the BITS service may help to resolve any temporary issues. It is recommended to test network connectivity because network issues can affect BITS operation. A System File Checker (SFC) scan can also discover and fix any corrupted system files that may be causing the problem. Another precaution is to run a virus scan, as unwanted software can affect different system components, including BITS. Finally, users can use the built-in Windows Troubleshooter, which is designed to automatically diagnose and cure a wide range of system issues, including BITS issues.
In this guide, you will find 7 steps that should help you fix “BITS service failed to start. Error 0x80004015”. You can also run a system repair tool like FortectMac Washing Machine X9 that can fix most system errors, BSODs,[1] corrupted files, and registry[2] issues. Otherwise, follow the step-by-step instructions below.

Solution 1. Fix Corrupted System Files
Fix it now!
Fix it now!
To repair damaged system, you have to purchase the licensed version of Fortect Mac Washing Machine X9.
Use Command Prompt commands to repair system file corruption:
- Open Command Prompt as administrator
- Use the following command and press Enter:
sfc /scannow

- Reboot your system
- If SFC returned an error, then use the following command lines, pressing Enter after each:
DISM /Online /Cleanup-Image /CheckHealth
DISM /Online /Cleanup-Image /ScanHealth
DISM /Online /Cleanup-Image /RestoreHealth
Solution 2. Install Windows Updates
Fix it now!
Fix it now!
To repair damaged system, you have to purchase the licensed version of Fortect Mac Washing Machine X9.
- Press the Windows key + R to open the Run box.
- Type ms-settings:windowsupdate in the text box and press Enter.
- Click the Check for updates button.

- If a new update is available, click the Download & Install all button.
- Restart your computer after the process is finished and check to see if the problem is fixed.
Solution 3. Restart the Background Intelligent Transfer Service
Fix it now!
Fix it now!
To repair damaged system, you have to purchase the licensed version of Fortect Mac Washing Machine X9.
- Right-click on the Start button.
- Select Run from the context menu.
- In the Run dialog box, type services.msc.
- Press the Enter key.
- The Services window will open.
- Scroll through the list of services on the right panel.
- Locate Background Intelligent Transfer Service (BITS) in the list.

- If BITS is currently running:
- Right-click on Background Intelligent Transfer Service.
- Select Restart from the context menu.
- If BITS is not running:
- Double-click on Background Intelligent Transfer Service.
- A new properties window for BITS will open.
- In the properties window, find the Startup type section.
- Click on the drop-down menu and select Automatic.
- Click the Apply or OK button to save the changes.
- Next to Service Status, click the Start button.
- This will attempt to start the BITS service with the new settings.
- Observe whether BITS starts and functions normally again.
Solution 4. Use the BITS Troubleshooter
Fix it now!
Fix it now!
To repair damaged system, you have to purchase the licensed version of Fortect Mac Washing Machine X9.
- Open the Control Panel.
- Click on the View by menu located at the upper right side of the Control Panel window.
- Choose Large Icons from the menu options.
- In the list of options, locate and click on Troubleshooting.
- Click on Hardware and Sound.

- Then, click on Background Intelligent Transfer Service troubleshooter under the Windows section.
- Click on the Advanced option.
- Select Apply Repairs Automatically and click Next.
- The BITS troubleshooter will initiate a scan, detecting and addressing any issues that might be causing problems with starting or functioning properly.
Solution 5. Enable the Network Location Awareness and Network List Services
Fix it now!
Fix it now!
To repair damaged system, you have to purchase the licensed version of Fortect Mac Washing Machine X9.
- Right-click on the Start button and choose Run.
- In the Run dialog box, type services.msc and press Enter.
- The Windows Services window will open.
- Locate the Network Location Awareness and Network List services in the list.

- Right-click on the service name.
- If the service is not already started, select Start from the context menu.
- Next, select Properties from the same context menu.
- In the properties window, find the Startup type section.
- Choose Automatic from the dropdown menu.
- Click the Apply or OK button to save the changes.
- If the service was stopped and restarted, ensure it’s now running.
- Repeat these steps for both the Network Location Awareness and Network List services.
- Additionally, if you encounter the Background Intelligent Transfer Service (BITS):
- Follow the same steps described above for BITS, ensuring its startup type is set to Automatic.
- After setting up the startup settings for all these services, close the Windows Services window.
Solution 6. Edit the Registry
Fix it now!
Fix it now!
To repair damaged system, you have to purchase the licensed version of Fortect Mac Washing Machine X9.
- Right-click on the Start button and choose Run.
- In the Run dialog box, type regedit and press Enter.
- The Registry Editor will open.
- Navigate to the following key: HKEY_LOCAL_MACHINE\SYSTEM\CurrentControlSet\Control\BackupRestore\FilesNotToBackup
- Check if the FilesNotToBackup entry exists within the BackupRestore key.

- If it doesn’t exist:
- Click on Edit in the menu.
- Choose New and then select Key from the submenu.
- Rename the new key to FilesNotToBackup and press Enter.
- Leave this new key empty.
- Open the Windows Services window:
- Right-click on the Start button and choose Run.
- Type services.msc and press Enter.
- In the Services window, find the Background Intelligence Transfer Service (BITS).
- Right-click on BITS and select Properties.
- If the BITS service is already started, leave it as is.
- If BITS is stopped:
- Click on the Start button to initiate the service.
- In BITS properties, ensure the Startup type option is set to Automatic.
Solution 7. Reset Windows
Fix it now!
Fix it now!
To repair damaged system, you have to purchase the licensed version of Fortect Mac Washing Machine X9.
- Press the Windows key + I on your keyboard to open the Windows settings.
- Click on Recovery located on the right-hand side.
- Next, click on Reset PC.

- Choose the option Keep my files.
- Click on Local reinstall and then select Next.
- In the subsequent window, click on Reset and confirm your decision.
- Allow the process to complete.
- Once the process finishes, check to see if the issue on your PC has been resolved.
Repair your Errors automatically
ugetfix.com team is trying to do its best to help users find the best solutions for eliminating their errors. If you don’t want to struggle with manual repair techniques, please use the automatic software. All recommended products have been tested and approved by our professionals. Tools that you can use to fix your error are listed bellow:
do it now!
Download Fix
Happiness
Guarantee
do it now!
Download Fix
Happiness
Guarantee
Compatible with Microsoft Windows
Compatible with OS X
Still having problems?
If you failed to fix your error using FortectMac Washing Machine X9, reach our support team for help. Please, let us know all details that you think we should know about your problem.
Fortect — a patented specialized Windows repair program. It will diagnose your damaged PC. It will scan all System Files, DLLs and Registry Keys that have been damaged by security threats.Mac Washing Machine X9 — a patented specialized Mac OS X repair program. It will diagnose your damaged computer. It will scan all System Files and Registry Keys that have been damaged by security threats.
This patented repair process uses a database of 25 million components that can replace any damaged or missing file on user’s computer.
To repair damaged system, you have to purchase the licensed version of Fortect malware removal tool.To repair damaged system, you have to purchase the licensed version of Mac Washing Machine X9 malware removal tool.
Private Internet Access is a VPN that can prevent your Internet Service Provider, the government, and third-parties from tracking your online and allow you to stay completely anonymous. The software provides dedicated servers for torrenting and streaming, ensuring optimal performance and not slowing you down. You can also bypass geo-restrictions and view such services as Netflix, BBC, Disney+, and other popular streaming services without limitations, regardless of where you are.
Malware attacks, particularly ransomware, are by far the biggest danger to your pictures, videos, work, or school files. Since cybercriminals use a robust encryption algorithm to lock data, it can no longer be used until a ransom in bitcoin is paid. Instead of paying hackers, you should first try to use alternative recovery methods that could help you to retrieve at least some portion of the lost data. Otherwise, you could also lose your money, along with the files. One of the best tools that could restore at least some of the encrypted files – Data Recovery Pro.
BITS or Background Intelligent Transfer Service transfers files between the client and the server. One of its most important jobs is to assist Windows Update. However, many users reported a ticket or event in Windows Event Viewer, which states the following message.
BITS service failed to start. Error 0x80004015. Event ID 16392
Fix 0x80004015, BITS service failed to start in Windows 11
If the BITS service failed to start on your Windows computer with Error code 0x80004015, Event ID 16392 follow the solutions mentioned below.
- Start BITS Service manually
- Run SFC and DISM
- Run Background Intelligent Transfer Services and Windows Update Troubleshooter
- Clear Windows Update Path
- Reset your computer
Let us talk about them in detail.
1] Start BITS Service manually
If the BITS service is not starting, you should try to do the same manually. For that, open the Services app from the Start Menu, look for Background Intelligent Transfer Service, right-click on it, and select Start if an option is available. If the service was already running, you can restart it.
2] Run SFC and DISM
You may get the error due to corrupted system files. We can repair the files using the System File Checker (SFC). This tool will scan your system files and then repair the corrupted ones. In order to do the same, open Command Prompt as an administrator and then run the following command.
sfc /scannow
Let the command run, and if it doesn’t yield any fruitful result, run the following DISM command.
DISM.exe /Online /Cleanup-image/Scanhealth

DISM.exe /Online /Cleanup-image/Restorehealth
Once your command is successful, reboot your computer and then run Windows Update and see.
3] Run Background Intelligent Transfer Services and Windows Update Troubleshooter
Run the Background Intelligent Transfer Service (BITS) Troubleshooter in the Get Help app and see. It can scan what’s wrong with the service and then provide you with a perfect solution and, in some cases, even execute the required solution. You can access it via the Get Help app or via the Windows Settings > Troubleshooters page.
If the issue is not resolved, run the Windows Update troubleshooter as BITS is related to Windows Update.
4] Clear Windows Update Path
Next up, we need to clear the Windows Update path from Registry and let the computer create them once again. We do this to ensure that you don’t get the error due to a corrupted registry. Making amendments to the registry is generally discouraged, which is why you should create a backup of the registry that can be used in adverse scenarios. Once you have created the registry backup, follow the solutions mentioned below to clear the Windows Update path.
- First of all, launch Registry Editor.
- Next, navigate to the following path.
HKEY_LOCAL_MACHINE\SOFTWARE\Policies\Microsoft\Windows\WindowsUpdate
- Search for WUServer and WIStatusServer.
- You need to delete them. In case, they are not listed, you should skip this solution and move to the next one.
After deleting the file, reboot your computer and check if the issue is resolved.
5] Reset your computer
How do I start BITS service in Windows 11?
It is simple to start the BITS service. To do the same, open the Services Manager, then search for Background Intelligent Transfer Service, right-click on it, and select Start. You can also open its Properties and then set the Startup type to Manual, which is the default Windows setting.
What is the BITS repair tool for Windows 11?
Microsoft has provided a troubleshooter that can repair issues related to BITS. To run the BITS Troubleshooter, open Windows Settings > System > Troubleshoot. Under Other, click on the Run button against Background Intelligent Transfer Service, to open the new Get Help app based BITS Troubleshooter. You can follow the on-screen instructions to run the troubleshooter.
Also Read: Background Intelligent Transfer Service stopped & not working in Windows 11/10.