С кодом ошибки 0x8007043c можно столкнуться во время обновления ОС Windows. Причинами для появления этой проблемы, как правило, выступает следующее:
- несовместимый с версией системы апдейт;
- вмешательство в процесс обновления стороннего антивируса;
- повреждение системных файлов Windows.
Ознакомившись поближе с неполадкой, давайте теперь попробуем от нее избавиться при помощи нескольких проверенных методов.

Метод №1 Запуск средства устранения неполадок (только Win 10)
Некоторые пользователи утверждают, что им удалось избавиться от ошибки 0x8007043c с помощью системного средства устранения неполадок Центра обновления. Верно, подобная вещица уже установлена в вашей ОС, так что загружать и устанавливать ничего не придется.
Чтобы воспользоваться этим средством, вам нужно выполнить следующее:
- нажмите на клавиатуре Windows+R;
- напишите в пустой строчке ms-settings:troubleshoot и нажмите Enter;
- кликните ЛКМ на пункт «Центр обновления Windows»;
- нажмите на кнопку «Запустить средство устранения неполадок», появившуюся ниже;
- следуйте инструкциям на экране.
Как только примените решение, предоставление средством решения неполадок, перезагрузите свой компьютер, после чего снова попытайтесь обновить систему.
Метод №2 Отключение антивируса
Антивирус предназначен для защиты компьютера от различных вирусных угроз. Тем не менее в некоторых случаях антивирус от сторонних разработчиков (не от Майкрософт) может мешать нормальной работе ОС Windows. Если у вас на ПК имеется какой-то сторонний антивирус, то мы настоятельно рекомендуем отключить него, а затем снова попытаться обновить Windows. Возможно, ошибка 0x8007043c возникала из-за чрезмерно заботливого антивируса.
Метод №3 Запуск DISM и SFC
Если ни один из вышеуказанных методов не помог вам, то можете попробовать использовать в своей системе средства DISM и SFC. Для этого вам необходимо проследовать этим шагам:
- нажмите Windows+R;
- пропишите значение cmd и нажмите Ctrl+Shift+Enter;
- напишите команду sfc /scannow и нажмите Enter;
- подождите окончания команды и перезагрузите компьютер;
- снова откройте Командную строку;
- напишите DISM /Online /Cleanup-Image /RestoreHealth и нажмите Enter;
- дождитесь окончания процедуры и еще раз перезагрузите компьютер.
Попытайтесь обновить свою Windows и посмотрите, возникнет ли ошибка 0x8007043c еще раз.
If you need help to fix this issue, you can follow our guide
by Matthew Adams
Matthew is a freelancer who has produced a variety of articles on various topics related to technology. His main focus is the Windows OS and all the things… read more
Updated on
- Windows Update errors can sometimes happen before, during, or after you perform an OS update.
- The article below will show you what you can do to fix Windows Update error 0x8007043c.
- For more articles covering similar topics, you can visit our Windows Update Errors Hub.
- If you need further assistance, you can also visit our Windows 10 Errors page.

Error 0x8007043c arises for some users when they try to install Windows updates. In one Microsoft forum post, a user said:
In trying to install the Windows 10 update, it takes forever; and then at the 99% level, I get a failed message with Error Code 0x8007043c.
There aren’t that many confirmed fixes for issues like This service cannot be started in safe mode 0x8007043c, Failed to connect to server error 0x8007043c, or other latest Windows 10 update issues. However, these are some of the potential fixes for error 0x8007043c that are worth a shot.
- How do I fix the Windows update error 0x8007043c?
- 1. Open the Windows Update troubleshooter
- 2.Run an antivirus scan
- 3. Scan system files
- 4. Turn off third-party antivirus utilities
How do I fix the Windows update error 0x8007043c?
1. Open the Windows Update troubleshooter
The Windows Update troubleshooter could resolve the issue if the OS is trying to install an update that isn’t compatible with the platform version.
- To launch that troubleshooter, open Windows 10’s search box by clicking Type here to search.
- Input troubleshoot in the Type here to search box.
- Click Troubleshoot settings to open Settings as in the image directly below.

- Select Windows Update there, and click the Run the troubleshooter option for it.

- Click Apply this Fix if the troubleshooter provides a resolution.


2.Run an antivirus scan
- An antivirus scan might help fix error 0x8007043c for some users. To initiate an antivirus scan, click the Settings button on the Start menu.

- Select Update & Security, and then click Windows Security on the left of Settings.
- Press the Open Windows Security button.

- Select Virus and threat protection on the left of the window.
- Press the Quick scan button.
- Alternatively, click Scan options and the Full scan option.
- Users with third-party antivirus software will need to initiate scans with those utilities.


Need a solid antivirus tool? Check out this article for the best ones on the market!
3. Scan system files
Corrupted system files can be another factor behind error 0x8007043c, which the System File Checker can repair.
- To initiate an SFC scan, enter the keyword cmd in Windows 10’s search utility.
- Right-click Command Prompt in the search utility and select Run as administrator.
- Before initiating the SFC scan, enter DISM /Online /Cleanup-Image /RestoreHealth in the Command Prompt.
- Then press the Enter keyboard key.
- Next, input sfc /scannow in the Command Prompt’s window.
- Press Return to initiate the scan.

- Press Return to initiate the scan.
- Please wait for the SFC scan to weave its magic. Restart Windows when it’s done.

4. Turn off third-party antivirus utilities
Third-party antivirus software might be blocking your Windows updates. To remedy that, right-click an antivirus icon in your system tray to open its context menu.
Then you can usually select some kind of disable option to turn off the antivirus utility with. If the antivirus utility happens to have a firewall component, like the one shown directly below, disable that as well.
Try updating Windows with the antivirus utility disabled. Some users might need to completely uninstall their antivirus software to stop them from blocking Windows updates.

The resolutions above are among the most likely fixes for Windows Update error x8007043c. However, they might not fix the issue for all users. Some users might need to refresh Windows with a repair install or the Reset this PC utility to fix error x8007043c.
If you know of any other method to fix this issue that we may have missed out on, let us know by leaving us a message in the comments section below.
![]()
Это будет очень раздражающая ситуация, если обновления Windows будут выдавать код ошибки. 0x8007043c. Эта ошибка обычно возникает, если какая-либо служба Windows, требуемая Центром обновления Windows, сталкивается с проблемами. Это может произойти, если вы попытаетесь запустить автономный установщик Центра обновления Windows в безопасном режиме или если вы также запустите Центр обновления Windows в обычном режиме. Если вы столкнулись с этой проблемой, ознакомьтесь с этой статьей, чтобы узнать об устранении неполадок.

У этой проблемы много возможных причин, но мы знаем, что эта ошибка существует уже более десяти лет, и ее не исправить. Наиболее вероятными причинами ошибки 0x8007043c являются чрезмерная защита стороннего производителя, повреждение системного файла или несовместимое обновление.
- Запустите средство устранения неполадок обновлений Windows.
- Проверьте состояние следующих служб Windows
- Используйте DISM для исправления поврежденных системных файлов Центра обновления Windows
- Установите Центр обновления Windows в состоянии чистой загрузки.
Последовательно попробуйте следующие решения, чтобы устранить проблему:
1]Запустите средство устранения неполадок обновлений Windows.
Средство устранения неполадок обновлений Windows – отличный инструмент для проверки исправлений обновлений Windows и связанных служб и исправления несовместимых обновлений. Процедура запуска средства устранения неполадок обновлений Windows следующая:
Нажмите на Начинать и перейти к Настройки> Обновления и безопасность> Устранение неполадок.
Выберите Средство устранения неполадок обновлений Windows из списка и запустите его.
После завершения процесса перезагрузите систему.
Вы также можете запустить онлайн-средство устранения неполадок Центра обновления Windows.
2]Проверьте состояние следующих служб Windows
Открыть Диспетчер служб Windows и убедитесь, что службы, связанные с Центром обновления Windows, такие как Центр обновления Windows, Центр обновления Windows Medic, Службы обновления Orchestrator и т. д., не отключены.
Конфигурация по умолчанию на автономном ПК с Windows 10 выглядит следующим образом:
- Служба обновления Windows – Вручную (запускается)
- Службы Windows Update Medic – Руководство
- Криптографические службы – автоматические
- Фоновая интеллектуальная служба передачи – вручную
- Установщик Windows – Вручную.
Это обеспечит доступность необходимых Сервисов.
3]Используйте DISM для исправления поврежденных системных файлов Центра обновления Windows.
Чтобы исправить поврежденные системные файлы Центра обновления Windows, введите следующую команду и нажмите Enter, чтобы запустить DISM:
DISM.exe /Online /Cleanup-image /Restorehealth
Обратите внимание, что здесь вам нужно набраться терпения, так как процесс может занять до нескольких минут.
Когда вы запускаете указанную выше команду, DISM заменит потенциально поврежденные или отсутствующие системные файлы исправными.
Однако если ваш Клиент Центра обновления Windows уже сломан, вам будет предложено использовать запущенную установку Windows в качестве источника восстановления или использовать параллельную папку Windows из общего сетевого ресурса в качестве источника файлов.
Вместо этого вам потребуется выполнить следующую команду:
DISM.exe /Online /Cleanup-Image /RestoreHealth /Source:C:RepairSourceWindows /LimitAccess
Здесь вам нужно заменить C: RepairSource Windows заполнитель с местоположением вашего источника ремонта.
После завершения процесса DISM создаст файл журнала в % windir% / Журналы / CBS / CBS.log и фиксируйте любые проблемы, которые инструмент обнаруживает или исправляет.
Закройте командную строку, а затем снова запустите Центр обновления Windows и убедитесь, что это помогло.
4]Установите Центр обновления Windows в состоянии чистой загрузки.
В случае, если стороннее программное обеспечение мешает процессу обновления Windows, что вызывает ошибку в обсуждении, вы можете попробовать установить обновления Windows после перезапуска системы в чистом состоянии загрузки. В этом состоянии все сторонние программы остаются отключенными при запуске.
Если это сработает, ваша проблема на время решена, а в будущем вы можете исследовать проблемную программу путем пробного запуска и удалить ее, если это не важно.
Если вышеупомянутые решения не работают, вам может потребоваться выполнить ремонтную или чистую установку в вашей системе. Скорее всего, многие пользователи в конечном итоге решили эту проблему после чистой установки.
Несколько пользователей Windows обращались к нам с вопросами после того, как не смогли установить обновление Windows. Большинство затронутых пользователей сообщают, что по прошествии длительного времени обновление в конечном итоге завершается сбоем на 99% с кодом ошибки. 0x8007043c. Несмотря на то, что проблема гораздо чаще встречается в Windows 7, нам удалось найти ту же проблему, что и в Windows 7, нам удалось найти некоторые вхождения в Windows 8.1 и Windows 10.

Что вызывает ошибку Центра обновления Windows 0x8007043c?
Мы исследовали эту конкретную проблему, просмотрев различные отчеты пользователей и опробовав различные стратегии восстановления, которые часто рекомендуют другие пользователи, оказавшиеся в аналогичной ситуации. Оказывается, возникновение этой проблемы может быть вызвано несколькими различными ситуациями. Вот краткий список потенциальных виновников, с которыми вы могли бы справиться:
- Несовместимое обновление Windows — Как оказалось, эта проблема также может возникать из-за обновления Windows, которое ваша ОС пытается установить, даже если оно несовместимо с вашей версией ОС. Если этот сценарий применим, вы сможете решить проблему, запустив средство устранения неполадок Центра обновления Windows.
- Сторонние AV-помехи — Как сообщали несколько различных затронутых пользователей, эта проблема также может возникать из-за чрезмерно защищающего стороннего антивирусного программного обеспечения, которое блокирует обмен данными между ПК и сервером WU из-за ложного срабатывания. В этом случае вы сможете решить проблему, отключив защиту в реальном времени или удалив сторонний пакет безопасности.
- Повреждение системного файла — Другой потенциальной причиной появления этого кода ошибки является повреждение системных файлов. В этом случае вы сможете решить проблему с помощью серии утилит (DISM и SFC), способных исправлять и заменять поврежденные экземпляры, которые нарушают работу компонента обновления.
- Сломанный компонент ОС — В редких случаях вы можете столкнуться с этой проблемой из-за основного экземпляра повреждения, который не может быть решен обычным способом. В этом случае вы можете решить проблему, обновив каждый компонент ОС с помощью такой процедуры, как ремонтная установка или чистая установка.
Если вы столкнулись с той же проблемой и один из описанных выше сценариев кажется подходящим, эта статья предоставит вам несколько шагов по устранению неполадок, которые позволят вам разобраться в сути проблемы. Ниже вы найдете набор потенциальных исправлений, которые другие пользователи в аналогичной ситуации успешно использовали для устранения кода ошибки. 0x8007043c.
Если вы хотите оставаться максимально эффективным, мы советуем вам следовать инструкциям в том же порядке, в котором мы их расположили (эффективность и серьезность). В конце концов, вы должны найти исправление, которое решит проблему независимо от причины, вызвавшей проблему.
Давайте начнем!
Метод 1. Запуск средства устранения неполадок Центра обновления Windows (только для Windows 10)
Согласно нескольким различным отчетам пользователей, эта конкретная проблема вполне может возникнуть из-за плохого обновления Windows, которое ваша ОС может пытаться установить, даже если оно несовместимо с версией вашей операционной системы.
Если этот сценарий применим, вам повезло, поскольку Microsoft уже выпустила исправление для этой проблемы. Чтобы воспользоваться этим, все, что вам нужно сделать, это запустить средство устранения неполадок Центра обновления Windows. Эта автоматизированная утилита автоматически позаботится о несовместимом драйвере, если определит, что сценарий уже охвачен одной из стратегий восстановления.
Нескольким пользователям Windows 10 удалось решить проблему 0x8007043c код ошибки, запустив Средство устранения неполадок Центра обновления Windows и применяя рекомендованную стратегию ремонта. Если вы не знали, Центр обновления Windows содержит набор стратегий восстановления, которые должны применяться автоматически при обнаружении уже устраненной проблемы.
Вот краткое руководство по запуску Средство устранения неполадок Центра обновления Windows:
-
Нажмите Клавиша Windows + R открыться Запустить чат. Затем введите « ms-settings: устранение неполадок » и нажмите Входить открыть Поиск проблемы вкладка Настройки приложение.

Image -
Как только вы окажетесь внутри Поиск проблемы вкладку, переместите курсор мыши в правую часть экрана и перейдите к Вставай и работай раздел. Как только вы попадете в это меню, нажмите Центр обновления Windows, затем нажмите Запустите средство устранения неполадок.
Image -
Запустите утилиту и дождитесь завершения первоначального сканирования. Этот начальный процесс чрезвычайно важен, поскольку он определит, применима ли какая-либо из стратегий ремонта, включая утилиты, к проблеме, с которой вы имеете дело.
Image -
Если подходящая стратегия ремонта определена, вам будет представлено окно, в котором вы можете нажать на Применить это исправление применить подходящую стратегию ремонта.
Image Примечание: Имейте в виду, что в зависимости от типа исправления вам может потребоваться выполнить некоторые дополнительные действия, чтобы применить стратегии исправления.
- После успешного применения исправления перезагрузите компьютер и посмотрите, будет ли проблема решена при следующем запуске компьютера.


Если вы все еще сталкиваетесь с 0x8007043c ошибка при попытке установить обновление Windows, перейдите к следующему способу ниже.
Метод 2: Устранение стороннего вмешательства (если применимо)
Другая вероятная причина, которая может вызвать 0x8007043c error — это чрезмерно защищающее антивирусное программное обеспечение стороннего производителя, которое в конечном итоге блокирует внешнюю связь между вашим компьютером и серверами Windows Update. Обычно это происходит из-за ложного срабатывания — ваш AV-пакет считает, что интернет-сеть была взломана.
AVAST, McAfee, Comodo и Sophos являются наиболее вероятными сторонними виновниками, которые могут вызвать проблемы (но могут быть и другие, которых мы не смогли идентифицировать).
Если вы используете сторонний пакет AV и подозреваете, что эта проблема может быть применима, вы сможете решить ее, отключив защиту в реальном времени или полностью удалив пакет и вернувшись к программе безопасности по умолчанию (Windows Защитник).
Конечно, процедура отключения защиты в реальном времени будет различаться в зависимости от того, какой AV-пакет вы активно используете, но в большинстве случаев вы сможете сделать это прямо из меню панели задач.

После отключения защиты в реальном времени попробуйте установить Центр обновления Windows, который ранее не работал, и посмотрите, решена ли проблема. Если та же проблема все еще возникает, это не означает автоматически, что проблема не в вашем антивирусном ПО.
Имейте в виду, что некоторые сторонние антивирусные пакеты включают компонент межсетевого экрана, даже если это не очевидно для конечного пользователя. В большинстве случаев этот механизм безопасности останется в силе, даже если вы отключите защиту в реальном времени. Из-за этого вы можете убедиться, что ваш сторонний пакет не вызывает проблемы, только полностью удалив его и убедившись, что вы не оставляете какие-либо оставшиеся файлы, которые все еще могут вызывать 0x8007043c ошибка.
Если вы решили пойти по этому пути, следуйте инструкциям в этой статье (здесь), чтобы полностью удалить AV-пакет и убедиться, что никакие остаточные файлы не вызывают проблемы.
Если вы уже сделали это без каких-либо улучшений или этот метод неприменим к вашему сценарию, перейдите к следующему методу ниже.
Метод 3: запуск сканирования DISM и SFC
Если описанные выше методы не позволили решить проблему или были неприменимы, давайте выясним, не вызвана ли проблема каким-либо типом повреждения системных файлов. Как сообщили несколько разных пользователей Windows, эта проблема может быть вызвана повреждением некоторых системных файлов, влияющих на важные файлы операционной системы.
Если этот сценарий применим, вы сможете решить проблему, запустив две встроенные утилиты, способные работать с экземплярами коррупции: DISM (обслуживание образов развертывания и управление ими) а также SFC (проверка системных файлов)
SFC лучше исправляет логические ошибки, в то время как DISM гораздо больше ориентирован на восстановление системных зависимостей, которые, скорее всего, сломаются. Из-за этого мы настоятельно рекомендуем вам запустить обе утилиты, чтобы максимизировать ваши шансы исправить поврежденные экземпляры, которые могут вызывать 0x8007043c ошибка.
Вот краткое руководство по запуску сканирований SFC и DISM из командной строки с повышенными привилегиями:
-
Откройте диалоговое окно запуска, нажав Клавиша Windows + R. Затем введите ‘Cmd’ внутри текстового поля и нажмите Ctrl + Shift + Enter открыть возвышенный CMD Подсказка. Если вы видите UAC (запрос учетной записи пользователя) нажмите Да, чтобы предоставить доступ администратора к окну CMD.
Image -
Когда вам удастся попасть в командную строку CMD с повышенными привилегиями, введите следующую команду и нажмите Enter, чтобы начать сканирование SFC:
sfc / scannow
Примечание: SFC использует локально кэшированную копию для замены поврежденных файлов работоспособными копиями. Чтобы не допустить, чтобы ваша система подвергалась другим логическим ошибкам, не прерывайте работу утилит до завершения операции.
- После завершения процедуры перезагрузите компьютер и дождитесь завершения следующей последовательности запуска. В этом случае выполните шаг 1 еще раз, чтобы открыть другую командную строку с повышенными привилегиями.
-
После того, как вам удастся вернуться в окно CMD с повышенными правами, введите следующую команду и нажмите Входить для запуска сканирования DISM:
DISM / Онлайн / Очистка-Образ / RestoreHealth
Примечание: DISM будет активно использовать компонент Центра обновления Windows для загрузки исправных копий для замены поврежденных экземпляров. Из-за этого вам необходимо убедиться, что ваше интернет-соединение стабильно.
- После выполнения инструкции перезагрузите компьютер и посмотрите, будет ли проблема решена при следующей загрузке.

Если вы следовали этому методу и все еще сталкиваетесь с тем же 0x8007043c ошибка, перейдите к следующему способу ниже.
Метод 4: Обновление каждого компонента ОС
Если вы выполнили все возможные исправления, указанные выше, и вам по-прежнему не удается установить обновление Windows, вы, вероятно, боретесь с каким-либо типом повреждения, которое не может быть устранено обычным способом. Один из способов решения этой проблемы — сбросить все компоненты Windows, которые могут быть ответственны за проблему (включая процессы, связанные с загрузкой).
Это можно сделать двумя способами: чистая установка или же ремонт установить.
чистая установка — это самое быстрое и удобное решение без каких-либо предварительных условий, но его серьезным недостатком является значительная потеря данных, если вы не сделаете резервную копию своих достижений. Все ваши файлы (изображения, музыка, видео), приложения, игры и пользовательские настройки будут потеряны, если вы сначала не воспользуетесь утилитой резервного копирования.
ремонт установить (ремонт на месте) — более утомительное решение, требующее наличия установочного носителя. Но главное преимущество в том, что будут сброшены только компоненты Windows. Это означает, что вам будет разрешено сохранить свои данные, приложения, игры и даже некоторые пользовательские настройки.
Так что, если вы ищете что-то быстрое, что решит проблему, и у вас нет важных данных, которые вы могли бы потерять, выберите чистую установку. С другой стороны, если вы хотите сохранить все свои данные и хотите, чтобы что-то было сосредоточено исключительно на компонентах Windows, перейдите на ремонтную установку.
What is 0x8007043c Error Code?
Have you ever come across 0x8007043c error message pop up on your PC? If yes, then you should know that this error message is generated when any corresponding process or operation cannot be completed successfully by the application.
This is a critical Windows OS Error message that should be fixed immediately.
Solution
 Error Causes
 Error Causes
The 0x8007043c error code is usually triggered by the following reasons:
- Missing or corrupt registry files
- Failure to update Windows Installer
- Viruses and Spyware
Common signs of this error code are pop-up messages, program lock-ups, problems with opening documents, and screen freeze.
Further Information and Manual Repair
As soon as you experience this error on your PC, it is advisable to repair it immediately because this error poses high-security risks. Malwares and viruses are notorious for data theft.
To fix the 0x8007043c error on your PC, you don’t need to take on the services of an IT professional. This error code is rated as easy to repair.
By following the instruction and repair solutions given below, you can easily fix this Window error 0x8007043c in a couple of minutes by yourself.
Here’s what you need to do:
Step 1: Scan for Viruses and Spyware
To stop hackers from sneaking into your PC and stealing your confidential data, you must first scan your computer for viruses and spyware on your PC. It is advisable to use a powerful antivirus to ensure your computer is totally virus and spyware clean.
Step 2: Download and Install a Registry Cleaner
After you scan for viruses, you should now download and install a registry cleaner. This is needed because an antivirus does not detect corrupt registry entries. To detect such entries, the registry cleaner tool is the best. After you download a registry cleaner on your system, click the scan button.
You will have to wait for a few seconds for the scanning to finish. Once the scanning is complete, click on the ‘Repair’ button to fix the errors.
After fixing all the errors, restart your computer. This is important because the registry changes will only come into effect after the system restarts.
By following these 2 simple steps, you can easily resolve the 0x8007043c error on your system. However, to prevent this error from occurring again, it is recommended to run the antivirus every time you use your PC.
Do You Need Help with Your Device?
Our Team of Experts May Help

Troubleshoot.Tech Experts are There for You!
GET HELP
Troubleshoot.Tech experts work with all versions of Microsoft Windows including Windows 11, with Android, Mac, and more.
Share this article:
You might also like
Booting up your Windows 10 computer does not always go smoothly as it is a complex process and you may encounter some issues along the way. There are various files that get loaded and executed while the Windows 10 operating system is loaded. You might encounter a page that displays the following error message:
“Operating System Loader has no signature. Incompatible with SecureBoot. All bootable devices failed Secure Boot verification.”
There are two main causes for this error – it could be that your computer is using a bad unauthentic Boot Image File or the Windows operating system is installed in the BIOS Mode. To fix this error, you can try performing a “cold” boot or reset the BIOS or reset your Windows 10 computer.
Option 1 – Try to perform a Cold Boot
To perform a cold boot, all you have to do is press and hold the power button of your CPU until it goes off. Once it’s off, boot your computer normally and then check if the problem is now fixed.
Option 2 – Try resetting the BIOS
If performing a cold boot did nothing to fix the problem, you can try to reset the BIOS instead.
- Start your computer and tap the F10 key during the booting process to enter the BIOS. If it does not work, you can try tapping the F1 or F2 key as well as the Del key.
- Once you’re already in the BIOS, tap the F9 key to get the prompt to RestoreLoad default configuration now for the BIOS.
- Next, click on Yes and then follow the next on-screen instructions that appear to set the BIOS back to its default settings.
- Once you’re done restoring the default settings of the BIOS, restart your computer and then check if it now boots properly.
Option 3 – Try to change the Boot Sequence
You could also try to change the Boot Sequence to fix the error. To change the Boot Sequence, follow these steps:
- Open Windows Settings and then go to Update & Security > Recovery Advanced Startup and then click on Restart Now.
- Once your computer has restarted, you should see the Advanced Options.
- Next, select Troubleshoot > Advanced Options. This will offer another set of options and from there, select the UEFI Firmware Settings and it will let your restart your computer.
- After the restart, it will take you to the Firmware settings and from there, switch to the Boot tab where you’ll see the “Boot Priority” which contains the list of the connected hard drive, CD/DVD, ROM, and USB drive.
- Use the arrow keys on your keyboard to change the boot sequence.
- Once you’re done, save and exit.
Option 4 – Reset your computer
- Tap the Win key or click on the Start button located in the Taskbar.
- Then click on the Power button at the bottom right portion of the screen.
- Next, press and hold the Shift key on your keyboard and then click on Restart. This will restart your Pc into the Advanced Startup options.
Note: Once you have access to the Advanced Startup options, you have to go to the setting which allows you to Reset your Windows 10 PC. All you have to do is select Troubleshoot > Reset this PC to reach the following screen
- Afterward, select either the “Keep my files” option and then proceed to the next on-screen instructions that follow to reset your Windows 10 computer without losing your files.
Read More
 BigTech platforms Google and Facebook were hit with a series of antitrust lawsuits by the US federal government and states on charges they are operating monopolies and abusing their power.
Below is the status of the cases, as well as government probes of Apple and Amazon in their current states
Two lawsuits against Facebook
In a defeat, Judge James Boasberg said the Federal Trade Commission, which had sued Facebook in December asking that Facebook be forced to sell WhatsApp and Instagram, failed to show that Facebook had monopoly power in the social-networking market, among other problems. However, the FTC could file a new complaint by July 29.
He threw out a related state lawsuit entirely, saying that the attorney’s general had waited too long. They are looking at their options.
Four lawsuits against Google
The US Justice Department sued Google in October, accusing the $1 trillion company of illegally using its market muscle to hobble rivals. A trial date was set for September 12, 2023.
A lawsuit by 38 US states and territories accuses Google of abusing its market power to try to make its search engine as dominant inside cars, TVs, and speakers as it is in phones. This was consolidated with the federal lawsuit for purposes of discovery.
Texas, backed by other states, filed a separate lawsuit against Google, accusing it of breaking antitrust law in how it runs its online advertising business.
Dozens of state attorneys general sued Google on July 7, alleging that it bought off competitors and used restrictive contracts to unlawfully maintain a monopoly for its app store on Android phones.
Justice Department investigates Apple
This probe, revealed in June 2019, appears to focus on Apple’s app store. Some app developers have accused Apple of introducing new products very similar to existing apps created by other developers and sold in the Apple Store, and then trying to banish the older apps from the store because they compete with Apple’s new product. Apple says it seeks to have only the highest-quality apps in the app store.
Justice Department probing Facebook and Amazon
In July 2019, the Justice Department said it was expanding its Big Tech probes to include «search, social media, and some retail services online», an apparent reference to Facebook and Amazon.
Federal Trade Commission on Amazon
In its investigation of Amazon, the FTC is likely looking at the inherent conflict of interest of Amazon competing with small sellers on its marketplace platform, including allegations that it used information from sellers on its platform to decide what products it would introduce.
Read More
If you are trying to run or starting a program on your Windows 10 computer and you suddenly get an error message saying, “Error 1061 The service cannot accept control messages at this time”, read on as this post will show you what you can do to fix the problem.
This kind of error pops up since the Application Information Service does not respond to the requests to raise applications to Administrator in Windows 10 like the Task Manager, Service updates, and so on. Thus, you won’t be able to run or open apps and will only get stuck with this error.
The “Error 1061 The service cannot accept control messages at this time” message is a type of network error that typically occurs when there is a temporary mismatch between the requested control and the state of the service to be controlled. It’s most likely that the service is in a state of start-pending, stop-pending, stopped or it may already be used by another user which explains why this error message suddenly appears.
You can encounter this error message on any Windows operation. Here are some of the most common occurrences:
- Debugging a Windows service
- Starting Task Manager
- Starting Registry Editor
- Starting Firewall
- Starting services.msc
- Starting dsm.exe
- Updating services
- Asking for file permissions, etc.
According to Microsoft MSDN, the error occurs because:
“There is a temporary mismatch between the requested control and the state of the service to be controlled. The service may be in a state of start-pending, stop-pending, or stopped. Wait a few minutes, then retry your operation.”
If after a few minutes, the error still appears, then you may have to follow the options prepared below.
Option 1 – Try to restart the Credential Manager Service
- Go to the Start menu.
- Then type in “services” in the search box.
- From the search results, right-click on “Services” and select the “Run as Administrator” option.
- Next, look for the Credential Manager Service in the Services window.
- Once you found it, double-click on it to open its Properties. From there, you need to click on the Stop button.
- After that, set the Credential Manager Service to “Automatic” and click on the Start button to restart it.
Option 2 – Try to start the Application Information Service
You can also try starting the Application Information Service to fix the “Error 1061 The service cannot accept control messages at this time”. Just open the Windows Services Manager and make sure that Application Information Service is Started. And if you find that it’s already started, you need to restart it.
Option 3 – Try killing the IIS Worker Process via Task Manager
- Tap the Ctrl + Alt + Del keys and select the Task Manager.
- Next, click on More details to expand the Task Manager and then look for the IIS Worker Process entry which should be displayed in the list under the Processes tab. From there, you can see it in the Background processes. Once you find it, kill its process.
- You can also try to look for the “w3wp.exe” entries and end its process. if you find many entries, right-click on some of them and select the End task option from the context menu.
- Now restart your PC. That should fix the problem.
Read More
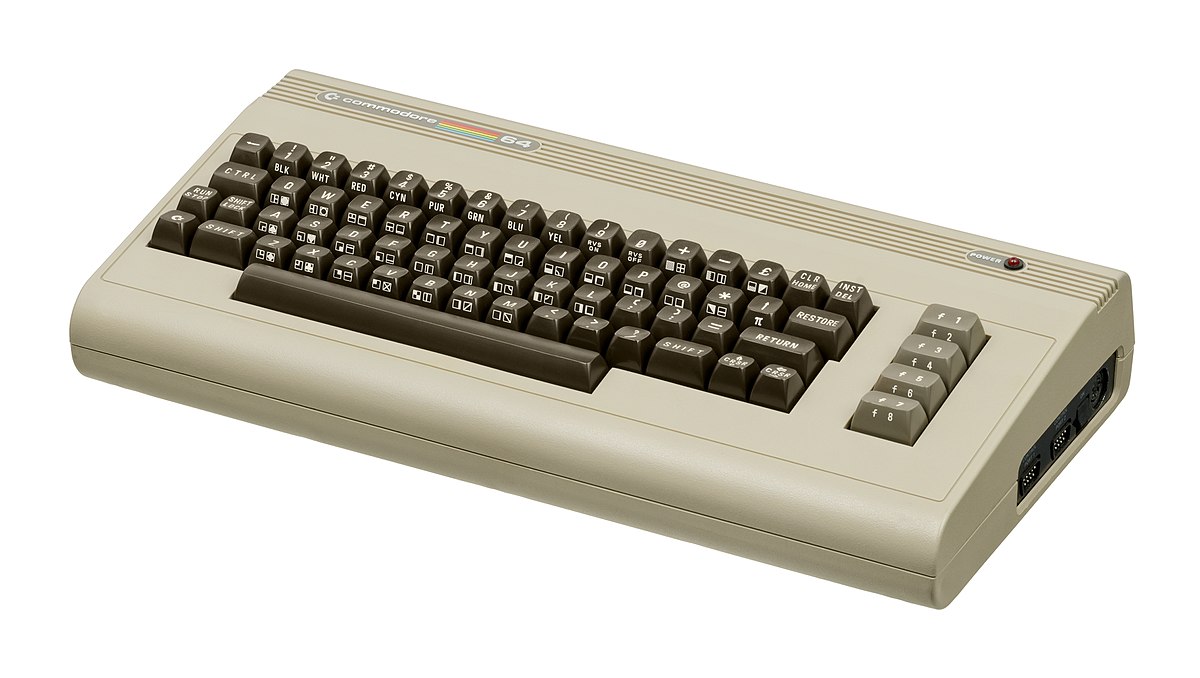
If you are a kid or in your teenage years you maybe will be not familiar with Commodore 64 but we are welcoming you anyway to go with us on this journey through time and find out about one of the most influential and beloved home computer of all time.
 History of Commodore
 History of Commodore
Firstly shown to the world in January of 1982, at the Consumer Electronics Show, C64 caught attention right away with its low price of only $595. Although it had some issues like limited functionality in some fields and a non-wide range of use by 1984 its price dropped below $200 and it cemented itself as an affordable home computer for the middle class.
In as same year Apple has released their Apple II computer with far superior capabilities, commodore 64 remains a middle-class favorite due to its price.
Also, the company has decided to distribute its homemade computer via some other means including not only just electronics stores specialized in that kind of equipment but in general shops and big department stores, through toy stores and book shops as well as through specialized dealers. This has given C64 a more competitive edge and mixed with the affordable price it soon became a staple of home computing.
 With sales booming and the early reliability issues with the hardware addressed, software for the C64 began to grow in size and ambition during 1984. This growth shifted to the primary focus of most US game developers. The two holdouts were Sierra, who largely skipped over the C64 in favor of Apple and PC compatible machines, and Broderbund, who was heavily invested in educational software and developed primarily around the Apple II. In the North American market, the disk format had become nearly universal while cassette and cartridge-based software all but disappeared. So most US-developed games by this point grew large enough to require multi-loading.
At a mid-1984 conference of game developers and experts at Origins Game Fair, Dan Bunten, Sid Meier, and a representative of Avalon Hill said that they were developing games for the C64 first as the most promising market. By 1985, games were an estimated 60 to 70% of Commodore 64 software. Over 35% of SSI’s 1986 sales were for the C64, ten points higher than for the Apple II.
Everything was great for Commodore but the industry was moving forward and by the year 1988, PC compatible computers were stated to be the largest and fastest-growing home entertainment systems pushing C64 on to second place. Also, Nintendo’s gaming system has started to take hold in the world with amazing 7 million systems sold in 1988 only.
By the year 1991, many developers exited the gaming market for Commodore 64 home computer system and its popularity started to fall due to lack of software and not so many hardware changes.
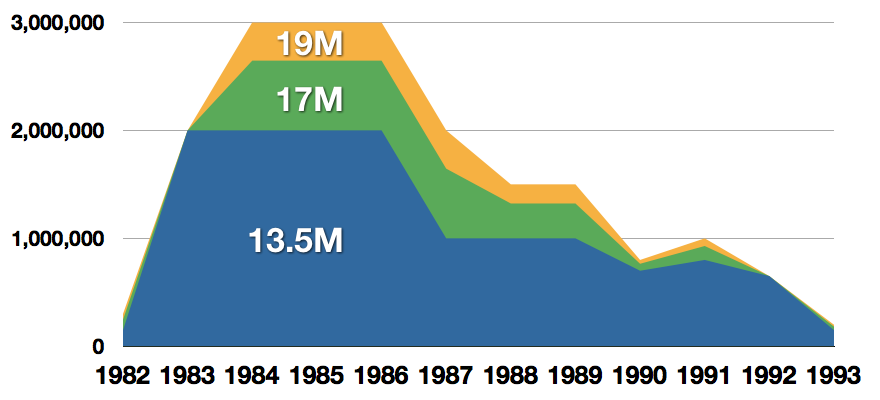 Commodore announced that the C64 would be finally discontinued in 1995.
However, only one month later in April 1994, the company filed for bankruptcy. When Commodore went bankrupt, all production on their inventory, including the C64, was discontinued, thus ending the C64’s 11 and a half year production.
Legendary titles
The history of Commodore 64 is interesting ones and I believe that it has done much for computers in general, yes it ran 11 years and that seems like a small-time, but remember that it was 11 years of C64 alone, there were other computers released by the company but none except arguably AMIGA 500 has not reached that much popularity as Commodore 64.
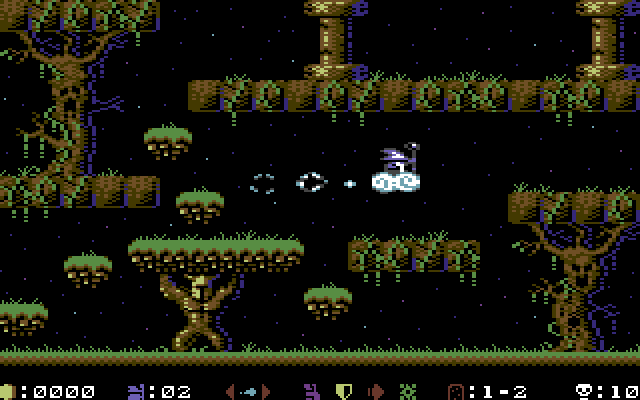
That being said the system has left some of the great titles in its catalog that are great to be played even today and have been classic games on other platforms, even on PC itself. That being said I am giving you the top 100 games for Commodore 64:
 Zak McKracken and the Alien Mindbenders
- Pirates!
- Maniac Mansion
- IK+
- Bubble Booble
- Turrican II: The Final Fight
- Last Ninja 2
- Space Rogue
- Ultima IV: Quest of the Avatar
- Archon: The Light and the Dark
- Turrican
- Wasteland
- Defender of the Crown
- Elite
- Ultima V: Warriors of Destiny
- Laser Squad
- Prince of Persia
- Impossible Mission
- U.L.E.
- Pool of Radiance
- Bruce Lee
- Paradroid
- Project Stealth Fighter
- Curse of the Azure Bonds
- Ultima III: Exodus
- Legacy of the Ancients
- Winter Games
- Leaderboard Golf
- Supremacy
- Airborne Ranger
- Exile
- Last Ninja, The
- World Class Leader Board
- MicroProse Soccer
- Project Firestart
- Boulder Dash
- Summer Games 2
- Great Giana Sisters, The
- Neuromancer
- Mad Doctor
- Mail Order Monsters
- Zork I: The Great Underground Empire
- Buck Rogers: Countdown to Doomsday
- Katakis
- Bard’s Tale, The: Tales of the Unknown
- WIzball
- Times of Lore
- Emlyn Hughes International Soccer
- Ultimate Wizard
- Alternate Reality: The Dungeon
- World Games
- Leaderboard Executive
- California Games
- Samurai Warrior: The Battles of Usagi Yojimbo
- Summer Games
- Creatures 2: Torture Trouble
- Gunship
- Space Taxi
- International Karate
- Silent Service
- Bard’s Tale III, The: Thief of Fate
- Seven Cities of Gold
- Armalyte
- Raid on Bungeling Bay
- Alter Ego: Male Version
- Enforcer: Fullmetal Megablaster
- Detective Game, The
- Creatures
- Skate or Die!
- Heart of Africa
- E.R.O. — Helicopter Emergency Rescue Operation
- Way of the Exploding Fist, The
- Stunt Car Racer
- Wizard of Wor
- Bard’s Tale II, The: The Destiny Knight
- Mayhem in Monsterland
- Train, The: Escape to Normandy
- Jumpman
- Champions of Krynn
- Pitstop II
- Barry McGuigan World Championship Boxing
- Montezuma’s Revenge
- Boulder Dash II: Rockford’s Revenge
- Spy vs Spy
- Mercenary: Escape from Targ
- Midnight Resistance
- Lords of Midnight
- Lode Runner
- Castles of Doctor Creep, The
- Boulder Dash Construction Kit
- Buggy Boy
- Racing Destruction Set
- Dino Eggs
- Realm of Impossibility
- Rainbow Islands
- Beach-Head II: The Dictator Strikes Back
- Barbarian: The Ultimate Warrior
- Grand Prix Circuit
- Head Over Heels
- Sentinel, The
 Zak McKracken and the Alien Mindbenders
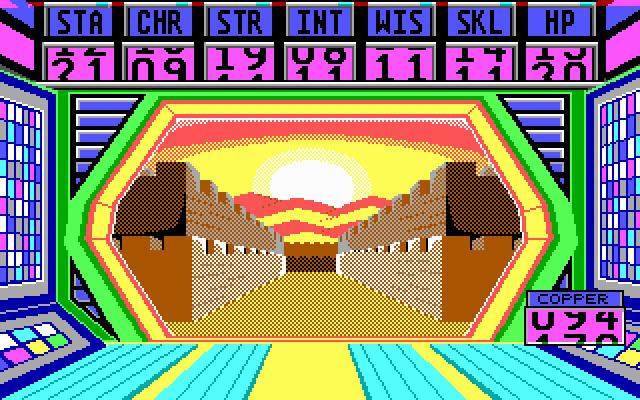
Commodore 64 emulator and game ROMs
Commodore 64 might be in the past but its legacy still lives on even today through emulators and ROMs for emulators. You can even purchase one in working condition if you want and relive the full experience as it once was.
 If you are not keen on spending money for reliving and checking games or software of C64 here are some links to help you to at least experience part of it completely free.
Commodore 64 Emulator
C64 Game ROMs
Conclusion
It is without a doubt that the C64 home system has made a great mark on home computers echoing even today and I am very grateful that I have been part of it as a kid. Sometimes today I will still spin some old classic via emulator just for nostalgia and enjoy its simplicity.
Thank you for reading the article and I hope to see you soon again.
Read More
According to some reports, using RDP or Remote Desktop Protocol on recent versions of Windows 10 results in a black screen. One encounters this issue is when using the Remote Desktop Connection feature on Windows 10. The real causes of this black screen are either the display drivers or some misconfiguration with the Remote Desktop Connection utility.
In most cases, the Remote Desktop in Windows 10 will display a black screen and then disconnects afterward. To fix this kind of issue on your Remote Desktop, there are two suggestions you need to check out. First, you can try to disable the persistent bitmap caching, and then you can also try to update your display driver. Follow the given options below for more troubleshooting instructions.
Option 1 – Try to disable Persistent Bitmap caching
The first thing you can do to resolve the black screen issue with the remote desktop is to disable the persistent bitmap caching. All you have to do is follow these steps:
- First, open the Remote Desktop Connection client.
- Next, click on the Show Options button to configure the Remote Desktop Connection.
- After that, go to the Experience tab and uncheck the Persistent bitmap caching option.
- Once done, you should now be able to connect to the remote computer without the black screen.
Option 2 – Try to update or rollback the Graphics driver
You can try to update your Graphics card driver using the Device Manager in your computer to resolve the blank dialog boxes problem or you can also go directly to the website of your graphics card manufacturers like NVIDIA, Intel, or AMD and go to the section called Drivers then check if there’s a new available update – if there is, download and install it.
To update your Graphics driver via Device Manager, refer to these steps:
- First, boot your computer into Safe Mode.
- After that, tap the Win + R keys to launch Run.
- Type in devmgmt.msc into the box and tap Enter or click OK to open the Device Manager.
- After that, a list of device drivers will be displayed. From there, look for the Display Adapters and click on them.
- After that, right-click on each entry under the Display Adapters and select the “Uninstall Device” option from the menu.
- Now restart your computer.
- After restarting your computer, go to the Settings app and Check for Updates in the Windows Update section.
Note: If updating the Graphics driver didn’t fix the problem, you can also try to roll back to its previous version and see if that helps or you could also try to roll back, update or reinstall the Network Adapter drivers.
Option 3 – Try performing a System Restore
You might also want to perform a System Restore that might help you in fixing the error. You can do this option either by booting into Safe Mode or in System Restore. If you are already in the Advanced Startup Options, just directly select System Restore and proceed with the next steps. And if you have just booted your PC into Safe Mode, refer to the steps below.
- Tap the Win + R keys to open the Run dialog box.
- After that, type in “sysdm.cpl” in the field and tap Enter.
- Next, go to the System Protection tab then click the System Restore button. This will open a new window where you have to select your preferred System Restore point.
- After that, follow the on-screen instructions to finish the process and then restart your computer and check if the problem is fixed or not.
Read More
Booting Windows 10 in safe mode can solve many issues with your computer since Windows will boot just in its basic core and you can safely maintain it, find a solution for issues, etc.
Before, entering safe mode was easy and pretty straightforward, during Windows evolution, entering safe mode was somewhat complicated and not being made so directly like once it was but do not worry. Starting Windows in safe mode today is even maybe easier than it was before, it is just not so obvious as it once was.
In this article, we will go through several ways how you can boot up Windows in safe mode in order to solve whatever issue is troubling you.
-
Start safe mode from settings
Open Settings by pressing the ⊞ WINDOWS + I or by just clicking on the Start button and clicking Settings.
Go to Update & Security, then Recovery.
In Advanced startup, click Restart now.
Once your PC reboots, click Troubleshoot, then Advanced options. Select Startup Settings then Restart. -
Go to safe screen from Sign-in screen
Click the Shift on your keyboard while clicking on the Power button on the bottom right corner of the screen.
Once your PC restarts, click on Troubleshoot, then Advanced options.
Select Startup Settings then Restart.
After the reboot, select 4 or the F4 on your keyboard to run in Safe Mode. If you choose to use Safe Mode with Networking, select 5 or F5. -
Start Windows recovery Environment
Go to the Windows Recovery Environment by doing the following steps:
Press on the power button to turn off your device.
Press on the button again to turn it on.
Once Windows starts, press the power button again for 10 seconds to turn it off. Then press it on again.
Upon the reboot, hold on to the power button for 10 seconds to turn it off, then turn it on again.
Because you’ve repeatedly turned on and off your PC, you will be redirected to Windows Recovery Environment.
On the pop-up window, click on Troubleshoot, then Advanced options. Select Startup Settings, then Restart.
After the reboot, select 4 or the F4 on your keyboard to run in Safe Mode. If you choose to use Safe Mode with Networking, select 5 or F5. -
Hold SHIFT while pressing RESTART on the start menu
On the Windows 10 sign-in screen, hold on the SHIFT on your keyboard.
While pressing on the key, click on the Power button, then choose Restart on the pop-up menu.
Once your PC restarts, click on Troubleshoot, then Advanced options.
Select Startup Settings then Restart.
After the reboot, select 4 or the F4 on your keyboard to run in Safe Mode. If you choose to use Safe Mode with Networking, select 5 or F5 -
Boot from installation media and choose it in the command prompt
Create a Windows 10 bootable installation media on any external storage media.
Once you do this step, wait for the installation to load.
Select your preferred language and click on Next.
Click on Repair your computer at the bottom left of the menu.
Click on Troubleshoot, then Advanced options.
Select Command Prompt — Use the Command Prompt for advanced troubleshooting options.
Type in the following command on the prompt: bcdedit /set {default} safeboot minimal
Hit Enter and wait for it to tell you that «The operation completed successfully».
Exit Command Prompt and click on Continue. -
Use system configuration tool
In the Search bar, type in msconfig.
Select the Boot tab and under the Boot options, put a check beside Safe boot.
Click OK.
Reboot PC -
Press SHIFT + F8
Press SHIFT + F8 when turning on Windows.
This redirects you to Advanced Boot Options Window, then choose to run Windows on Safe Mode
There you have it, 7 different ways to enter safe mode in Windows 10, we hope that any of these tips proved helpful and that you managed to enter the safe mode and fix your Windows issues.
Read More
NoteHomepage (by MyWay) is a browser extension that may be bundled with other free software that you download off of the Internet, or delivered via other advertising means. When installed NoteHomepage will set the homepage and search engine for your web browser to http://search.myway.com.
While installing this extension will gather information from your browsing sessions, including website visits, clicked links, and sometimes even private information, that it later sends back to display unwanted ads into your browser.
Several anti-virus scanners have marked this extension as a Browser Hijacker and are therefore not recommended to keep on your computer. It is considered potentially unwanted, and many users wish to remove it, so it is flagged for optional deletion.
About Browser Hijackers
Browser hijacking is a form of unwanted software program, usually a web browser add-on or extension, which then causes modifications in the web browser’s settings. Browser hijacker malware is developed for many different reasons. Generally, browser hijacking is utilized for earning advertising revenue from forced advert mouse clicks and site visits. Even though it might seem harmless, these tools are designed by malicious individuals who always look to take full advantage of you, so that they can earn money from your naivety and distraction. Some browser hijackers are programmed to make certain modifications beyond the browsers, like altering entries on the system registry and letting other malware further damage your machine.
Find out how to identify a browser hijack
Below are some signs and symptoms that suggest your browser has been hijacked: the home page of your browser is changed unexpectedly; your browser is constantly being redirected to adult websites; the default search engine is changed; you are getting browser toolbars you have never noticed before; never-ending pop-up advertisements show up and/or your web browser popup blocker is disabled; your web browser gets sluggish, buggy, crashes regularly; Inability to navigate to certain websites, particularly anti-malware and also other security software websites.
So how exactly does a browser hijacker infect a computer?
Browser hijackers might use drive-by downloads or file-sharing networks or an e-mail attachment in order to reach a targeted PC. They could also come from add-on programs, also called browser helper objects (BHO), web browser plug-ins, or toolbars. Browser hijackers sneak into your computer in addition to free software application downloads also that you unknowingly install alongside the original. A good example of some infamous browser hijackers includes Babylon, Anyprotect, Conduit, SweetPage, DefaultTab, Delta Search, and RocketTab, however, the names are regularly changing.
Browser hijackers will affect the user’s web surfing experience severely, track the websites frequented by users and steal personal information, cause difficulty in connecting to the web, and eventually create stability problems, causing software programs and systems to crash.
Learn how to remove browser hijackers
Some hijackers can be removed by just uninstalling the corresponding freeware or add-ons through the Add or Remove Programs in the Windows control panel. But, many browser hijackers are difficult to get rid of manually. No matter how much you try to get rid of it, it might keep returning again and again. Additionally, manual removals demand in-depth system knowledge and thus can be a very difficult job for novices.
Industry experts always suggest users remove any malicious software including browser hijacker with an automatic malware removal tool, which is easier, safer, and quicker than the manual removal method. Employ a PC optimizer along with your anti-malware software to solve various registry issues, remove computer vulnerabilities, and boost your computer performance.
Download the software in Safe Mode with Networking
If the malware is set to run immediately when Windows starts, stepping into safe mode may block the attempt. Just minimal required applications and services are loaded whenever you start your laptop or computer in Safe Mode. To launch your Windows XP, Vista, or 7 PCs in Safe Mode with Networking, follow the instructions below.
1) At power on, hit the F8 key before the Windows splash screen begins to load. This would invoke the “Advanced Boot Options” menu.
2) Select Safe Mode with Networking with arrow keys and press ENTER.
3) As soon as this mode loads, you should have an internet connection. Now, get the malware removal software you want by utilizing the web browser. To install the program, follow the directions in the installation wizard.
4) Immediately after installation, run a full scan and let the software remove the threats it discovers.
Switch over to an alternate browser
Some viruses may target vulnerabilities of a particular web browser that obstruct the downloading process. If you’re not able to download the anti-virus software program using Internet Explorer, this means malware is targeting IE’s vulnerabilities. Here, you need to switch to a different internet browser such as Firefox or Chrome to download the antivirus program.
Run anti-virus from a pen drive
To successfully get rid of the malware, you have to approach the problem of installing anti-malware software on the affected computer system from a different perspective. Adopt these measures to run the anti-virus on the affected computer system.
1) Download the anti-malware software on a virus-free computer.
2) Plug the USB drive into the clean computer.
3) Double click on the downloaded file to open the installation wizard.
4) Select flash drive as the location when the wizard asks you exactly where you wish to install the application. Follow the on-screen instructions to finish the installation process.
5) Remove the flash drive. Now you can utilize this portable anti-malware on the affected computer.
6) Double-click the anti-malware software EXE file on the USB drive.
7) Press the “Scan” button to run a full computer scan and remove viruses automatically.
Technical Details and Manual Removal (Advanced Users)
To eliminate NoteHomepage manually, navigate to the Add or Remove programs list in the Windows Control Panel and select the program you want to get rid of. For web browser plug-ins, go to your web browser’s Addon/Extension manager and choose the add-on you want to disable or remove. You might also want to reset your home page and search providers, as well as clear your web browser cache and cookies.
Finally, check your hard disk for all of the following and clean your Windows registry manually to remove leftover application entries after uninstalls. Please be aware that this is for professional users only and could be challenging, with incorrect file removal resulting in additional PC errors. In addition to that, certain malware is capable of replicating or preventing deletion. You’re advised to do this procedure in Windows Safe Mode.
Files:
C:\Users\%USERNAME%\AppData\Local\Google\Chrome\User Data\Default\Extensions\lamecoaceiheggdhlnjnmciaonfdamlg.600.11.14900_0
C:\Users\%USERNAME%\AppData\Local\Google\Chrome\User Data\Default\Local Extension Settings\lamecoaceiheggdhlnjnmciaonfdamlg
C:\Users\%USERNAME%\AppData\Local\Google\Chrome\User Data\Default\Sync Extension Settings\lamecoaceiheggdhlnjnmciaonfdamlg
C:\Users\%USERNAME%\AppData\Local\NoteHomepageTooltab
C:\Users\%USERNAME%\AppData\Roaming\Mozilla\Firefox\Profiles\profile\extensions\[email protected]
C:\Users\%USERNAME%\AppData\Roaming\Mozilla\Firefox\Profiles\profile\extensions\[email protected]\chrome
C:\Users\%USERNAME%\AppData\Roaming\Mozilla\Firefox\Profiles\profile\extensions\[email protected]\META-INF
C:\Users\%USERNAME%\AppData\Roaming\Mozilla\Firefox\Profiles\profile\notehomepage_j
Registry:
HKLM\SOFTWARE\Classes\AppID\NoteHomepage Toolbar.exe
HKEY_LOCAL_MACHINE\SOFTWARE\Microsoft\Internet Explorer\Extensions
HKEY_LOCAL_MACHINE\Software\Microsoft\Windows\CurrentVersion\Explorer\Browser Helper Objects
HKEY_LOCAL_MACHINE\Software\Microsoft\Internet Explorer\Toolbar
HKEY_LOCAL_MACHINE\SOFTWARE\Google\Chrome\Extensions
HKEY_LOCAL_MACHINE\SOFTWARE\Mozilla\Firefox\Extensions
HKEY_CURRENT_USER\Software\Opera Software\Explorer\Main\Start Page Redirect=http://random.com
HKEY_LOCAL_MACHINE\SOFTWARE\Microsoft\Windows NT\CurrentVersion\NoteHomepage
HKEY_CURRENT_USER\Software\Microsoft\Windows NT\CurrentVersion\Winlogon Shell = %AppData%\IDP.ARES.Generic.exe
HKEY_CURRENT_USER\Software\Microsoft\Windows\CurrentVersion\Run Random
HKEY_LOCAL_MACHINE\Software\Microsoft\Windows NT\CurrentVersion\Random.
HKEY_CURRENT_USER\Software\Microsoft\Internet Explorer\Main
HKEY_CURRENT_USER\Software\Microsoft\Windows\CurrentVersion\Uninstall\NoteHomepageTooltab Uninstall Internet Explorer
HKEY_CURRENT_USER\Software\NoteHomepage
Read More
If you encounter Windows Update error 0x80092004 while trying to update your Windows 10 computer, then this post is for you. This kind of Windows Update error could be due to many reasons but none of them includes your hardware or installed driver software. Microsoft releases updates that are either not supposed to go out, or you install them when you click on the Check for Update button which can install updates that have not finished testing yet. As a result, you may encounter the Windows Update error 0x80092004
To resolve the Windows Update error 0x80092004, here are some fixes you can try.
Option 1 – Try removing recent updates and packages
When a Windows Update fails, it mostly rolls back and cleans up all its residues. However, there are times when it doesn’t and you can clean that package manually. To remove recent updates and packages, you can go to the Update History and find out what KB updates were installed and once you’ve figured it out, you can execute the DISM tool to remove it manually.
- Tap the Win + X keys and click on the “Command Prompt (Admin)” option.
- After that, execute the “Dism /online /Get-Packages”. This will give you a list of packages that were recently installed.
- Now run the Remove Package program to remove the concerned update and package.
dism.exe /online /remove-package /packagename:Package_for_RollupFix_Wrapper~31bf3856ad364e35~amd64~~16299.248.1.17 /packagename:Package_for_RollupFix~31bf3856ad364e35~amd64~~16299.125.1.6 /packagename:Package_for_RollupFix_Wrapper~31bf3856ad364e35~amd64~~16299.192.1.9 /packagename:Package_for_RollupFix~31bf3856ad364e35~amd64~~16299.192.1.9 /norestart
- Now restart your computer and log back in.
- After that, run the following command:
Dism.exe /online /Cleanup-Image /StartComponentCleanup
- Then scan for updates.
Note: Keep in mind that the remove package command is made for AMD 64-bit machines specifically.
Option 2 – Try deleting the files from the SoftwareDistribution folder and resetting the Catroot2 folder
The downloaded Windows Updates are placed in a folder called “SoftwareDistribution”. The files downloaded in this folder are automatically deleted once the installation is completed. However, if the files are not clean up or if the installation is still pending, you can delete all the files in this folder after you pause the Windows Update service. For complete instructions, refer to the steps below.
- Open the WinX Menu.
- From there, open Command Prompt as admin.
- Then type in the following command – don’t forget to hit Enter right after typing each one of them.
net stop wuauserv
net start cryptSvc
net start bits
net start msiserver
- After entering these commands, it will stop the Windows Update Service, Background Intelligent Transfer Service (BITS), Cryptographic, and the MSI Installer
- Next, go to the C:/Windows/SoftwareDistribution folder and get rid of all the folders and files thereby tapping the Ctrl + A keys to select them all and then click on Delete. Note that if the files are in use, you won’t be able to delete them.
After resetting the SoftwareDistribution folder, you need to reset the Catroot2 folder to restart the services you just stopped. To do that, follow these steps:
- Type each one of the following commands.
net start wuauserv
net start cryptSvc
net start bits
net start msiserver
- After that, exit Command Prompt and restart your computer.
Option 3 – Try to run the Windows Update Troubleshooter
Running the built-in Windows Update troubleshooter could also help you resolve the “We couldn’t install some updates because the PC was turned off” error. To run it, go to Settings and then select Troubleshoot from the options. From there, click on Windows Update and then click the “Run the troubleshooter” button. After that, follow the next on-screen instructions and you should be good to go.
Option 4 – Try to manually install the Windows Updates
Windows Update Error 0x80092004 might be due to a Windows Update that has failed. So if it is not a feature update and only a cumulative update, you can download the Windows Update and install it manually. But first, you need to find out which update has failed, and to do so, refer to the following steps:
- Go to Settings and from there go to Update and Security > View Update History.
- Next, check which particular update has failed. Note that Updates that have failed to install will be displayed under the Status column which has a label of “Failed”.
- After that, go to the Microsoft Download Center and look for that update using its KB number and once you find it, download and then install it manually.
Note: You can also use the Microsoft Update Catalog, a service from Microsoft that provides a list of software updates that can be distributed over a corporate network. With the help of this service, it can be easier for you to find Microsoft software updates, drivers as well as fixes.
Read More
As you know, the Office Language Packs need to be installed right after installing Office. It also has to be on the correct version of Office so if any of these conditions are not met, you will most likely get error codes 30053-4 or 30053-39 when you install a language pack in Microsoft Office. If you are currently facing this error, read on as this post will help you fix the problem. Here’s the full context of the error message:
“Something went wrong, Sorry, installation cannot continue because no compatible office products are detected.”
When you have to work on two different languages, that’s where the language packs come in handy. You might have to work on one language but when it comes to proofreading or help, you need another language. Note that some language accessory packs offer partial localization which is why some parts of the Office might show the default language.
If you are using Office 365 or Office 2019, 2016, 2013, or 2010, you need to go to the language accessory pack page from office.com and select your language. Once you see the download link, click on it to start downloading the pack. It includes the display in the chosen language, proofing tools for the selected language, as well as the Help in the selected language. Once the installation is complete, follow each one of the given options below to configure the language accessory pack properly.
Option 1 – Select Editing and Proofing language
- You need to open any Office program and navigate to File > Options > Language.
- From there, you need to make sure that the language you want to use is in the list under the Choose Editing Languages section.
- After that, you can add or remove the language that Office uses for editing and proofing tools.
Option 2 – Configure the Display and Help languages
In this option, you can change the default display and help languages for all the Office applications so whatever you choose will be used for all the buttons, menus, and support of all the programs. After you select the language, restart all the Office applications to apply the changes made successfully.
On the other hand, if you are using Office volume license versions, note that only an administrator account can install this if you are using the Volume License version of Microsoft Office 2016. You have to download the ISO image of the language packs, language interface packs, and the proofing tools from the VLSC or Volume Licensing Service Center. This process can be quite complicated so you might have to go to the docs.microsoft.com page to be guided accordingly. After you installed everything correctly, the error code 30053-4 or 30053-39 should now be fixed.
Read More
If the display of your Windows 10 computer turns on all of a sudden no matter how put it to sleep over and over again, it always wakes up, read on as this post will guide you in resolving this peculiar issue.
In case you don’t know, the Windows 10 computer Sleep state is made in such a way that if it’s really important, it wakes up. You may have configured this kind of behavior or there could be some hardware component that’s interrupting its Sleep state. Thus, this post will give you some troubleshooting tips to fix the Sleep state issue caused by the Legacy Kernel Caller. The Legacy Kernel Caller points to the external hardware that’s causing your Windows 10 to wake up even when it’s in a Sleep state.
Step 1: Find out what’s keeping your computer from going to sleep.
To figure out what really is keeping your computer from going to sleep, you can execute the “powercfg –requests” command instead of checking the power configuration of your computer. This command will look for requests from applications and drivers that prevent the computer from turning off the display or from going to sleep.
To execute the command, simply open Command Prompt and type “powercfg –requests” and hit Enter. After that, you will see part of the result that looks like this:
“SYSTEM
[DRIVER] USB AUDIO DEVICE
An audio stream is currently in use
[DRIVER] Legacy Kernel Caller.”
Step 2: The next thing you have to do is remove all the external hardware connected to your computer.
In this step, you have to disconnect external hardware from your computer. Based on reports from users who experienced the same issue, the “TV card” is the culprit so make sure you remove that one. Once you’ve removed it, open Command Prompt and run the “powercfg –requests” command again and you’ll see that the “Legacy Kernel Caller” will no longer be on the list. In addition, your computer will get into its regular sleep mode once the hardware is removed. Once you do that, the driver gets hung and won’t release the power request despite being used.
Step 3: Try using the request override option
The powercfg command also offers a request override option which allows users to disable the requests from applications and services to wake the computer from sleep mode. To run this command, simply open Command Prompt with admin privileges. After you open Command Prompt, type the following command and hit Enter to disable requests from applications and services that causes the computer to wake from sleep state.
Powercfg -requestsoverride Driver «Legacy Kernel Caller» System
Step 4: Check the streaming and media applications
You also have to check if your computer is running an audio or video service in the background. In such cases, your computer won’t be able to go to sleep mode if these services are running in the background. You might have noticed that when you play a video or audio, your computer never goes to sleep. And if you have put it to sleep in between watching the video, then it’s probably why your computer is waking up. Thus, you have to stop these services.
Step 5: Check the devices that can wake your computer
If you didn’t see the Legacy Kernel Caller in the result after you execute the ”powercfg –requests” command, then you can try to execute the following command instead.
powercfg –devicequery wake_armed
After you enter this command, it will give you a list of all the devices that can wake your computer. So if there is anything other than the mouse, keyboard, touchpad, you have to check the power configuration of that device. To do that, go to the Device Manager and disable the device’s “Allow this device to wake the computer” option in its Properties
Step 6: Check the Sleep Advanced Settings
- Click on the Windows key and type “control panel” in the field and select the related search result.
- Next, select the Security and Maintenance option and click on the Power Options.
- After that, you have to select the Change Plan Settings but keep in mind that this option is barely readable so you need to read each option carefully.
- Now click on the Change advanced power settings button and a new window will appear.
- Then look for the “Sleep” option and expand it. Make sure that the “Allow hybrid sleep” option is on.
- Reboot your computer and check if your computer now functions properly. If it still didn’t work, you may have to reverse the changes you’ve made.
On the other hand, you could also run the Power Troubleshooter to resolve the Sleep state issue. This built-in troubleshooter will automatically fix any power-related issues in your computer.
Read More
![]()
Copyright © 2023, ErrorTools. All Rights Reserved
Trademark: Microsoft Windows logos are registered trademarks of Microsoft. Disclaimer: ErrorTools.com is not affiliated with Microsoft, nor claims direct affiliation.
The information on this page is provided for information purposes only.
![]()