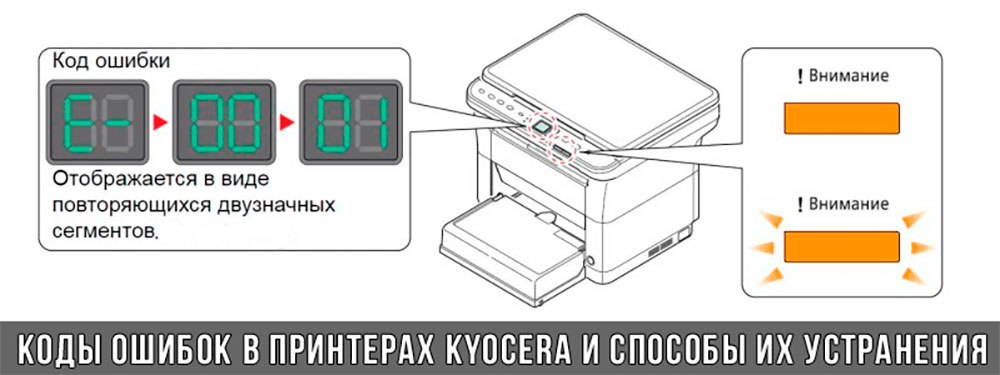
Все современные копировальные аппараты, мфу и принтеры Kyocera имеют возможность диагностировать все узлы устройства в режиме запуска и во время работы аппарата. По этому, если во время включения или во время работы произошел сбой, то техника Kyocera сможет сообщить о наличии ошибки.
В большинстве случаев у аппаратов Kyocera код ошибки отображается на дисплее, в остальных случаях тип ошибки зависит от последовательности и количества миганий индикаторов.
Если Ваш копировальный аппарат, МФУ или принтер Kyocera выдал на дисплее некий код, то узнать причину, описание возникновения ошибки, а так же в каком узле аппарата стоит искать проблему, Вы можете в этом разделе выбрав интересующую модель из списка.
Но диагностика не решит проблему сбоя аппарата, для этого лучше обратиться к профессиональным и опытным сервисным специалистам компании Kyomart! Позвоните нам по телефону
8 (343) 288-23-45 или отправьте запрос на электронную почту: sales@kyomart.ru , и мы обязательно свяжемся с Вами в кратчайшие сроки.
| Код ошибки | Описание ошибки | Причина ошибки |
|---|---|---|
| 0100 | Backup memory device error | Defective flash memory (U14). Defective control PWB. |
| 0110 | Backup memory data error | Defective flash memory (U14). Defective control PWB. |
| 0120 | MAC address data error | Defective control PWB. |
| 0150 | Control PWB EEPROM error Detecting control PWB EEPROM (U2001) communication error. |
Improper installation control PWB EEPROM (U2001). Defective control PWB. |
| 0170 | Billing counting error | Defective control PWB. |
| 0420 | Paper feeder communication error Communication error between control PWB and optional paper feeder. |
Improper installation paper feeder. Defective harness between control PWB (YC344) and paper feeder interface connector, or improper connector insertion. Defective control PWB. Defective harness between PF main PWB (YC5) and paper feeder interface connector, or improper connector insertion. Defective PF main PWB. |
| 0840 | Faults of RTC The time is judged to go back based on the comparison of the RTC time and the current time or five years or more have passed. |
The battery is disconnected from the control PWB. Defective control PWB. |
| 0970 | 12 V power down detect Power is disconnected during sleeping. |
Defective power source PWB. |
| 2000 | Main motor error The main motor ready input is not given for 2 s during the main motor is ON. |
Defective harness between main motor (CN1) and control PWB (YC331), or improper connector insertion. Defective drive transmission system of the main motor. Defective main motor. Defective control PWB. |
| 4000 | Polygon motor (laser scanner unit) error The polygon motor ready input is not given for 6 s during the polygon motor is ON. |
Defective harness between polygon motor and control PWB (YC9), or improper connector insertion. Defective laser scanner unit. Defective control PWB. |
| 4200 | BD error (laser scanner unit) error | Defective laser scanner unit. Defective control PWB. |
| 6000 | Broken fuser heater lamp wire The fuser temperature does not rise after the fuser heater lamp has been turned on. | Poor contact in the fuser thermistor connector terminals. Poor contact in the fuser heater lamp connector terminals. Fuser thermistor installed incorrectly. Fuser thermal cutout triggered. Fuser heater lamp installed incorrectly. Broken fuser heater lamp wire. |
| 6020 | Abnormally high fuser thermistor temperature Fuser thermistor detects abnormally temperature. When the temperature of a fuser thermistor detects 195 °C or more at the time of heater OFF and 155 °C or more. |
Shorted fuser thermistor. Defective control PWB. |
| 6030 | Broken fuser thermistor wire Input from fuser thermistor is 0 (A/D value). |
Poor contact in the fuser thermistor connector terminals. Broken fuser thermistor wire. Fuser thermistor installed incorrectly. Fuser thermal cutout triggered. Fuser heater installed incorrectly. Broken Fuser heater wire. |
| 6400 | Zero cross signal error The zero cross signal does not reach the control PWB for specified time. |
Defective harness between high voltage PWB (CN202) and control PWB (YC23), or improper connector insertion. Defective connection between power source PWB (YC103) and high voltage PWB (CN201). Defective power source PWB. Defective control PWB. |
| F000 | Control PWB — Operation panel PWB communication error | Defective harness between operation panel PWB (YC1) and control PWB (YC7), or improper connector insertion. motor is ON. Defective operation panel PWB. Defective control PWB. |
| F010 | Control PWB checksum error | Defective code ROM (flash memory). Defective control PWB. |
| F020 | Control PWB RAM checksum error | Defective main memory (RAM) on the control PWB. Defective expanded memory (DIMM). |
| F040 | Control PWB engine communication error A communication error is detected. |
Defective control PWB. |
| F050 | Control PWB engine checksum error | Some error may have occurred when downloading the firmware of the control PWB. Defective control PWB. |
- Code: 0100
- Description: Backup memory device error
- Causes: Defective flash memory (U14). Defective control PWB.
- Remedy: Defective flash memory (U14). Replace the control PWB.
Defective control PWB. Replace the control PWB.
- Code: 0110
- Description: Backup memory data error
- Causes: Defective flash memory (U14). Defective control PWB.
- Remedy: Defective flash memory (U14). Replace the control PWB.
Defective control PWB. Replace the control PWB.
- Code: 0120
- Description: MAC address data error
- Causes: Defective control PWB.
- Remedy: Defective control PWB. Replace the control PWB.
- Code: 0150
- Description: Control PWB EEPROM error
Detecting control PWB EEPROM (U2001) communication error. - Causes: Improper installation control PWB EEPROM (U2001). Defective control PWB.
- Remedy: Improper installation control PWB EEPROM (U2001). Check the installation of the EEPROM (U2001) and remedy if necessary.
Defective control PWB. Replace the control PWB.
- Code: 0170
- Description: Billing counting error
- Causes: Defective control PWB.
- Remedy: Defective control PWB. Replace the control PWB.
- Code: 0420
- Description: Paper feeder communication error
Communication error between control PWB and optional paper feeder. - Causes: Improper installation paper feeder. Defective harness between control PWB (YC344) and paper feeder interface connector, or improper connector insertion. Defective control PWB. Defective harness between PF main PWB (YC5) and paper feeder interface connector, or improper connector insertion. Defective PF main PWB.
- Remedy: Improper installation paper feeder. Follow installation instruction carefully again.
Defective harness between control PWB (YC344) and paper feeder interface connector, or improper connector insertion. Reinsert the connector. Also check for continuity within the connector harness. If none, remedy or replace the harness.
Defective control PWB. Replace the control PWB.
Defective harness between PF main PWB (YC5) and paper feeder interface connector, or improper connector insertion. Reinsert the connector. Also check for continuity within the connector harness. If none, remedy or replace the harness (Refer to the service manual for the paper feeder).
Defective PF main PWB. Replace the PF main PWB (Refer to the service manual for the paper feeder).
- Code: 0840
- Description: Faults of RTC
The time is judged to go back based on the comparison of the RTC time and the current time or five years or more have passed. - Causes: The battery is disconnected from the control PWB. Defective control PWB.
- Remedy: The battery is disconnected from the control PWB. Check visually and remedy if necessary
Defective control PWB. Replace the control PWB and check for correct operation.
- Code: 0970
- Description: 12 V power down detect
Power is disconnected during sleeping. - Causes: Defective power source PWB.
- Remedy: Defective power source PWB. Replace the power source PWB and check for correct operation.
- Code: 2000
- Description: Main motor error
The main motor ready input is not given for 2 s during the main motor is ON. - Causes: Defective harness between main motor (CN1) and control PWB (YC331), or improper connector insertion. Defective drive transmission system of the main motor. Defective main motor. Defective control PWB.
- Remedy: Defective harness between main motor (CN1) and control PWB (YC331), or improper connector insertion. Reinsert the connector. Also check for continuity within the connector harness. If none, remedy or replace the harness.
Defective drive transmission system of the main motor. Check if the rollers and gears rotate smoothly. If not, grease the bushings and gears. Check for broken gears and replace if any.
Defective main motor. Replace the main motor.
Defective control PWB. Replace the control PWB.
- Code: 4000
- Description: Polygon motor (laser scanner unit) error
The polygon motor ready input is not given for 6 s during the polygon motor is ON. - Causes: Defective harness between polygon motor and control PWB (YC9), or improper connector insertion. Defective laser scanner unit. Defective control PWB.
- Remedy: Defective harness between polygon motor and control PWB (YC9), or improper connector insertion. Reinsert the connector. Also check for continuity within the connector harness. If none, remedy or replace the harness.
Defective laser scanner unit. Replace the laser scanner unit.
Defective control PWB. Replace the control PWB.
- Code: 4200
- Description: BD error (laser scanner unit) error
- Causes: Defective laser scanner unit. Defective control PWB.
- Remedy: Defective laser scanner unit. Replace the laser scanner unit.
Defective control PWB. Replace the control PWB.
- Code: 6000
- Description: Broken fuser heater lamp wire The fuser temperature does not rise after the fuser heater lamp has been turned on.
- Causes: Poor contact in the fuser thermistor connector terminals. Poor contact in the fuser heater lamp connector terminals. Fuser thermistor installed incorrectly. Fuser thermal cutout triggered. Fuser heater lamp installed incorrectly. Broken fuser heater lamp wire.
- Remedy: Poor contact in the fuser thermistor connector terminals. Reinsert the connector.
Poor contact in the fuser heater lamp connector terminals. Reinsert the connector.
Fuser thermistor installed incorrectly. Replace the fuser unit.
Fuser thermal cutout triggered. Replace the fuser unit.
Fuser heater lamp installed incorrectly. Replace the fuser unit.
Broken fuser heater lamp wire. Replace the fuser unit.
- Code: 6020
- Description: Abnormally high fuser thermistor temperature
Fuser thermistor detects abnormally temperature. When the temperature of a fuser thermistor detects 195 °C or more at the time of heater OFF and 155 °C or more. - Causes: Shorted fuser thermistor. Defective control PWB.
- Remedy: Shorted fuser thermistor. Replace the fuser unit.
Defective control PWB. Replace the control PWB.
- Code: 6030
- Description: Broken fuser thermistor wire Input from fuser thermistor is 0 (A/D value).
- Causes: Poor contact in the fuser thermistor connector terminals. Broken fuser thermistor wire. Fuser thermistor installed incorrectly. Fuser thermal cutout triggered. Fuser heater lamp installed incorrectly. Broken fuser heater lamp wire.
- Remedy: Poor contact in the fuser thermistor connector terminals. Reinsert the connector.
Broken fuser thermistor wire. Replace the fuser unit.
Fuser thermistor installed incorrectly. Replace the fuser unit.
Fuser thermal cutout triggered. Replace the fuser unit.
Fuser heater lamp installed incorrectly. Replace the fuser unit.
Broken fuser heater lamp wire. Replace the fuser unit.
- Code: 6400
- Description: Zero cross signal error
The zero cross signal does not reach the control PWB for specified time. - Causes: Defective harness between high voltage PWB (CN202) and control PWB (YC337), or improper connector insertion. Defective harness between power source PWB (YC103) and high voltage PWB (CN202), or improper connector insertion. Defective power source PWB. Defective control PWB.
- Remedy: Defective harness between high voltage PWB (CN202) and control PWB (YC337), or improper connector insertion. Reinsert the connector. Also check for continuity within the connector harness. If none, remedy or replace the harness.
Defective harness between power source PWB (YC103) and high voltage PWB (CN202), or improper connector insertion. Reinsert the connector. Also check for continuity within the connector harness. If none, remedy or replace the harness.
Defective power source PWB. Replace the power source PWB.
Defective control PWB. Replace the control PWB.
- Code: F000
- Description: Control PWB — Operation panel PWB communication error
- Causes: Defective harness between operation panel PWB (YC1) and control PWB (YC7), or improper connector insertion. Defective operation panel PWB. Defective control PWB.
- Remedy: Defective harness between operation panel PWB (YC1) and control PWB (YC7), or improper connector insertion. Reinsert the connector. Also check for continuity within the connector harness. If none, remedy or replace the harness.
Defective operation panel PWB. Replace the operation panel PWB.
Defective control PWB. Replace the control PWB.
- Code: F010
- Description: Control PWB checksum error
- Causes: Defective code ROM (flash memory). Defective control PWB.
- Remedy: Defective code ROM (flash memory). Turn the power switch off/on to restart the printer. If the error is not resolved, replace the control PWB.
Defective control PWB. Replace the control PWB.
- Code: F020
- Description: Control PWB RAM checksum error
- Causes: Defective main memory (RAM) on the control PWB. Defective expanded memory (DIMM).
- Remedy: Defective main memory (RAM) on the control PWB. Turn the power switch off/on to restart the printer. If the error is not resolved, replace control PWB.
Defective expanded memory (DIMM). Replace the expanded memory (DIMM).
- Code: F040
- Description: Control PWB engine communication error
- Causes: Defective control PWB.
- Remedy: Defective control PWB. Turn the power switch off/on to restart the printer. If the error is not resolved, replace control PWB.
- Code: F050
- Description: Control PWB engine checksum error
- Causes: Some error may have occurred when downloading the firmware of the control PWB. Defective control PWB.
- Remedy: Some error may have occurred when downloading the firmware of the control PWB. Download the firmware of the control PWB again using the memory card (SD card).
Defective control PWB. Turn the power switch off/on to restart the printer. If the error is not resolved, replace control PWB.
Message
Add paper MP Tray
Call service
F###
Call service
###
#
:0123456
Canceling data
Cassette # not loaded
Close top cover
Device busy
Duplex disabled
Press GO
Error.Power off.
F###
Error.Power off.
F000
Install MK
Troubleshooting
The following table lists errors and maintenance messages that you can
be dealt with by yourself.
If Call service or Error.Power off. is displayed, turn off the
printer then turn it back on to see if the printer has recovered. If the
printer has not recovered, turn off the printer, disconnect the power cord,
and contact your service representative or authorized service center.
Some errors cause the alarm to sound. To stop the alarm, press
[Cancel].
Corrective Action
The paper has run out in the paper source displayed. Supply paper according to the
paper source displayed (paper cassettes, MP tray, or optional paper feeders).This
message is displayed alternately with messages indicating the printer status, such as,
Ready, Please wait, and Processing.
F### represents a controller error (#=0, 1, 2, …). Call for service representative. The
printer does not operate when this message is displayed.
#### represents a mechanical error (#=0, 1, 2, …). Call for service representative. The
printer does not operate when this message is displayed. The total number of pages
printed is also indicated, e.g. 0123456.
Displayed when data is being canceled.
The corresponding paper cassette is not installed. Install the cassette. The cassette
number can be 1 (topmost) to 4 (bottom).
The top cover of the printer is open. Close the printer top cover.
This message is displayed when Remove Device was selected while a USB flash
memory was being used.
The previous screen is displayed again 1 or 2 seconds.
You attempted to print with a paper size and paper type that cannot be used for duplex
printing. Press [GO] to print onto one-side of the paper only.
You can select an alternative paper size and type by pressing the or . You can also
press [MENU] and change the tray setting inside the menu, which will automatically
cancel the error and output resumes. At the same time [ATTENTION] indicator will light
up and [READY] indicator will start flashing.
Turn the power switch off and then back on again. If this message still remains, turn the
power switch off, and contact your service representative or authorized service center.
The printer controller and operation panel cannot exchange data. Turn the printer off
and unplug it from the mains power supply. Then contact your service representative or
authorized service center. See the back page of this manual for the relevant phone
numbers.
Replace Maintenance Kit which is displayed on the message display. Replacement of
the maintenance kit is necessary at every 100,000 pages of printing and requires
professional servicing. Contact your service technician.
6-5
Ошибки Kyocera ECOSYS M2030dn
Ошибки Kyocera ECOSYS M2030pn
Ошибки Kyocera ECOSYS M2035dn
Ошибки Kyocera ECOSYS M2040dn
Ошибки Kyocera ECOSYS M2135dn
Ошибки Kyocera ECOSYS M2530dn
Ошибки Kyocera ECOSYS M2535dn
Ошибки Kyocera ECOSYS M2540dn
Ошибки Kyocera ECOSYS M2540dw
Ошибки Kyocera ECOSYS M2635dn
Ошибки Kyocera ECOSYS M2635dw
Ошибки Kyocera ECOSYS M2640idw
Ошибки Kyocera ECOSYS M3040dn
Ошибки Kyocera ECOSYS M3040idn
Ошибки Kyocera ECOSYS M3145dn
Ошибки Kyocera ECOSYS M3145idn
Ошибки Kyocera ECOSYS M2735dw
Ошибки Kyocera ECOSYS M3540dn
Ошибки Kyocera ECOSYS M3540idn
Ошибки Kyocera ECOSYS M3550idn
Ошибки Kyocera ECOSYS M3560idn
Ошибки Kyocera ECOSYS M3645dn
Ошибки Kyocera ECOSYS M3645idn
Ошибки Kyocera ECOSYS M3655idn
Ошибки Kyocera ECOSYS M3660idn
Ошибки Kyocera ECOSYS M3860idn
Ошибки Kyocera ECOSYS M3860idn
Ошибки Kyocera ECOSYS M4125idn
Ошибки Kyocera ECOSYS M4132idn
Ошибки Kyocera ECOSYS M5521cdn
Ошибки Kyocera ECOSYS M5521cdw
Ошибки Kyocera ECOSYS M5526cdn
Ошибки Kyocera ECOSYS M5526cdw
Ошибки Kyocera ECOSYS M6026cdn
Ошибки Kyocera ECOSYS M6026cidn
Ошибки Kyocera ECOSYS M6030cdn
Ошибки Kyocera ECOSYS M6035cidn
Ошибки Kyocera ECOSYS M6230cidn
Ошибки Kyocera ECOSYS M6235cidn
Ошибки Kyocera ECOSYS M6526cdn
Ошибки Kyocera ECOSYS M6526cidn
Ошибки Kyocera ECOSYS M6530cdn
Ошибки Kyocera ECOSYS M6535cidn
Ошибки Kyocera ECOSYS M6630cidn
Ошибки Kyocera ECOSYS M6635cidn
Ошибки Kyocera ECOSYS M8124cidn
Ошибки Kyocera ECOSYS M8130cidn
Ошибки Kyocera ECOSYS P2035d
Ошибки Kyocera ECOSYS P2040dn
Ошибки Kyocera ECOSYS P2040dw
Ошибки Kyocera ECOSYS P2135d
Ошибки Kyocera ECOSYS P2135dn
Ошибки Kyocera ECOSYS P2235dn
Ошибки Kyocera ECOSYS P2235dw
Ошибки Kyocera ECOSYS P3045dn
Ошибки Kyocera ECOSYS P3050dn
Ошибки Kyocera ECOSYS P3055dn
Ошибки Kyocera ECOSYS P3060dn
Ошибки Kyocera ECOSYS P3145dn
Ошибки Kyocera ECOSYS P3150dn
Ошибки Kyocera ECOSYS P3155dn
Ошибки Kyocera ECOSYS P3160dn
Ошибки Kyocera ECOSYS P3260dn
Ошибки Kyocera ECOSYS P4035dn
Ошибки Kyocera ECOSYS P4040dn
Ошибки Kyocera ECOSYS P5021cdn
Ошибки Kyocera ECOSYS P5021cdw
Ошибки Kyocera ECOSYS P5026cdn
Ошибки Kyocera ECOSYS P5026cdw
Ошибки Kyocera ECOSYS P6021cdn
Ошибки Kyocera ECOSYS P6026cdn
Ошибки Kyocera ECOSYS P6030cdn
Ошибки Kyocera ECOSYS P6035cdn
Ошибки Kyocera ECOSYS P6130cdn
Ошибки Kyocera ECOSYS P6230cdn
Ошибки Kyocera ECOSYS P6235cdn
Ошибки Kyocera ECOSYS P7035cdn
Ошибки Kyocera ECOSYS P7040cdn
Ошибки Kyocera ECOSYS P7240cdn
Ошибки Kyocera ECOSYS P8060cdn
Ошибки Kyocera FS-C8600DN
Ошибки Kyocera FS-C8650DN
Ошибки Kyocera FS1016MFP
Ошибки Kyocera FS1018MFP
Ошибки Kyocera FS1020MFP
Ошибки Kyocera FS1024MFP
Ошибки Kyocera FS1025MFP
Ошибки Kyocera FS1028MFP
Ошибки Kyocera FS1030MFP
Ошибки Kyocera FS1035MFP
Ошибки Kyocera FS1040
Ошибки Kyocera FS1050
Ошибки Kyocera FS1060DN
Ошибки Kyocera FS1100
Ошибки Kyocera FS1110
Ошибки Kyocera FS1116MFP
Ошибки Kyocera FS1118MFP
Ошибки Kyocera FS1120
Ошибки Kyocera FS1120MFP
Ошибки Kyocera FS1124MFP
Ошибки Kyocera FS1125MFP
Ошибки Kyocera FS1128MFP
Ошибки Kyocera FS1130MFP
Ошибки Kyocera FS1135MFP
Ошибки Kyocera FS1200
Ошибки Kyocera FS1220MFP
Ошибки Kyocera FS1300D
Ошибки Kyocera FS1320D
Ошибки Kyocera FS1320MFP
Ошибки Kyocera FS1325MFP
Ошибки Kyocera FS1350DN
Ошибки Kyocera FS1370DN
Ошибки Kyocera FS1500
Ошибки Kyocera FS6020
Ошибки Kyocera FS6025MFP
Ошибки Kyocera FS6025MFPB
Ошибки Kyocera FS6030MFP
Ошибки Kyocera FS6500
Ошибки Kyocera FS6525MFP
Ошибки Kyocera FS6530MFP
Ошибки Kyocera FS6700
Ошибки Kyocera FS6900
Ошибки Kyocera FS6950DN
Ошибки Kyocera FS8000CD
Ошибки Kyocera FS8000CN
Ошибки Kyocera FS8100DN
Ошибки Kyocera TASKalfa 180
Ошибки Kyocera TASKalfa 1800
Ошибки Kyocera TASKalfa 1801
Ошибки Kyocera TASKalfa 181
Ошибки Kyocera TASKalfa 205c
Ошибки Kyocera TASKalfa 220
Ошибки Kyocera TASKalfa 2200
Ошибки Kyocera TASKalfa 2201
Ошибки Kyocera TASKalfa 221
Ошибки Kyocera TASKalfa 2420w
Ошибки Kyocera TASKalfa 2460ci
Ошибки Kyocera TASKalfa 2470ci
Ошибки Kyocera TASKalfa 250ci
Ошибки Kyocera TASKalfa 2510i
Ошибки Kyocera TASKalfa 2520i
Ошибки Kyocera TASKalfa 255
Ошибки Kyocera TASKalfa 2550ci
Ошибки Kyocera TASKalfa 2551ci
Ошибки Kyocera TASKalfa 2552ci
Ошибки Kyocera TASKalfa 2553ci
Ошибки Kyocera TASKalfa 255b
Ошибки Kyocera TASKalfa 255c
Ошибки Kyocera TASKalfa 265ci
Ошибки Kyocera TASKalfa 300ci
Ошибки Kyocera TASKalfa 300i
Ошибки Kyocera TASKalfa 3010i
Ошибки Kyocera TASKalfa 3011i
Ошибки Kyocera TASKalfa 305
Ошибки Kyocera TASKalfa 3050ci
Ошибки Kyocera TASKalfa 3051ci
Ошибки Kyocera TASKalfa 306ci
Ошибки Kyocera TASKalfa 307ci
Ошибки Kyocera TASKalfa 308ci
Ошибки Kyocera TASKalfa 3212i
Ошибки Kyocera TASKalfa 3252ci
Ошибки Kyocera TASKalfa 3253ci
Ошибки Kyocera TASKalfa 3500i
Ошибки Kyocera TASKalfa 3501i
Ошибки Kyocera TASKalfa 350ci
Ошибки Kyocera TASKalfa 3510i
Ошибки Kyocera TASKalfa 3511i
Ошибки Kyocera TASKalfa 3550ci
Ошибки Kyocera TASKalfa 3551ci
Ошибки Kyocera TASKalfa 3552ci
Ошибки Kyocera TASKalfa 3553ci
Ошибки Kyocera TASKalfa 356ci
Ошибки Kyocera TASKalfa 358ci
Ошибки Kyocera TASKalfa 4002i
Ошибки Kyocera TASKalfa 4003i
Ошибки Kyocera TASKalfa 400ci
Ошибки Kyocera TASKalfa 4012i
Ошибки Kyocera TASKalfa 4052ci
Ошибки Kyocera TASKalfa 4053ci
Ошибки Kyocera TASKalfa 406ci
Ошибки Kyocera TASKalfa 408ci
Ошибки Kyocera TASKalfa 420i
Ошибки Kyocera TASKalfa 4500i
Ошибки Kyocera TASKalfa 4501i
Ошибки Kyocera TASKalfa 4550ci
Ошибки Kyocera TASKalfa 4551ci
Ошибки Kyocera TASKalfa 4820w
Ошибки Kyocera TASKalfa 5002i
Ошибки Kyocera TASKalfa 5003i
Ошибки Kyocera TASKalfa 500ci
Ошибки Kyocera TASKalfa 5052ci
Ошибки Kyocera TASKalfa 5053ci
Ошибки Kyocera TASKalfa 508ci
Ошибки Kyocera TASKalfa 520i
Ошибки Kyocera TASKalfa 5500i
Ошибки Kyocera TASKalfa 5501i
Ошибки Kyocera TASKalfa 550c
Ошибки Kyocera TASKalfa 552ci
Ошибки Kyocera TASKalfa 5550ci
Ошибки Kyocera TASKalfa 5551ci
Ошибки Kyocera TASKalfa 6002i
Ошибки Kyocera TASKalfa 6003i
Ошибки Kyocera TASKalfa 6052ci
Ошибки Kyocera TASKalfa 6053ci
Ошибки Kyocera TASKalfa 620
Ошибки Kyocera TASKalfa 6500i
Ошибки Kyocera TASKalfa 6501i
Ошибки Kyocera TASKalfa 650c
Ошибки Kyocera TASKalfa 6550ci
Ошибки Kyocera TASKalfa 6551ci
Ошибки Kyocera TASKalfa 7002i
Ошибки Kyocera TASKalfa 7003i
Ошибки Kyocera TASKalfa 7052ci
Ошибки Kyocera TASKalfa 7353ci
Ошибки Kyocera TASKalfa 750c
Ошибки Kyocera TASKalfa 7550ci
Ошибки Kyocera TASKalfa 7551ci
Ошибки Kyocera TASKalfa 8000i
Ошибки Kyocera TASKalfa 8001i
Ошибки Kyocera TASKalfa 8002i
Ошибки Kyocera TASKalfa 8003i
Ошибки Kyocera TASKalfa 8052ci
Ошибки Kyocera TASKalfa 820
Ошибки Kyocera TASKalfa 8353ci
Ошибки Kyocera TASKalfa 9002i
Ошибки Kyocera TASKalfa 9003i
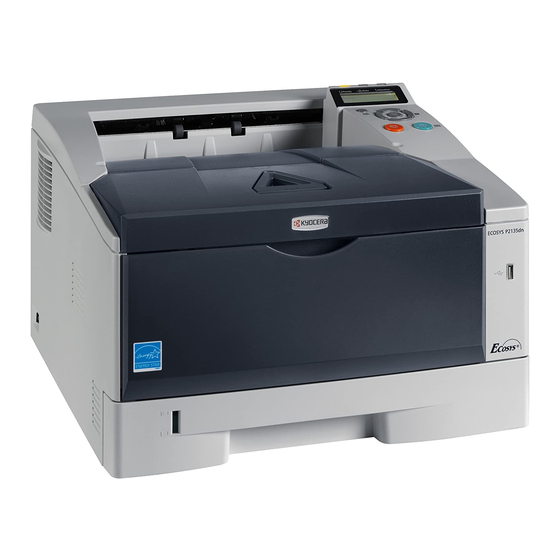
Японская компания Kyocera производит высококачественные лазерные принтеры и МФУ для офисной печати. Их продукция одна из самых востребованных на сегодняшний день. Ведь печатающие устройства Kyocera характеризуются высокой надежностью, износостойкостью и большим сроком эксплуатации. Однако даже их изделия не являются вечными. Со временем принтеры Kyocera начинают сбоить.
К счастью, оргтехника Kyocera оснащена системой самодиагностики (так же, как и струйные принтеры Canon). Поэтому, в случае возникновения проблемы, устройство самостоятельно выявит уязвимое место и сообщит Вам об этом миганием соответствующего индикатора на панели управления либо кодом ошибки, выведенным на дисплей принтера.
Если Вы не являетесь мастером по обслуживанию принтеров и МФУ Kyocera, то, чтобы понять, о чем сообщает печатающее устройство, Вам потребуется расшифровать указанный им код. Для этого мы добавили в статью таблицу кодов ошибок лазерных принтеров Kyocera серии FS и не только.
Коды ошибок принтеров и МФУ Kyocera, которые можно исправить самостоятельно
|
Код ошибки |
Значение ошибки |
Решение проблемы |
|
E-0001 (E1) |
Поврежден чип картриджа либо установлен неоригинальный картридж. |
Замените установленный картридж оригинальной версией изделия. Если хотите сэкономить, тогда купите и установите новый чип на картридж или перепрошейте принтер Kyocera. Однако предварительно не помешает попробовать сбросить ошибку соответствующей комбинацией клавиш (как это сделать, читайте в статье «Сброс ошибки установки неоригинального картриджа в принтерах Kyocera»). |
|
E-0002 (E2) |
Регион использования картриджа и принтера не совпадают. |
Замените чип или прошейте принтер Kyocera. |
|
E-0003 (E3) |
Заполнена память принтера или МФУ Kyocera. |
Отпечатайте ранее отсканированные листы или очистите очередь печати нажатием кнопки Стоп/Сброс (ранее отсканированные листы также удалятся из памяти принтера, даже если они еще не были распечатаны). |
|
E-0007 (E7) |
Тонер-картридж Kyocera израсходовал ресурс красящего вещества. |
Замените или заправьте картридж Kyocera (если используете совместимый или перезаправленный расходник, то после установки его в принтер не забудьте сбросить ошибку зажатием на 3-5 секунды кнопок [Ок] и [Сброс/Стоп]). |
|
E-0008 (E8) |
Открыта крышка принтера либо не работает датчик закрытия крышек устройства. |
Откройте и еще раз закройте переднюю и заднюю крышку принтера. Во время закрытия Вы должны услышать характерный щелчок. Если не помогло, то причина в неисправности датчика. |
|
E-0009 (E9) |
Лоток приема бумаги полон. |
Уберите все отпечатанные листы бумаги из выходящего лотка. Чтобы возобновить печать, нажмите кнопку [Старт]. |
|
E-0012 (E12) |
Ошибка памяти принтера Kyocera. |
Попробуйте уменьшить разрешение печати. Скорее всего, формат создаваемого отпечатка не соответствует возможностям принтера. |
|
E-0014 (E14) |
Установлен неверный формат бумаги (неподдерживаемый принтером Kyocera). |
Поменяйте бумагу на поддерживаемую принтером либо смените ее формат в настройках печати. Попробуйте обновить программное обеспечение. Возможно, это расширит поддерживаемые принтером Kyocera форматы. |
|
E-0015 (E15) |
Устройство не подключено к электрической сети либо на компьютере нет (не работает) драйвера принтера Kyocera. |
Проверьте подключение печатающего аппарата к электрической сети, а также целостность кабеля. Если ошибка не исчезает, скачайте драйвер принтера Kyocera и установите его на компьютер. |
|
E-0017 (E17) |
Ошибка передачи данных. |
Проверьте подключение принтера к компьютеру. Кабель не должен быть длиннее 5 метров, а также обязан поддерживать стандарт USB 2.0. Кроме того, переустановите драйвер принтера и утилиту Kyocera Client Tool. |
|
E-0018 (E18) |
Очередь печати заполнена. |
Очистите очередь печати нажатием кнопки [Сброс] либо через драйвер принтера. |
|
E-0019 (E19) |
Неверный формат печати. |
Отмените печать нажатием кнопки [Стоп/Сброс]. Выберите в настройках принтера соответствующий режим печати, а также установите в лоток поддерживаемый принтером формат бумаги. |
|
J-0000 (jam0000) |
Замятие бумаги за задней крышкой. |
Откройте крышку и извлеките бумагу. Проверьте надежность крепления бумаги в лотке, а также принтер на наличие посторонних предметов. Еще причина может быть в пружине выходного флажка. Если она растянулась, то может плохо работать фиксатор. Также проблема может быть из-за печки, сделайте ее ревизию, переборку и смазку. |
|
J-0501 (jam0501) |
Бумага застряла в принтере Kyocera |
Извлеките замятую бумагу. Проверьте надежность установки бумаги во входной лоток. Проверьте целостность роликов протяжки бумаги, а также принтер на наличие посторонних предметов. Если не помогло, стоит внимательно осмотреть ребра на направляющей пластине. На них могут образоваться сколы, трещины и заусенцы. Их можно слегка подчистить наждачной бумагой (нулевкой). |
|
J-0511 (jam0511) |
Принтер Kyocera замял бумагу. |
Извлеките замятую бумагу и повторите печать. Если проблема не исчезла, несите принтер в сервис. Скорее всего, изношен ролик протяжки бумаги. |
|
C7990 |
Бункер драм-картриджа (блока фотобарабана) заполнен отработанным тонером либо неисправен счетчик отработки красящего вещества. Еще проблема может быть в главной плате PWB. |
Осуществите чистку драм-картриджа (блока фотобарабана). Если проблема в датчике или плате, то нужно отнести принтер в СЦ на диагностику. |
|
F248 |
Ошибка обработки отпечатываемого материала. |
Перезагрузите принтер. Уберите неподдерживаемые спецсимволы из отпечатка. Обновите ПО принтера Kyocera. Смените режим работы принтера с PDL на GDI (Пуск -> Принтеры -> Свойства -> Параметры устройства). |
|
PF |
Отсутствует бумага в лотке подачи. |
Загрузите листы бумаги во входной лоток. Если принтер по-прежнему не печатает, значит нужно искать проблему в чем-то другом. |
|
1101 |
Ошибка сканирования через сеть из-за неправильного имени SMTP сервера. |
Пропишите DNS-адреса помимо прочих настроек печати по сети. |
|
1102 |
Некорректная настройка сканера для работы через сеть |
Зайдите в Web-панель управления принтером (нужно в адресную строку браузера ввести iP принтера Kyocera). Далее в зависимости от модели введите логин и пароль (Admin/Admin или просто admin00 без логина). Далее следуйте инструкции:
Логин и пароль нужны обязательно, если их нет, то следует создать. |
|
2101 |
Ошибка передачи данных при сканировании через сеть. |
Правильно настройте параметры (как для ошибки 1102), только предварительно отключите на ПК антивирус и брандмауэр. |
Если Вы испытали все способы, но не смогли убрать ошибку, то следует нести печатающее устройство в сервисный центр. Кроме того, есть ряд ошибок (высвечиваемых на дисплее принтера), которые нельзя устранить в домашних условиях. Соответствующие коды ошибок принтеров Kyocera представляем в очередной таблице.
Коды ошибок принтеров и МФУ Kyocera, которые нужно устранять в сервисном центре
|
Код ошибки |
Значение ошибки |
Решение проблемы |
|
0030 |
Неисправность платы управления факсом принтера. |
Замена платы. |
|
0100 |
Неисправность платы управления или флеш-памяти принтера. |
Замена платы. |
|
0120 |
Ошибка чтения mac-адреса из-за неисправности флеш-памяти принтера. |
Замена платы. |
|
0190 |
Неисправность платы управления или флеш-памяти принтера. |
Замена платы. |
|
0630 |
Неисправность платы управления принтера. |
Замена платы. |
|
1020 |
Неисправность мотора, привода или отсутствие контакта. |
Разборка принтера и замена изношенных частей. Проверка надежности подключений, замена разорванных (прогоревших) кабелей. Ремонт или замена привода мотора. |
|
1040 |
Неисправность мотора, привода или отсутствие контакта. |
Разборка принтера и замена изношенных частей. Проверка надежности подключений, замена разорванных (прогоревших) кабелей. Ремонт или замена привода мотора. |
|
2000 |
Неисправность главной платы управления, соединительного кабеля или привода принтера. |
Проверить ремни, шестерни и ролики привода. Смазать или заменить, если есть дефекты. Заменить привод или главную плату. |
|
3100 (C3100) |
Неисправность главной платы, привода сканера, датчика положения или нарушение целостности соединений. |
Проверить наличие разрывов и отсутствия контакта. Смазать или заменить изношенные элементы привода. Заменить привод, главную плату, датчик или соединительный кабель. Если Вам повезло, то возможно забыли отключить фиксатор блока сканера. |
|
3101 |
Сетевой кабель не подсоединен, или нарушена работа концентратора. Еще может быть из-за наличия вирусов в системе или неправильно заданным параметрам сервера SMTP. |
Проверить соединения, правильно настроить параметры сети. |
|
3300 |
Неисправность главной платы, датчика CIS или соединительного кабеля. |
Проверить контакты, заменить плату или датчик. |
|
3500 |
Неисправность главной платы или нарушение соединения контактов. |
Проверить контакты, заменить плату. |
|
4000 (C4000) |
Неисправность главной платы, привода сканера или нарушение соединений. Однако чаще всего ошибка лазера. |
Проверить контакты, заменить плату или привод блока сканера. Почистить лазер, смазать ось полигон-мотора, либо полностью заменить блок лазера. |
|
4200 |
Неисправность главной платы, блока сканера или датчика BD. |
Отключить питание принтера на 30 минут. Если не помогло, то следует заменить привод сканера или главную плату принтера. |
|
6000 (С6000) |
Неисправность главной платы, термостата, печки или нарушение соединения контактов. |
Проверить и поправить контакты. Заменить фьюзер. Ремонт или замена печки, термодатчика, термопредохранителя и т.д. |
|
6020 |
Сгорание термистора или главной платы. |
Замена термистора или главной платы. |
|
6030 |
Неисправность главной платы, термостата или термистора. Возможно, причина в отсутствии контакта. |
Проверить соединения. Заменить плату, термостат или термистор. |
|
6400 |
Неисправность главной платы, отсутствие питания или контакта. |
Заменить плату или источник питания. |
|
F000 |
Неисправность главной платы или отсутствие контакта. |
Проверить соединение ремня безопасности. Заменить ремень или плату управления. |
|
F020 |
Неисправность элементов памяти принтера. |
Перезагрузить принтер. Если ошибка не устранилась – заменить плату управления. |
|
F040 |
Неисправность главной платы принтера. |
Перезагрузить принтер. Если ошибка не устранилась – заменить плату управления. |
|
F05D |
Неисправность главной платы. Сбой программного оборудования привода. Проблемы с прошивкой принтера Kyocera. |
Перезагрузить принтер. Если ошибка не устранилась – заменить плату управления. Перепрошить принтер Kyocera. |
|
F245 F246 F247 F375 |
Принтер Kyocera заблокирован из-за проблемы, вызванной отказом источника питания. |
Нужно перепрошить принтер специальной сервисной микропрограммой. |
Обратите внимание: Если у печатающего устройства нет дисплея, то определить проблему можно по светодиодным индикаторам, встроенным в панель управления принтером. Например, у Kyocera Ecosys P2135D нужно сосчитать количество миганий индикаторов красного цвета и таким образом определить число, указывающее на ту или иную ошибку. В свою очередь, у модели Kyocera FS-1040 все зависит от темпа мигания светодиода с надписью «Внимание!» («Attention!»):
- Мигает медленно – указывает на отсутствие бумаги в лотке или тонера в картридже.
- Мигает быстро – оповещает о проблеме с памятью устройства, переполненном лотке или замятии бумаги, а также об использовании неоригинальных расходных материалов.
- Горит постоянно – говорит о проблемах с картриджем или фотобарабаном либо указывает на открытые крышки принтера.

Чтобы потребитель мог наверняка определить проблему, рекомендуем использовать утилиту Kyocera Client Tool, которая идет в комплекте с драйверами принтера.
Ваше Имя:
Ваш вопрос:
Внимание: HTML не поддерживается! Используйте обычный текст.
Оценка:
Плохо
Хорошо
Введите код, указанный на картинке:


Ошибки Kyocera ECOSYS M2030dn
Ошибки Kyocera ECOSYS M2030pn
Ошибки Kyocera ECOSYS M2035dn
Ошибки Kyocera ECOSYS M2040dn
Ошибки Kyocera ECOSYS M2135dn
Ошибки Kyocera ECOSYS M2530dn
Ошибки Kyocera ECOSYS M2535dn
Ошибки Kyocera ECOSYS M2540dn
Ошибки Kyocera ECOSYS M2540dw
Ошибки Kyocera ECOSYS M2635dn
Ошибки Kyocera ECOSYS M2635dw
Ошибки Kyocera ECOSYS M2640idw
Ошибки Kyocera ECOSYS M3040dn
Ошибки Kyocera ECOSYS M3040idn
Ошибки Kyocera ECOSYS M3145dn
Ошибки Kyocera ECOSYS M3145idn
Ошибки Kyocera ECOSYS M2735dw
Ошибки Kyocera ECOSYS M3540dn
Ошибки Kyocera ECOSYS M3540idn
Ошибки Kyocera ECOSYS M3550idn
Ошибки Kyocera ECOSYS M3560idn
Ошибки Kyocera ECOSYS M3645dn
Ошибки Kyocera ECOSYS M3645idn
Ошибки Kyocera ECOSYS M3655idn
Ошибки Kyocera ECOSYS M3660idn
Ошибки Kyocera ECOSYS M3860idn
Ошибки Kyocera ECOSYS M3860idn
Ошибки Kyocera ECOSYS M4125idn
Ошибки Kyocera ECOSYS M4132idn
Ошибки Kyocera ECOSYS M5521cdn
Ошибки Kyocera ECOSYS M5521cdw
Ошибки Kyocera ECOSYS M5526cdn
Ошибки Kyocera ECOSYS M5526cdw
Ошибки Kyocera ECOSYS M6026cdn
Ошибки Kyocera ECOSYS M6026cidn
Ошибки Kyocera ECOSYS M6030cdn
Ошибки Kyocera ECOSYS M6035cidn
Ошибки Kyocera ECOSYS M6230cidn
Ошибки Kyocera ECOSYS M6235cidn
Ошибки Kyocera ECOSYS M6526cdn
Ошибки Kyocera ECOSYS M6526cidn
Ошибки Kyocera ECOSYS M6530cdn
Ошибки Kyocera ECOSYS M6535cidn
Ошибки Kyocera ECOSYS M6630cidn
Ошибки Kyocera ECOSYS M6635cidn
Ошибки Kyocera ECOSYS M8124cidn
Ошибки Kyocera ECOSYS M8130cidn
Ошибки Kyocera ECOSYS P2035d
Ошибки Kyocera ECOSYS P2040dn
Ошибки Kyocera ECOSYS P2040dw
Ошибки Kyocera ECOSYS P2135d
Ошибки Kyocera ECOSYS P2135dn
Ошибки Kyocera ECOSYS P2235dn
Ошибки Kyocera ECOSYS P2235dw
Ошибки Kyocera ECOSYS P3045dn
Ошибки Kyocera ECOSYS P3050dn
Ошибки Kyocera ECOSYS P3055dn
Ошибки Kyocera ECOSYS P3060dn
Ошибки Kyocera ECOSYS P3145dn
Ошибки Kyocera ECOSYS P3150dn
Ошибки Kyocera ECOSYS P3155dn
Ошибки Kyocera ECOSYS P3160dn
Ошибки Kyocera ECOSYS P3260dn
Ошибки Kyocera ECOSYS P4035dn
Ошибки Kyocera ECOSYS P4040dn
Ошибки Kyocera ECOSYS P5021cdn
Ошибки Kyocera ECOSYS P5021cdw
Ошибки Kyocera ECOSYS P5026cdn
Ошибки Kyocera ECOSYS P5026cdw
Ошибки Kyocera ECOSYS P6021cdn
Ошибки Kyocera ECOSYS P6026cdn
Ошибки Kyocera ECOSYS P6030cdn
Ошибки Kyocera ECOSYS P6035cdn
Ошибки Kyocera ECOSYS P6130cdn
Ошибки Kyocera ECOSYS P6230cdn
Ошибки Kyocera ECOSYS P6235cdn
Ошибки Kyocera ECOSYS P7035cdn
Ошибки Kyocera ECOSYS P7040cdn
Ошибки Kyocera ECOSYS P7240cdn
Ошибки Kyocera ECOSYS P8060cdn
Ошибки Kyocera FS-C8600DN
Ошибки Kyocera FS-C8650DN
Ошибки Kyocera FS1016MFP
Ошибки Kyocera FS1018MFP
Ошибки Kyocera FS1020MFP
Ошибки Kyocera FS1024MFP
Ошибки Kyocera FS1025MFP
Ошибки Kyocera FS1028MFP
Ошибки Kyocera FS1030MFP
Ошибки Kyocera FS1035MFP
Ошибки Kyocera FS1040
Ошибки Kyocera FS1050
Ошибки Kyocera FS1060DN
Ошибки Kyocera FS1100
Ошибки Kyocera FS1110
Ошибки Kyocera FS1116MFP
Ошибки Kyocera FS1118MFP
Ошибки Kyocera FS1120
Ошибки Kyocera FS1120MFP
Ошибки Kyocera FS1124MFP
Ошибки Kyocera FS1125MFP
Ошибки Kyocera FS1128MFP
Ошибки Kyocera FS1130MFP
Ошибки Kyocera FS1135MFP
Ошибки Kyocera FS1200
Ошибки Kyocera FS1220MFP
Ошибки Kyocera FS1300D
Ошибки Kyocera FS1320D
Ошибки Kyocera FS1320MFP
Ошибки Kyocera FS1325MFP
Ошибки Kyocera FS1350DN
Ошибки Kyocera FS1370DN
Ошибки Kyocera FS1500
Ошибки Kyocera FS6020
Ошибки Kyocera FS6025MFP
Ошибки Kyocera FS6025MFPB
Ошибки Kyocera FS6030MFP
Ошибки Kyocera FS6500
Ошибки Kyocera FS6525MFP
Ошибки Kyocera FS6530MFP
Ошибки Kyocera FS6700
Ошибки Kyocera FS6900
Ошибки Kyocera FS6950DN
Ошибки Kyocera FS8000CD
Ошибки Kyocera FS8000CN
Ошибки Kyocera FS8100DN
Ошибки Kyocera TASKalfa 180
Ошибки Kyocera TASKalfa 1800
Ошибки Kyocera TASKalfa 1801
Ошибки Kyocera TASKalfa 181
Ошибки Kyocera TASKalfa 205c
Ошибки Kyocera TASKalfa 220
Ошибки Kyocera TASKalfa 2200
Ошибки Kyocera TASKalfa 2201
Ошибки Kyocera TASKalfa 221
Ошибки Kyocera TASKalfa 2420w
Ошибки Kyocera TASKalfa 2460ci
Ошибки Kyocera TASKalfa 2470ci
Ошибки Kyocera TASKalfa 250ci
Ошибки Kyocera TASKalfa 2510i
Ошибки Kyocera TASKalfa 2520i
Ошибки Kyocera TASKalfa 255
Ошибки Kyocera TASKalfa 2550ci
Ошибки Kyocera TASKalfa 2551ci
Ошибки Kyocera TASKalfa 2552ci
Ошибки Kyocera TASKalfa 2553ci
Ошибки Kyocera TASKalfa 255b
Ошибки Kyocera TASKalfa 255c
Ошибки Kyocera TASKalfa 265ci
Ошибки Kyocera TASKalfa 300ci
Ошибки Kyocera TASKalfa 300i
Ошибки Kyocera TASKalfa 3010i
Ошибки Kyocera TASKalfa 3011i
Ошибки Kyocera TASKalfa 305
Ошибки Kyocera TASKalfa 3050ci
Ошибки Kyocera TASKalfa 3051ci
Ошибки Kyocera TASKalfa 306ci
Ошибки Kyocera TASKalfa 307ci
Ошибки Kyocera TASKalfa 308ci
Ошибки Kyocera TASKalfa 3212i
Ошибки Kyocera TASKalfa 3252ci
Ошибки Kyocera TASKalfa 3253ci
Ошибки Kyocera TASKalfa 3500i
Ошибки Kyocera TASKalfa 3501i
Ошибки Kyocera TASKalfa 350ci
Ошибки Kyocera TASKalfa 3510i
Ошибки Kyocera TASKalfa 3511i
Ошибки Kyocera TASKalfa 3550ci
Ошибки Kyocera TASKalfa 3551ci
Ошибки Kyocera TASKalfa 3552ci
Ошибки Kyocera TASKalfa 3553ci
Ошибки Kyocera TASKalfa 356ci
Ошибки Kyocera TASKalfa 358ci
Ошибки Kyocera TASKalfa 4002i
Ошибки Kyocera TASKalfa 4003i
Ошибки Kyocera TASKalfa 400ci
Ошибки Kyocera TASKalfa 4012i
Ошибки Kyocera TASKalfa 4052ci
Ошибки Kyocera TASKalfa 4053ci
Ошибки Kyocera TASKalfa 406ci
Ошибки Kyocera TASKalfa 408ci
Ошибки Kyocera TASKalfa 420i
Ошибки Kyocera TASKalfa 4500i
Ошибки Kyocera TASKalfa 4501i
Ошибки Kyocera TASKalfa 4550ci
Ошибки Kyocera TASKalfa 4551ci
Ошибки Kyocera TASKalfa 4820w
Ошибки Kyocera TASKalfa 5002i
Ошибки Kyocera TASKalfa 5003i
Ошибки Kyocera TASKalfa 500ci
Ошибки Kyocera TASKalfa 5052ci
Ошибки Kyocera TASKalfa 5053ci
Ошибки Kyocera TASKalfa 508ci
Ошибки Kyocera TASKalfa 520i
Ошибки Kyocera TASKalfa 5500i
Ошибки Kyocera TASKalfa 5501i
Ошибки Kyocera TASKalfa 550c
Ошибки Kyocera TASKalfa 552ci
Ошибки Kyocera TASKalfa 5550ci
Ошибки Kyocera TASKalfa 5551ci
Ошибки Kyocera TASKalfa 6002i
Ошибки Kyocera TASKalfa 6003i
Ошибки Kyocera TASKalfa 6052ci
Ошибки Kyocera TASKalfa 6053ci
Ошибки Kyocera TASKalfa 620
Ошибки Kyocera TASKalfa 6500i
Ошибки Kyocera TASKalfa 6501i
Ошибки Kyocera TASKalfa 650c
Ошибки Kyocera TASKalfa 6550ci
Ошибки Kyocera TASKalfa 6551ci
Ошибки Kyocera TASKalfa 7002i
Ошибки Kyocera TASKalfa 7003i
Ошибки Kyocera TASKalfa 7052ci
Ошибки Kyocera TASKalfa 7353ci
Ошибки Kyocera TASKalfa 750c
Ошибки Kyocera TASKalfa 7550ci
Ошибки Kyocera TASKalfa 7551ci
Ошибки Kyocera TASKalfa 8000i
Ошибки Kyocera TASKalfa 8001i
Ошибки Kyocera TASKalfa 8002i
Ошибки Kyocera TASKalfa 8003i
Ошибки Kyocera TASKalfa 8052ci
Ошибки Kyocera TASKalfa 820
Ошибки Kyocera TASKalfa 8353ci
Ошибки Kyocera TASKalfa 9002i
Ошибки Kyocera TASKalfa 9003i
Содержание
- Причины и типы горящей кнопки «Внимание» на принтере Kyocera
- Ошибки картриджей
- Код C7990
- Замятие бумаги
- Другие неисправности
- Сброс ошибок у принтеров Kyocera своими руками
Причины и типы горящей кнопки «Внимание» на принтере Kyocera
Для начала необходимо разобраться, какие варианты свечения красной кнопки на принтере Kyocera существуют. В большинстве случаев именно определение характера свечения позволяет устранить проблему, не делая ничего лишнего. Каждый из этих типов связан с конкретной природой проблемы, которую мы рассмотрим ниже.

- Медленное мигание лампочки. Если свет тускнеет, а затем ярко вспыхивает и медленно меняет яркость, это может быть одной из двух проблем печати. Первый вызван тем, что закончилась бумага, которую следует проверить и при необходимости вставить заново. Если бумага уже вставлена, но принтер ее не видит, попробуйте слегка отрегулировать ее и отрегулировать ручки, затянув или ослабив их. Вторая причина заключается в том, что тонер в картридже заканчивается, и чтобы проверить это, просто визуально проверьте качество печати готового документа и вспомните, когда принтер заправлялся в последний раз.
- Быстрое мигание света. Иногда свет имеет другой коэффициент горения, довольно часто мигая. Это может означать, что был обнаружен неоригинальный картридж, не совместимый с данным устройством. Другой причиной этого явления является переполнение памяти принтера, вызванное попыткой распечатать слишком большой документ. Реже быстрое мигание вызвано перегруженным или засоренным лотком для бумаги, поэтому мы рекомендуем немедленно проверить это и при необходимости устранить неисправность.
- Непрерывное мигание индикаторной лампочки. Если возникают ошибки печати и кнопка горит постоянно, стоит проверить, закрыта ли крышка принтера и есть ли тонер в кассете. Вы можете устранить эти неисправности самостоятельно, поэтому трудностей возникнуть не должно. Более редкой и серьезной проблемой является выход из строя барабана формирования изображения. В таких случаях следует обратиться в сервисный центр для дальнейшей диагностики и ремонта.
Теперь, когда вы знаете, какой мигающий рисунок отвечает за те или иные проблемы, вы сможете провести диагностику устройства и понять, какие действия необходимо предпринять. Тем, кто недавно заправил чернильный картридж и столкнулся с этой проблемой, следует перезагрузить принтер, как описано ниже. Всем, кому не удалось самостоятельно устранить ошибку, рекомендуется выполнить следующие шаги, а затем перейти к последнему совету, если и он окажется безуспешным.
Ошибки картриджей
Все современные принтеры страдают от ошибок картриджей. В большинстве случаев они возникают после отгрузки устройства. Решение заключается в извлечении и повторной установке картриджа. Сделать это можно следующим образом (на примере многофункционального устройства Kyocera FS-1040):
- Выключите принтер.
- На передней панели принтера находится откидная крышка. Откройте откидную крышку.
- Под откидной крышкой с левой стороны находится картридж. Извлеките картридж.
- Чтобы подстраховаться, проверьте переднюю часть картриджа. Если на контактах есть грязь, удалите ее мягкой безворсовой тканью. Для засохших чернил смочите салфетку в воде и протрите ею контакты.
- Замените чернильный картридж, плотно задвинув его до щелчка.
- Включите принтер и подождите около 5-10 секунд, пока картридж инициализируется.
Если проблема была связана с картриджем, эта процедура должна помочь ее решить.
Код C7990
Этот номер ошибки в таких моделях, как FS 1020MFP, указывает на то, что бункер для тонера переполнен.

Ошибка C7990
Возможны три причины ошибки C7990:
-плата PWB неисправна;
-Датчик чернил неисправен;
Неисправен блок барабана; — Картридж переполнен — Рекомендуется заменить блок барабана.

Блок барабана формирования изображения
В первых двух случаях обратитесь в сервисный центр.
В третьем случае появляется код C7990, если срок службы барабана изображения не закончился, барабан изображения можно очистить от чернил. Процедура выполняется следующим образом:
1.Откройте переднюю крышку и извлеките блок проявителя.
2.Извлеките барабан с изображением.
3.Осторожно откройте крышку резервуара и удалите чернила.
4.Соберите машину в обратном порядке.
Как видите, ошибку C7990 в принтере Kyocera легко устранить самостоятельно, и к специалисту нужно обращаться только в том случае, если платы действительно неисправны.

Замятие бумаги
Застревание бумаги внутри принтера — распространенная проблема принтеров. Устройства Kyocera не являются исключением. Механизм подачи бумаги состоит из нескольких вращающихся роликов. Если любой из них застрянет, печать не будет выполнена. Если произошло замятие бумаги, на передней панели принтера также появится соответствующее сообщение.
В самых оптимистичных случаях нет необходимости разбирать принтер для извлечения бумаги. Чаще всего он заклинивает прямо на входе. Однако если замятие бумаги произошло внутри принтера, его необходимо удалить.
Другие неисправности
Также могут возникнуть следующие коды:
-C-F040. Выключите и снова включите принтер, нажав кнопку питания.
-J-0511 Код указывает на замятие бумаги под задней крышкой. В инструкциях описано, как удалить бумагу в соответствующем разделе.
-PF. Принтер показывает, что листы были добавлены во входной лоток.

Как видите, японские принтеры Kyocera редко ломаются. Чаще всего ошибки возникают из-за неправильного или невнимательного обращения. Вы можете починить их самостоятельно, но если вы не уверены, лучше обратиться к профессионалу.
Сброс ошибок у принтеров Kyocera своими руками
Сброс ошибок на принтерах Kyocera следует понимать как набор шагов, которые потенциально может выполнить опытный пользователь для восстановления работоспособности печатающих устройств, не прибегая к услугам сервиса.
|
Ошибка # |
Причина |
Решение |
|
E-0001 |
В принтер был установлен совместимый картридж или поврежден чип расходного материала. | Эта проблема может быть решена несколькими способами:
1. установка оригинального картриджа; 2. замена неисправного чипа; 3. перепрошивка принтера — после этого любой картридж может быть установлен в принтер неограниченное количество раз; 4. сброс ошибки — Нажмите кнопки «Режим» и «Сброс» на несколько секунд. |
|
E-0002 |
Регион используемого картриджа не соответствует принтеру. | Эта проблема может быть решена несколькими способами:
1. установите правильный картридж для региона принтера; 2. Замените микросхему; 3) Обновите микропрограмму принтера. |
|
E-0003 |
Память в принтере заполнена. | Распечатайте документы, которые уже были отсканированы, или сбросьте операцию с помощью соответствующей кнопки. |
|
E-0007 |
Тонер-картридж закончился. | Замените новый оригинальный тонер-картридж, совместимый тонер-картридж или перезарядите картридж. |
|
E-0008 |
Одна из крышек принтера не закрыта. | Закройте переднюю и заднюю крышки принтера, звучно щелкнув. |
|
E-0009 |
Лоток для печати заполнен. | Извлеките отпечатанные листы бумаги, затем нажмите кнопку Старт, чтобы возобновить печать. |
|
E-0012 |
Память принтера заполнена. | Уменьшите разрешение печати до 600 точек на дюйм. |
|
E-0014 |
Установлен размер бумаги, который не поддерживается принтером. | Замените бумагу на совместимую по размеру.
Иногда функциональность принтера может быть ограничена на уровне программного обеспечения. Для расширения диапазона размеров рекомендуется обновить программное обеспечение принтера. |
|
E-0015 |
1 Принтер не имеет источника питания.
2. сетевой кабель не подключен. 3. на персональном компьютере отсутствует драйвер. |
Проверьте целостность сетевого кабеля.
Включите принтер. При необходимости установите драйвер. |
|
E-0018 |
Выбранный файл отсутствует в очереди печати. | Сбросьте операцию, нажав кнопку «Сброс». Затем выберите новый файл и продолжите печать. |
|
E-0019 |
Формат печати не поддерживается принтером. | Сбросьте действие, нажав кнопку «Сброс». |
|
J-0511 |
Бумага замята. | Осторожно извлеките оставшуюся бумагу из корпуса принтера. |
|
ПФ |
Во входном лотке нет бумаги. | Вставьте бумагу во входной лоток и возобновите печать, нажав кнопку Старт. |
Источники
- https://Lumpics.ru/kyocera-printer-does-not-print-attention-button-is-on/
- https://ru.NoDevice.com/articles/printers/does-not-print-a-kyocera-printer
- https://www.dvenashka.ru/2021/11/kody-oshibok-printerov-kyocera-i-ih-sbros.html
- https://computermaker.info/ecosys-fs-1020mfp-oshibka-e7.html
- http://printergid.ru/neispravnosti/oshibki-kyocera
- https://moscowtoner.ru/kody-oshibok-u-printerov-kyocera/
- Manuals
- Brands
- Kyocera Manuals
- Printer
- ECOSYS P2135dn
- Operation manual
-
Contents
-
Table of Contents
-
Troubleshooting
-
Bookmarks
Quick Links
ECOSYS P2135dn
OPERATION GUIDE
Related Manuals for Kyocera ECOSYS P2135dn
Summary of Contents for Kyocera ECOSYS P2135dn
-
Page 1: Operation Guide
PRINT ECOSYS P2135dn OPERATION GUIDE…
-
Page 2
This Operation Guide is for model ECOSYS P2135dn. Note This Operation Guide contains information that corresponds to using both the inch and metric versions of these machines. The inch versions of these machines are shown in the screens in this guide. If you are using the metric version, use the messages provided for the inch version as reference only. -
Page 3: Table Of Contents
Contents Machine Parts …………….1-1 Components at the Front of the Printer ……..1-2 Components at the Rear of the Printer ……..1-2 Operation Panel …………….1-3 Loading Paper …………….2-1 Preparing the Paper …………..2-2 Loading Paper into Cassette …………. 2-2 Loading Paper into MP (Multi-Purpose) Tray ……
-
Page 5
Legal and Safety Information Please read this information before using your machine. This chapter provides information on the following topics: Legal Information License Agreements Safety Information Symbols xvii Installation Precautions xviii Precautions for Use About the Operation Guide xxii Conventions in This Guide xxiii… -
Page 6: Legal Information
Regarding Tradenames • PRESCRIBE and ECOSYS are registered trademark of Kyocera Corporation. • KPDL is a trademark of Kyocera Corporation. • Microsoft, Windows, Windows XP, Windows Server 2003, Windows…
-
Page 7
• Helvetica, Palatino and Times are registered trademarks of Linotype GmbH. • ITC Avant Garde Gothic, ITC Bookman, ITC ZapfChancery and ITC ZapfDingbats are registered trademarks of International Typeface Corporation. • UFST™ MicroType® fonts by Monotype Imaging Inc. are installed in this machine. -
Page 8: License Agreements
License Agreements IBM Program License Agreement THE DEVICE YOU HAVE PURCHASED CONTAINS ONE OR MORE SOFTWARE PROGRAMS (“PROGRAMS”) WHICH BELONG TO INTERNATIONAL BUSINESS MACHINES CORPORATION (“IBM”). THIS DOCUMENT DEFINES THE TERMS AND CONDITIONS UNDER WHICH THE SOFTWARE IS BEING LICENSED TO YOU BY IBM. IF YOU DO NOT AGREE WITH THE TERMS AND CONDITIONS OF THIS LICENSE, THEN WITHIN 14 DAYS AFTER YOUR ACQUISITION OF THE DEVICE YOU MAY RETURN THE DEVICE FOR A FULL…
-
Page 9
1. the equivalent of U.S. $25,000 in your local currency; or 2. IBM’s then generally available license fee for the Program This limitation will not apply to claims for bodily injury or damages to real or tangible personal property for which IBM is legally liable. IBM will not be liable for any lost profits, lost savings, or any incidental damages or other economic consequential damages, even if IBM, or its authorized supplier, has been advised of the possibility of such… -
Page 10
3. To protect proprietary rights of Monotype Imaging, you agree to maintain the Software and other proprietary information concerning the Typefaces in strict confidence and to establish reasonable procedures regulating access to and use of the Software and Typefaces. 4. You agree not to duplicate or copy the Software or Typefaces, except that you may make one backup copy. -
Page 11: Original Ssleay License
GPL/LGPL This product contains GPL (http://www.gnu.org/licenses/gpl.html) and/or LGPL (http://www.gnu.org/licenses/lgpl.html) software as part of its firmware. You can get the source code, and you are permitted to copy, redistribute and modify it under the terms of GPL/LGPL. For further information including availability of the source code, visit http://www.kyoceradocumentsolutions.com/gpl/.
-
Page 12
This package is an SSL implementation written by Eric Young (eay@cryptsoft.com). The implementation was written so as to conform with Netscapes SSL. This library is free for commercial and non-commercial use as long as the following conditions are adhered to. The following conditions apply to all code found in this distribution, be it the RC4, RSA, lhash, DES, etc., code;… -
Page 13
Compliance and Conformity This equipment has been tested and found to comply with the limits for a Class B digital device, pursuant to Part 15 of the FCC Rules. These limits are designed to provide reasonable protection against harmful interference in a residential installation. This equipment generates, uses and can radiate radio frequency energy and, if not installed and used in accordance with the instructions, may cause harmful interference to radio communications. -
Page 14: Safety Information
Radio Frequency Transmitter This machine contains a transmitter module. We, the manufacturer (KYOCERA Document Solutions) hereby declare that this equipment (page printer), model ECOSYS P2135dn is in compliance with the essential requirements and other relevant provisions of Directive 1999/5/EC. Radio Tag Technology…
-
Page 15: Caution Labels
High temperature inside. Do not touch parts in this area, because there is a danger of getting burned. ECOSYS P2135dn CDRH Regulations The Center for Devices and Radiological Health (CDRH) of the U.S. Food and Drug Administration implemented regulations for laser products on August 2, 1976.
-
Page 16
Canadian Department of Communications Compliance Statement This Class B digital apparatus complies with Canadian ICES-003. Avis de conformité aux normes du ministere des Communications du Canada Cet appareil numérique de la classe B est conforme à la norme NMB- 003 du Canada. EN ISO 7779 Maschinenlärminformations-Verordnung 3. -
Page 17: Energy Saving Control Function
Energy Saving Control Function The device comes equipped with a Low Power Mode where energy consumption is reduced after a certain amount of time elapses since the device was last used, as well as a Sleep where printer functions remain in a waiting state but power consumption is still reduced to a minimum when there is no activity with the device within a set amount of time.
-
Page 18: Energy Star Program
Your sales or service representative can provide information about recommended paper types. Environmental benefits of «Power Management» To reduce power consumption when idle, this machine is equipped with a power management function that automatically activates energy- saving mode when the machine is idle for a certain period of time. Although it takes the machine a slight amount of time to return to READY mode when in energy-saving mode, a significant reduction in energy consumption is possible.
-
Page 19: Symbols
Symbols The sections of this guide and parts of the machine marked with symbols are safety warnings meant to protect the user, other individuals and surrounding objects, and ensure correct and safe usage of the machine. The symbols and their meanings are indicated below. DANGER: Indicates that serious injury or even death will very possibly result from insufficient attention to or incorrect compliance with the related points.
-
Page 20: Installation Precautions
Installation Precautions Environment Caution Avoid placing the machine on or in locations which are unstable or not level. Such locations may cause the machine to fall down or fall over. This type of situation presents a danger of personal injury or damage to the machine. Avoid locations with humidity or dust and dirt.
-
Page 21
Power Supply/Grounding the Machine Warning Do not use a power supply with a voltage other than that specified. Avoid multiple connections in the same outlet. These types of situations present a danger of fire or electrical shock. Plug the power cord securely into the outlet. If metallic objects come in contact with the prongs on the plug, it may cause a fire or electric shock. -
Page 22: Precautions For Use
Precautions for Use Cautions when using the machine Warning Do not place metallic objects or containers with water (flower vases, flower pots, cups, etc.) on or near the machine. This situation presents a danger of fire or electrical shock should they fall inside.
-
Page 23
If dust accumulates within the machine, there is a danger of fire or other trouble. It is therefore recommended that you consult with your service representative in regard to cleaning of internal parts. This is particularly effective if accomplished prior to seasons of high humidity. -
Page 24: About The Operation Guide
About the Operation Guide This Operation Guide contains the following chapters: Parts Machine This chapter explains the names of parts. 2 Loading Paper This chapter explains paper specifications for this printer and how to load paper into the cassette or MP tray. 3 Printing This chapter explains how to install the printer driver, print from your PC, and use the application software included in the DVD-ROM.
-
Page 25: Conventions In This Guide
Conventions in This Guide This manual uses the following conventions. Convention Description Example Italic Used to emphasize a key word, Refer to Print Quality Problems on page Typeface phrase or reference to additional 5-3. information. Bold Used to denote buttons on the To start printing, click OK.
-
Page 26
Introduction-xxiv… -
Page 27: Machine Parts
Machine Parts This chapter identifies machine parts and operation panel keys. Components at the Front of the Printer Components at the Rear of the Printer Operation Panel Machine Parts…
-
Page 28: Components At The Front Of The Printer
Components at the Front of the Printer Top Cover Paper Stopper Top Tray Operation Panel USB Memory Slot Right Cover Paper Cassette Front Cover MP Tray 10 Subtray Components at the Rear of the Printer 11 Network Interface Connector 12 USB Interface Connector 13 Rear Cover 14 Power Cord Connector 15 Power Switch…
-
Page 29: Operation Panel
Operation Panel Indicators Message Display Cursor Keys [GO] Key [Cancel] Key [OK] Key [MENU] Key Machine Parts…
-
Page 30
Machine Parts… -
Page 31: Loading Paper
Loading Paper This chapter explains how to load paper into the cassette or MP tray Preparing the Paper Loading Paper into Cassette Loading Paper into MP (Multi-Purpose) Tray Loading Paper…
-
Page 32: Preparing The Paper
Preparing the Paper After removing paper from the packaging, fan through the sheets to separate them prior to loading. If using paper that has been folded or is curled, straighten it prior to loading. Failure to do so may result in a paper jam. IMPORTANT Ensure paper is not stapled and clips are removed.
-
Page 33
Adjust the paper length guide to the paper size required. If you are going to use paper that is longer than A4, pull out the extension paper cassette by pushing the release lever one by one and adjust it to the desired paper size. Load the paper in the cassette. -
Page 34
Insert the paper cassette into the slot in the printer. Push it straight in as far as it will go. There is a paper gauge on the left side of the front of the paper cassette to indicate the remaining paper supply. When paper is exhausted, the pointer will go down to the level of (empty). -
Page 35: Loading Paper Into Mp (Multi-Purpose) Tray
Loading Paper into MP (Multi-Purpose) Tray This machine can load up to 50 sheets of 11 × 8 1/2″ or A4 paper (80 g/m²) into the MP tray. Pull the MP tray towards you until it stops. Adjust the position of the paper guides on the MP tray. Standard paper sizes are marked on the MP tray.
-
Page 36: Paper Stopper
Note If the paper is considerably curled in one direction, for example, if the paper is already printed on one side, try to roll the paper in the opposite direction to counteract the curl. Printed sheets will then come out flat. Correct Incorrect When loading envelope, place with the envelope flap closed and…
-
Page 37: Connecting And Printing
Connecting and Printing This chapter explains how to start up the printer, print from your PC, and use the application software included in the DVD-ROM. Connections Changing Network Interface Parameters Printing a Network Interface Status Page Command Center RX Installing the Printer Driver 3-14 Printing 3-21…
-
Page 38: Connections
Connections This section explains how to start up the printer. Connecting the USB Cable Follow the steps as below for connecting the USB cable. Connect the USB cable to the USB Interface Connector. Note Use a USB cable with a rectangular Type A plug and a square Type B plug.
-
Page 39: Connecting The Power Cord
Connecting the Power Cord Install the printer close to an AC wall outlet. If an extension cord is used, the total length of the power cord plus extension should be 5 meters (16 feet) or less. Note Ensure the printer’s power switch is off. Only use the power cord supplied with the printer.
-
Page 40: Changing Network Interface Parameters
Changing Network Interface Parameters This printer supports TCP/IP, TCP/IP (IPv6), IPP, SSL Server and the IPSec protocols and Security Level. The table below shows the items required for each of the settings. Configure the printer’s network parameters as appropriate for your PC and your network environment.
-
Page 41
Menu Submenu Setting SSL Server On/Off On/Off 3DES On/Off On/Off IPP over SSL On/Off HTTPS On/Off IPSec On/Off LAN Interface Auto/ 10BASE-Half/ 10BASE-Full/ 100BASE-Half/ 100BASEFull/ 1000BASE-T Security Level High/Low Note After all network related settings have been done, turn the machine OFF and ON again. This is mandatory to make the settings effective! Connecting and Printing… -
Page 42: Printing A Network Interface Status Page
Printing a Network Interface Status Page You can print out a status page for the network interface. The network status page shows the network addresses, and other information under various network protocols about the network interface. Adjust/Maintenance Adjust/Maintenance is used to adjust the print quality and to carry out printer maintenance.
-
Page 43: Command Center Rx
Command Center RX If the machine is connected to the network, you can configure various settings using Command Center RX. This section explains how to access Command Center RX, and how to change security settings and the host name. For details on Command Center RX, refer to the Command Center RX User Guide.
-
Page 44
Accessing Command Center RX Launch your Web browser. In the address or location bar, enter the machine’s IP address or the host name. Examples: https://192.168.48.21/ (for IP address) https://P001 (if the host name is «P001») The web page displays basic information about the machine and Command Center RX as well as their current status. -
Page 45: Changing Security Settings
Changing Security Settings This section explains how to change the security settings. Access Command Center RX by referring to Accessing Command Center RX on page 3-8. From the Security Settings menu, select the setting you want to configure. The configurable settings are Device Security, Network Security, and Certificates.
-
Page 46: Changing Device Information
Changing Device Information Change the device information of the machine. Access Command Center RX by referring to Accessing Command Center RX on page 3-8. From the Device Settings menu, select System. Enter the device information, and then click Submit. IMPORTANT After changing the setting, restart the network or turn the machine OFF and then ON.
-
Page 47
E-mail settings By configuring the SMTP settings, you can send E-mail notifications on completed jobs. To use this function, this machine must be connected to a mail server using the SMTP protocol. In addition, check the following. • The network environment used to connect this machine to the mail server A full-time connection via a LAN is recommended. -
Page 48
Enter the appropriate values to each field. Setting Description SMTP Set to send e-mail from the machine. SMTP Protocol Set SMTP protocol. Set the SMTP (E-mail TX) setting to On on the Protocol Settings page. SMTP Server Enter the host name or IP address of the SMTP server. Name SMTP Port Specify the port number to be used for SMTP. -
Page 49
Setting Description E-mail E-mail Size Limit Enter the maximum size of E-mail that can be sent in kilobytes. Send When E-mail size is greater than this value, an error message Settings appears and E-mail sending is cancelled. Use this setting if you have set E-mail Size Limit for SMTP server. -
Page 50: Installing The Printer Driver
Installing the Printer Driver Ensure the printer is plugged in and connected to the PC before installing the printer driver from the DVD-ROM. Note Installation on Windows must be done by a user logged on with administrator privileges. When connected by USB cable, Plug and Play is disabled on this device when in Sleep mode.
-
Page 51
Select the device to be installed. You can also select Use host name for port name and set to use the host name of the standard TCP/IP port. (A USB connection cannot be used.) Note The machine cannot be detected unless it is on. If the computer fails to detect the machine, verify that it is connected to the computer via a network or USB cable and that it is turned on and click… -
Page 52
Custom Install The following procedure is an example for installing the software in Windows 7 using Custom Install. Insert the DVD-ROM. Note Installation on Windows must be done by a user logged on with administrator privileges. If the Welcome to the Found New Hardware Wizard dialog box displays, select Cancel. -
Page 53
Select the device to be installed and driver to be installed, and then click the arrow button to move it to the Products to Install list. Select the utility to be installed, and then click the arrow button to move it to the Products to Install list. Note To install Status Monitor, it is necessary to install Microsoft .NET Framework 4.0 beforehand. -
Page 54: Uninstalling The Software
Uninstalling the Software Perform the following procedure to delete the Software from your computer. Note Uninstallation on Windows must be done by a user logged on with administrator privileges. Click Start button on the Windows and then select All Programs, Kyocera, and Uninstall Kyocera Product Library to display the Uninstall Wizard.
-
Page 55
Double-click the Kyocera icon. Double-click OS X 10.5 or higher. Double-click Kyocera OS X 10.5+. The printer driver installation program starts up. Install the printer driver as directed by the instructions in the installation software. This completes the printer driver installation. If a USB connection is used, the machine is automatically recognized and connected. -
Page 56
Click the plus symbol (+) to add the installed printer driver. Click the IP icon for an IP connection and then enter the IP address and printer name. The number entered in Address will automatically appear in Name. Change if needed. Note When using a Bonjour connection, select Default and click the item that appears in Printer Name. -
Page 57: Printing
Printing This section explains the printing procedure from an application software. You can specify the printing settings from each tab on KX Driver. KX Driver is stored in the DVD-ROM (Product Library). For more information, refer to the Printer Driver User Guide in the DVD-ROM. About KX Driver KX Driver consists of the following tabs.
-
Page 58: Printing From Application Software
Printing from Application Software The steps required to print a document created with an application are explained below. You can select the printing Paper Size and Output Destination. Load the paper required into the paper cassette. From the application File menu, select Print. The Print dialog box displays.
-
Page 59: Printing By Airprint
Printing by AirPrint AirPrint is a printing function that is included standard in iOS 4.2 and later products, and Mac OS X 10.7 and later products. This function enables you to connect and print to any AirPrint compatible device without installing a printer driver. To allow the machine to be found when printing by AirPrint, you can set machine location information in Command Center RX.
-
Page 60: Status Monitor
Status Monitor The Status Monitor monitors the printer status and provides an ongoing reporting function. Note When you activate Status Monitor, check the status below. • KX Driver is Installed. • Either Enhanced WSD or EnhancedWSD(SSL) are set to On in Security section of the Advanced Operation Guide.
-
Page 61
Printing Progress Tab The status of the print jobs is displayed. Job list Status icon Select a job on the job list and it can be canceled using the menu displayed with a right-click. Paper Tray Status Tab Information is displayed about the paper in the printer and about the amount of paper remaining. -
Page 62
Alert Tab If an error occurs, a notice is displayed using a 3D image and a message. Status Monitor Context Menu The following menu is displayed when the settings icon is clicked. Settings icon • Command Center RX If the printer is connected to a TCP/IP network and has its own IP address, use a web browser to access the Command Center RX to modify or confirm the network settings. -
Page 63
Status Monitor Notification Settings The Status Monitor settings and event list details are displayed. Select whether notification is performed when an error in the event list occurs. Select Enable event notification. If this setting is set to Off, then the Status Monitor will not start up even when printing is executed. -
Page 64: Energy Saver Function
Energy Saver Function Low Power Mode When the set time (factory setting is 1 minute) elapses after the printer is last used, the printer automatically enters low power mode. The message display backlight and lights turn off and power consumption is reduced.
-
Page 65
Note that ambient environmental conditions, such as ventilation, may cause the machine to respond more slowly. For more information about configuring settings, refer to Sleep Timer (Sleep timer timeout setting) section of the Advanced Operation Guide. Energy Saver Mode This mode reduces power consumption even more than quick recovery mode, and allows Sleep mode to be set separately for each function. -
Page 66
3-30 Connecting and Printing… -
Page 67: Maintenance
Maintenance This chapter explains how to replace the toner container and clean the printer General Information Toner Container Replacement Cleaning the Printer Prolonged Non-Use and Moving of the Printer Maintenance…
-
Page 68: General Information
General Information This chapter describes basic maintenance tasks you can perform for the printer. You can replace the toner container according to the printer’s display. Also, the internal parts need periodic cleaning. Note Information Collection on Memory Chips — The memory chip attached to the toner container is designed to improve convenience for the end user;…
-
Page 69: Replacing The Toner Container
Replacing the Toner Container This section explains how to replace the toner container. CAUTION Do not attempt to incinerate parts which contain toner. Dangerous sparks may cause burns. IMPORTANT During toner container replacement, temporarily move storage media and computer supplies (such as floppy disks) away from the toner container.
-
Page 70
Take the new toner container out of the toner kit. Shake the new toner container at least 5 times as shown in the figure in order to distribute the toner evenly inside the container. Remove the label from the toner container. Install the new toner container in the printer. -
Page 71: Maintenance Kit Replacement
Turn the lock lever to the lock position. Close the top cover. Maintenance Kit Replacement When the machine prints 100,000 pages, a message is displayed indicating that the maintenance kit should be replaced. The maintenance kit must then be replaced immediately. To replace the maintenance kit, contact your service technician.
-
Page 72: Cleaning The Printer
Cleaning the Printer To avoid print quality problems, the interior of the printer must be cleaned with every toner container replacement. Open the top cover and front cover. Lift the developer unit together with the toner container out of the printer.
-
Page 73
Place the drum unit flat on a clean, level surface. IMPORTANT Do not place the drum unit on end. Use a clean, lint free cloth to clean dust and dirt away from the metal registration roller. IMPORTANT Take care not to touch the transfer roller (black) during cleaning. -
Page 74
Return the developer unit to its position, aligning the guides at both ends with the slots in the printer. Then, close the front cover and top cover. Use a lint free cloth to clean dust and dirt away from the vent on the left and the right side of the machine. -
Page 75: Prolonged Non-Use And Moving Of The Printer
Prolonged Non-Use and Moving of the Printer Prolonged Non-use If you ever leave the printer unused for a long period of time, remove the power cord from the wall outlet. We recommend you consult with your dealer about the additional actions you should take to avoid possible damage that may occur when the printer is used next time.
-
Page 76
4-10 Maintenance… -
Page 77: Troubleshooting
Troubleshooting This chapter explains how to handle printer problems, understand error messages, and clear paper jams General Guidelines Print Quality Problems Error Messages Ready, Data, and Attention Indicators Clearing Paper Jams 5-10 Troubleshooting…
-
Page 78: General Guidelines
General Guidelines The table below provides basic solutions for problems you may encounter with the printer. We suggest you consult this table to troubleshoot the problems before calling for service repairs. Symptom Check Items Corrective Actions Print quality is poor. –…
-
Page 79: Print Quality Problems
Print Quality Problems The tables and diagrams in the following sections define print quality problems and the corrective action you can conduct to solve the problems. Some solutions may require cleaning or replacing parts of the printer. If the suggested corrective action will not solve the problem, call for service representative.
-
Page 80
Printed Results Corrective Action Faint or blurred printing Check the toner container and if necessary replace. Refer to Toner Container Replacement on page 4-2. Clean the charger wire. Refer to Cleaning the Printer on page 4-6. Gray background Check the toner container and if necessary replace. Refer to Toner Container Replacement on page 4-2. -
Page 81: Error Messages
Error Messages The following table lists errors and maintenance messages that you can be dealt with by yourself. If Call service or Error.Power off. is displayed, turn off the printer then turn it back on to see if the printer has recovered. If the printer has not recovered, turn off the printer, disconnect the power cord, and contact your service representative or authorized service center.
-
Page 82
Message Corrective Action Current print processing cannot continue because of occurrence of KPDL error which is categorized by ##. To print out an error report, display >>Error Report from the KPDL error menu system, and select On. Press [GO] to resume printing. You can abandon printing Press GO by pressing [Cancel]. -
Page 83
Message Corrective Action Toner has run out in the toner container. Replace the toner container using a new toner kit. The printer does not operate when this message is displayed. Replace toner Replace the toner container using a new toner kit. Toner low Displayed when the installed toner is not the original Kyocera product. -
Page 84: Storage Error Codes
Storage Error Codes USB Flash Memory Errors Code Meaning The amount of data that can be saved at once has been exceeded. Split the large file into multiple smaller files. The USB flash memory is write protected. Remove the write protection. The USB flash memory is broken.
-
Page 85: Ready, Data, And Attention Indicators
Ready, Data, and Attention Indicators The following indicators light during normal operation and whenever the printer needs attention. Depending on the status of lighting, each indicator has the following meaning: Indicator Description Flashing. Indicates an error that you can resolve. Refer to Error Messages on page 5-5.
-
Page 86: Clearing Paper Jams
Clearing Paper Jams If paper jams in the paper transport system, or no paper sheets are fed at all, the Paper jam message appears and the location of the paper jam (the component where the paper jam has occurred) is also indicated.
-
Page 87: General Considerations For Clearing Jams
Paper jam message Paper jam location Description Reference page Paper jam inside the printer. page 5-15 Paper jam Printer Paper jam at the rear cover. page 5-17 Paper jam Rear Cover General Considerations for Clearing Jams Bear in mind the following considerations when attempting paper jam removal: CAUTION When pulling the paper, pull it gently so as not to tear it.
-
Page 88
MP Tray Remove the paper jammed at the MP tray. IMPORTANT Do not try to remove paper that has already been partially fed. Proceed to Inside the Printer on page 5-15. Reload the MP tray. Open and close the top cover to clear the error and the printer warms up and resumes printing. -
Page 89
Paper Cassette/Paper Feeder Pull out the cassette or optional paper feeder. Remove any partially fed paper. IMPORTANT Do not try to remove paper that has already been partially fed. Proceed to Inside the Printer on page 5-15. Note Check to see if paper is loaded correctly. If not, reload the paper. -
Page 90
Duplexer Paper is jammed in the duplexer. Remove the jammed paper using the procedure given below. Pull the paper cassette all the way out of the printer. Open the duplexer’s cover in front of the printer and remove any jammed paper. Open the duplexer’s cover at the rear of the printer and remove any jammed paper. -
Page 91: Inside The Printer
Inside the Printer Pull the paper cassette all the way out of the printer. Remove any partially fed paper. IMPORTANT Do not try to remove paper that has already been partially fed. Proceed to step 2. Open the top cover and front cover, and lift the developer unit together with the toner container out of the printer.
-
Page 92
Return the drum unit to its position, aligning the guides at both ends with the slots in the printer. Insert the developer unit together with the toner container, back into the machine. Close the top cover and the front cover. The printer warms up and resumes printing. -
Page 93: Rear Cover
Rear Cover Open the rear cover and remove the jammed paper by pulling it out. CAUTION The fuser unit inside the printer is hot. Do not touch it, as it may result in burn injury. If the paper is jammed inside the fuser unit, open the fuser cover and remove the paper by pulling it out.
-
Page 94
5-18 Troubleshooting… -
Page 95: Appendix
Appendix This section lists the following information of this printer. Specifications Environmental Standard Requirements Appendix…
-
Page 96: Specifications
Specifications Note These specifications are subject to change without notice. Item Description Type Desktop Printing Method Electrophotography, laser scan Paper Weight Cassette 60 to 120 g/m² (Duplex: 60 to 105 g/m²) MP Tray 60 to 220 g/m² Paper Type Cassette Plain, Preprinted, Bond, Recycled, Rough, Letterhead, Color (Colour), Prepunched, High Quality, Custom 1 to 8 MP Tray…
-
Page 97
Item Description Interface USB Interface: 1 USB Memory Slot: 1 Network Interface: 1 (10 BASE-T/100 BASE-TX/1000BASE-T) Network Option eKUIO slot: 1 PRESCRIBE Emulation PCL 6, KPDL, KPDL (AUTO), Line Printer, IBM Proprinter, EPSON LQ-850 Memory Standard 256 MB Maximum 1280 MB Dimension (W ×… -
Page 98: Environmental Standard Requirements
Environmental Standard Requirements This machine conforms to the following environmental standard requirements. • Time for switching to Sleep mode (default): 15 minutes (For Europe), 1 minute (Except for Europe) • Time for switching to Low power mode (default): 1 minute •…
-
Page 99: Index
Index troubleshooting …………5-2 Cassette loading paper …………2-2 Charger cleaner …………… 4-7 Inside the printer Cleaning clearing paper jams ……….5-15 charger wire ………….. 4-7 Installation method printer …………… 4-6 custom mode …………3-16 registration roller …………4-7 express mode …………3-14 Clearing paper jams Installation precautions ………..xviii duplexer …………..
-
Page 100
Paper gauge …………..2-4 Turning on the power …………3-3 Paper guides …………..2-5 Paper length guide …………2-3 Paper stopper components …………..1-2 USB cable Possible paper jam locations ………5-10 connection …………..3-2 Power cord USB interface connector connection …………..3-3 components ………….. 1-2 Power cord connector components …………..1-2 Power switch… -
Page 101
We recommend the use of our own brand supplies. We will not be liable for any damage caused by the use of third party supplies in this machine. -
Page 102
KYOCERA Document Solutions America, Inc. KYOCERA Document Solutions Asia Limited 16/F.,Mita Centre, 552-566, Castle Peak Road Headquarters Tsuenwan, NT, Hong Kong 225 Sand Road, Phone: +852-2610-2181 Fairfield, New Jersey 07004-0008, USA Fax: +852-2610-2063 Phone: +1-973-808-8444 Fax: +1-973-882-6000 KYOCERA Document Solutions Latin America (China) Corporation 8240 NW 52nd Terrace Dawson Building, Suite 100… -
Page 103
KYOCERA Document Solutions Europe B.V. KYOCERA Document Solutions Bloemlaan 4, 2132 NP Hoofddorp, Deutschland GmbH The Netherlands Otto-Hahn-Strasse 12, 40670 Meerbusch, Phone: +31-20-654-0000 Germany Fax: +31-20-653-1256 Phone: +49-2159-9180 Fax: +49-2159-918100 KYOCERA Document Solutions Nederland B.V. Beechavenue 25, 1119 RA Schiphol-Rijk, KYOCERA Document Solutions Austria GmbH The Netherlands Eduard-Kittenberger-Gasse 95, 1230 Vienna,… -
Page 104
Rev1.0 2014.7 2PJKDEN001…