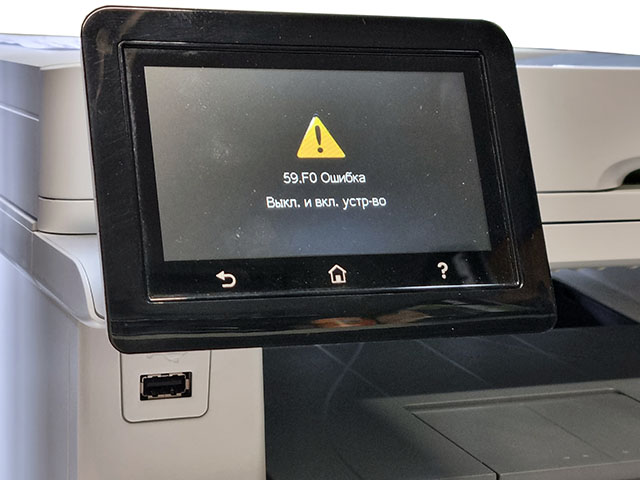
Ошибка 59.F0 — это довольно частая проблема цветных МФУ HP LaserJet Pro M477 и M377. Причина заключается в датчике внутри узла ленты переноса, контроллер принтера получает неверный сигнал из-за дребезга контактов. Компания HP улучшила обработку сигнала с этого датчика в более свежей прошивке контроллера, и в большинстве случаев проблема убирается обновлением. Нам понадобится только флешка и сам файл прошивки, разбирать ничего не надо.
Инструкция по обновлению прошивки контроллера
Инструкция по исправлению ошибки 59.F0 актуальна для моделей HP LaserJet Pro M377dw, M452dw, M477fnw, M477fdn, M477fdw, у которых есть USB разъем для подключения флешки.
Скачайте архив с файлом прошивки по этой ссылке. Распакуйте из архива файл dccv1_51.prn в корневой каталог на флешку, отформатированную в формате FAT32.
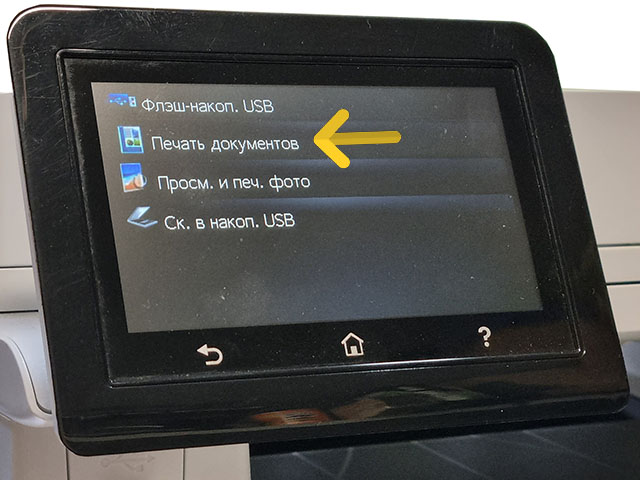
Включите принтер, подождите выхода в готовность, если он выдал ошибку 59.F0 — это не помешает. Вставьте флешку в USB порт принтера, через некоторое время должен появиться запрос с выбором действия с флешкой. Выберите «Печать документов». Если запрос не появился сам, то в главном меню выберите иконку флешки, если на экране ошибка 59.F0, то просто нажмите центральную кнопку для выхода на главный экран.
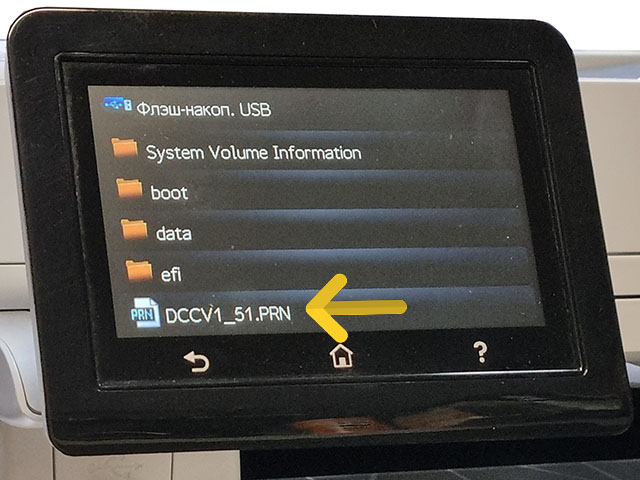
На экране выбора документа для печати найдите файл DCCV1_51.PRN, который вы записали ранее, и нажмите на строчку с его названием.
На экране появится запрос на печать следующего файла, откажитесь от этого, нажмите на экране строчку «Нет».
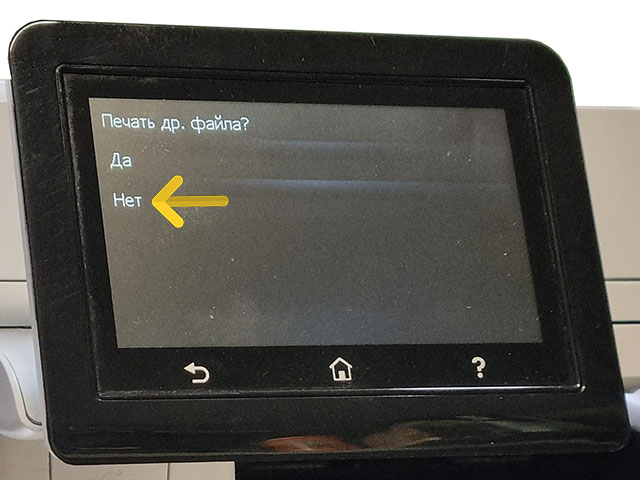
Дальше нужно подождать до 5 минут, пока не закончится процедура прошивки. По окончании процесса обновления контроллера принтер перезагрузится. Чтобы убедиться, что прошивка прошла успешно, распечатайте отчет о конфигурации, в разделе «Сведения об изделии» в последней строчке должен быть указан номер контроллера: 15101.


Create an account on the HP Community to personalize your profile and ask a question
Your account also allows you to connect with HP support faster, access a personal dashboard to manage all of your devices in one place, view warranty information, case status and more.

02-21-2019
10:32 AM

HP Recommended
- Mark as New
- Bookmark
- Subscribe
- Permalink
- Flag Post
Product: Color Laserjet MFP M477fnw
Operating System: Microsoft Windows 10 (64-bit)
Sorted through others with this error message, but didn’t see anything conclusive. According to the service manual the 59.F0 error says to replaced the Drum Assembly Motor which we did, but we are still experiencing the same problem. Sometimes you can power cycle and get a few print jobs before the error comes up again. As mentioned we have replaced the drum assembly motor, reseated the transfer unit and updated the firmware. The service manual gives no other part to try for this specific error.
1 ACCEPTED SOLUTION

AlS77
268
79
17
82,532
Level 6
08-05-2019
07:23 PM
HP Recommended
- Mark as New
- Bookmark
- Subscribe
- Permalink
- Flag Post
It sounds like they updated the formatter firmware, not the DC Controller firmware. There are two different firmware that can be updated. Most everyone updates the formatter firmware which is publicly available from HP, but the DC Controller firmware (which is the link I supplied) will fix the 59 error and is not normally publicly available. You should keep this for future issues that you may run into.
9 people found this reply helpful
Was this reply helpful?
Yes
No
25 REPLIES 25
Was this reply helpful?
Yes
No

![]()
Valsimot
9,891
1,857
1,084
82,784
Level 13
02-22-2019
01:09 PM
HP Recommended
- Mark as New
- Bookmark
- Subscribe
- Permalink
- Flag Post
On M477 series the 59.F0 error is caused by a defective transfer belt.
Was this reply helpful?
Yes
No
02-22-2019
01:15 PM
HP Recommended
- Mark as New
- Bookmark
- Subscribe
- Permalink
- Flag Post
From what I’ve read other places, your solution seems the most plausible. If we opt for the transfer belt (as opposed to replacing the unit), I will let you know how it turns out. Thanks.
Was this reply helpful?
Yes
No
03-14-2019
03:40 PM
HP Recommended
- Mark as New
- Bookmark
- Subscribe
- Permalink
- Flag Post
Hi Friend,
Did you solve your printer problem after change IBT? I have M377 model, came with the same code, 59.F0. After we changed the Drum motor, still shows the same error message.
Was this reply helpful?
Yes
No
03-15-2019
06:05 AM
HP Recommended
- Mark as New
- Bookmark
- Subscribe
- Permalink
- Flag Post
Our client has not opted yet for the repair so I don’t know yet. If they do the repair, I will post the results.
1 person found this reply helpful
Was this reply helpful?
Yes
No
AlS77
268
79
17
82,562
Level 6
08-04-2019
03:51 AM
— edited
02-19-2020
09:17 PM
HP Recommended
- Mark as New
- Bookmark
- Subscribe
- Permalink
- Flag Post
The 59.F0 error is typically the result of a small sensor switch inside the ITB (Intermediate Transfer Belt) assembly that is not working correctly. It will have variable amounts of resistance as it is activated during the course of operation and causes the error. It’s supposed to detect and report to the controller when the plates are moved into position to press the belt into contact for the toner cartridge drums for color printing. HP came out with a new version of firmware for the DC Controller board to ignore this shortly after I brought it to HP’s attention awhile ago. The previous fix was to replace the ITB assy., which worked most of the time, but the firmware update should be tried first as it is quick and simple and we’ve had great success with it so far.
Here’s the link for it:
https://www.dropbox.com/sh/liy40fjbmbfqhmj/AAAHQOsA-2Ap-upz-oG1nA_Fa?dl=0
13 people found this reply helpful
Was this reply helpful?
Yes
No
08-05-2019
06:20 AM
HP Recommended
- Mark as New
- Bookmark
- Subscribe
- Permalink
- Flag Post
Hello Jason, Sorry for such a late reply. I just found out that the client replaced the transfer belt. It did not fix the problem. Another post said the firmware which was already done. The client ended up replacing the unit.
Was this reply helpful?
Yes
No
AlS77
268
79
17
82,533
Level 6
08-05-2019
07:23 PM
HP Recommended
- Mark as New
- Bookmark
- Subscribe
- Permalink
- Flag Post
It sounds like they updated the formatter firmware, not the DC Controller firmware. There are two different firmware that can be updated. Most everyone updates the formatter firmware which is publicly available from HP, but the DC Controller firmware (which is the link I supplied) will fix the 59 error and is not normally publicly available. You should keep this for future issues that you may run into.
9 people found this reply helpful
Was this reply helpful?
Yes
No
08-06-2019
06:02 AM
HP Recommended
- Mark as New
- Bookmark
- Subscribe
- Permalink
- Flag Post
Yes, you are right. It was the formatter firmware and not the DC Controller Firmware that was updated. Thank you for the distinction. I appreciate the info. Too bad HP doesn’t make that info more public. It would go a long way for customer relations and keep people from switching to a different brand. Thanks again.
1 person found this reply helpful
Was this reply helpful?
Yes
No
-
Previous
-
- 1
- 2
- 3
-
Next
![]()
Be alert for scammers posting fake support phone numbers and/or email addresses on the community.
If you think you have received a fake HP Support message, please report it to us by clicking on «Flag Post».
† The opinions expressed above are the personal opinions of the authors, not of HP. By using this site, you accept the Terms of Use and Rules of Participation.

-
English
Open Menu

† The opinions expressed above are the personal opinions of the authors, not of HP. By using this site, you accept the <a href=»https://www8.hp.com/us/en/terms-of-use.html» class=»udrlinesmall»>Terms of Use</a> and <a href=»/t5/custom/page/page-id/hp.rulespage» class=»udrlinesmall»> Rules of Participation</a>.
Принтер или МФУ HP CLJ Pro M377 / M452 / M477 и другие модели выдают ошибку 59.F0 или 59.C0 выкл. и вкл. Устройство. Давайте разберемся в проблеме. Данная ошибка возникает после определенного пробега устройства. Ошибки в датчиках или по другому в концевиках. Ошибка 59.F0 означает что неисправна лента переноса, но если лента не прошла свой ресурс заявленным производителем, то какой смысл ее менять, да и к тому же это не дешевое удовольствие.
Что делать с ошибкой 59.C0 и 59.F0
Разберем в чем неисправность ошибки, в ленте переноса изображения есть микрик, в котором со временем окисляется контакт и мозги устройства сигнализируют ошибку, не дающую дальнейшей работы на оборудовании.
Что можно сделать в данной ситуации, самое простое заменить ленту, второе очистка микрика от окислов. Чтобы до него добраться сначала надо разобрать принтер и извлечь ленту переноса. Далее становится труднее, так как повредив перенос изображения, вы автоматически попадаете на замену ее. Сам датчик не разбирается легко, концевик можно извлечь с помощью иголок не повредив его крепление. Контакты нужно очистить и привезти в порядок. Мультиметр должен показывать сопротивление не больше одного ома. Чтоб сэкономить время и деньги вы всегда можете обратиться к нам по ремонту принтеров.
Замена ленты переноса или профилактика аппарата

При разборке узла переноса нужно быть очень внимательным, так как повредив узел уже нельзя будет добиться идеальной печати документов. По работе мастер извлекает ленту переноса, разбирает ее полностью, проводит профилактику, затем добирается до виновника ошибки. Так как к нам очень много заходит аппаратов с этими ошибками, у нас есть инструмент который легко извлекает ножку микрика из датчика.
Провести ремонт в нашем сервисе довольно просто, создав заявку или обратившись по другим контактам. Занимает по времени от одного до двух дней в зависимости от загруженности инженеров. Насколько долго это прослужит, прослужит до конца ресурса ленты переноса.
You need to have someone fix it for you.
But if you want do it yourself……..
It’s caused by so called sticky solenoid which seat behind formatter, ADF……
Not so easy to get to it. You need to take out ADF,left,right,upper case…. first.
Download a service manual first.
http://westhillprinters.blogspot.com/2011/12/sticky-solenoids.html
It controls black color and the other three colors (at the same time)to work with each other.
But because of sticky problem you got 59.C0 error.
What you need to do is to resolve the sticky solenoid issue.
Not an easy job to do but it’s not so difficult either.
No need to really take apart everything before you to get to it .
What you really need to do is making a piece of V shape of paper its dimention maybe is 0.3 * 1.2 cm.
And find some ways to insert it into and between the solenoid’s two metals to prevent the sticky issues happens again.
It will always has a small hole between gears and plastics. Find it out and insert the V shape paper into it.
After done that you will be fine.
Don’t even try to take apart everything to get to the solenoid it’s too hard to do that and will fail to reassembly back.
You need a thin paper don’t make it too thick!


Do you have an HP color laserjet printer and are experiencing the 59.f0 error? If so, don’t worry – you’re not alone! This is a common error that can occur on many different models of HP printers, especially for HP Color LaserJet M452Nw, M277, and M477dw.
In this guide, we will discuss what causes the HP 59.f0 error and how to fix it. We will also provide some tips to help prevent this error from happening in the future.
[lwptoc numerationSuffix=”none” title=”Contents”]
Basic Printer Checkup
Before you start troubleshooting the 59.f0 error, it’s a good idea to do a basic printer checkup on your HP printer. This can help identify any potential problems that may be causing your HP laserjet printer to malfunction. Here are a few things you can do to get started with the basic printer checkup.
- Turn on your HP laserjet printer.
- Check your printer screen, it should not have any display or button issue.
- Now, place any document on your scanner glass, then click on the copy button. It does not matter if you copy in black or copy in color. You may select either one of them.
If you can copy successfully, you can proceed to the more advanced troubleshooting steps below.
If you cannot copy from your printer, then you have a much bigger problem and you might need to investigate further.
How To Fix 59.f0 Error On your Printer
Now that you’ve done a basic checkup of your printer, it’s time to start troubleshooting the 59.f0 error. There are a few different things you can try to fix this error.
Restart Your Printer
One simplest and most effective way to fix many printer errors is to simply turn off your printer. We highly recommend doing a hard reset.
To do this, you just unplug the power source at the back of your HP printer and wait a couple of minutes before you insert back the plug into your printer and turn it back on.
Check Your Toner Cartridges
If you’ve recently replaced your toner cartridges or installed a new one, this could be the root cause of your 59.f0 error. We recommend checking to see if the toner cartridge is properly seated in its slot and that there are no loose wires or connections.
You should also check the expiration date on your toner cartridge. If it’s been more than six months since you last replaced it, the toner might be dried out and causing the error. In this case, you’ll need to replace the toner cartridge. To ensure that you are only using HP genuine toners, check these items out.
Update Your Printer Firmware
If you’re still experiencing the HP 59.f0 error after restarting your printer and checking your toner cartridges, it’s time to try updating your printer firmware. Firmware is the software that controls your printer and tells it how to function.
Sometimes, there are bugs in the firmware that can cause your printer to display errors or behave erratically. By updating your printer firmware, you can often fix these issues.
To update your printer firmware, you’ll need to go to the HP website and download the latest version of the firmware for your printer model. Once you’ve downloaded the firmware, follow the instructions on how to install it on your printer.
If you’re still having trouble with the 59.f0 error after trying all of these troubleshooting steps, we recommend doing our expert fix for the 59.f0 error code.
Advanced Troubleshooting Steps To Fix 59.f0 Error On HP Printer
Access the inside of your HP printer.
Open the access door on the right of your HP printer.
Locate the intermediate transfer belt.
Hold the blue lever inside and carefully pull it on both ends of this transfer belt assembly. You’ll need to pull it towards you for easy access so make sure you’re doing it correctly!
Look for two large handles.
Once you’ve pulled out enough of the transfer belt, two large handles should pop free.
Remove the transfer belt
Hold both large handles on the transfer belt and pull until it is completely free from its connection.
Installing the new ITB
The new transfer belt should be installed in reverse order. Be careful not to touch the surface of your transfer belt while installing it. This can cause some serious damage to your HP printer.
Setting up the newly installed ITB
Go to the “Control Panel” of your HP printer and press the “Home” button, so you can start resetting the New Transfer Kit Setting. At the “Administration” menu, click on “Manage Supplies”.
Make sure the New Transfer Kit is detected
Click on the “Rest Supplies” option and then choose “New Transfer Kit.” Click on Yes and OK, respectively.
Do a printer calibration
After you have replaced the transfer belt to fix the 59.f0 error, you need to perform a full calibration of your HP printer. Calibration ensures that your printer’s colors are accurate, consistent, and of the highest quality.
Testing The ITB To Ensure HP 59.f0 Error Fix Works
There are a few ways to test your Intermediate Transfer Belt. One way is by rotating the gears and checking for any fluctuations in the flag when you turn the white gear, if there’s an issue with it then replace it with a new ITB.
If the ITB is not damaged after checking, proceed with examining the Sensor SR9. The location of Sensor SR9 in your HP printer is inside the ITB Cavity. On your printer’s control panel, proceed to click on the home button and look for the Diagnostics menu. Look for Manual Sensor Test and click the “OK” button.
Once you release the SR9 flag from inside of the ITB cavity, check to see if your sensor responds by pressing down on it. If not then sensor replacement may be needed or something else might have happened that caused this problem on your HP printer. If you’re still having trouble, we recommend taking your printer to an HP service center near you.