Войти или зарегистрироваться
Pitco PITCO серии SE, SEH
Тема в разделе «Фритюрницы», создана пользователем Demagogys, 19 фев 2012.
-
Demagogys
Команда форума
Администратор
СпециалистИнструкция на фритюрницы PITCO серии SE, SEH
Вложения:
-
Инструкция на фритюрницы PITCO серии SE,SEH(rus).doc
- Размер файла:
- 467,5 КБ
- Просмотров:
- 487
-
-
Demagogys
Команда форума
Администратор
СпециалистИнструкция на фритюрницы PITCO SEH-50, тех. обслуживание и эл. схемы
Вложения:
-
Инструкция на фритюрницы PITCO SEH-50,ТО и эл. схемы(rus).doc
- Размер файла:
- 3,6 МБ
- Просмотров:
- 251
-
-
Demagogys
Команда форума
Администратор
СпециалистИнструкция и деталировка на эл. фритюрницы PITCO
Вложения:
-
Инструкция на эл. фритюрницы PITCO(rus).doc
- Размер файла:
- 105,5 КБ
- Просмотров:
- 195
-
Деталировка на эл. фритюрницы PITCO(eng).pdf
- Размер файла:
- 3,1 МБ
- Просмотров:
- 144
-
-
Res
Региональный сервисПишет rprobeop se 14 кто сталкивался? Спасибо
(Вы должны войти или зарегистрироваться, чтобы ответить.)
Показать игнорируемое содержимое
- Похожие темы:
-

Pitco
PITCO DD-E24RUFM, DD24-RUFM(Gas)
Demagogys,
24 фев 2012, в разделе: Фритюрницы- Ответов:
- 1
- Просмотров:
- 5.241
-
Материнская плата для индукции вт-350t (3,5 квт) 900 серии ( с июня 2017 года)
ЯрославТехник,
1 окт 2022, в разделе: Витрина товаров- Ответов:
- 0
- Просмотров:
- 305
-
Магистраль (коллектор) подачи моющего средства для пароконвектоматов от electrolux серии aos
Вадим Венско,
14 сен 2022, в разделе: Витрина товаров- Ответов:
- 0
- Просмотров:
- 327
-
Eliwell
Ремонт контроллера IWP750 серии WP35D
Вадим Венско,
20 июл 2022, в разделе: Камеры холодильные- Ответов:
- 0
- Просмотров:
- 346
-
Руководство по эксплуатации контроллеров серии DTK Delta
Руст1975,
23 ноя 2021, в разделе: Контроллеры- Ответов:
- 0
- Просмотров:
- 585
-
Sveba Dahlen S-серии печь
Виталий Смирнов,
22 ноя 2021, в разделе: Печи- Ответов:
- 0
- Просмотров:
- 851
- Виталий Смирнов
- 22 ноя 2021
-
Diosna Тестомес серии SP
Леонид10,
16 июл 2021, в разделе: Тестомесы- Ответов:
- 2
- Просмотров:
- 876
Поделиться этой страницей
- Войти через Facebook
- Войти через Twitter
- Войти через Google
- Ваше имя или e-mail:
- У Вас уже есть учётная запись?
-
- Нет, зарегистрироваться сейчас.
- Да, мой пароль:
-
Забыли пароль?
-
Запомнить меня
Поиск
-
- Искать только в заголовках
- Сообщения пользователя:
-
Имена участников (разделяйте запятой).
- Новее чем:
-
- Искать только в этой теме
- Искать только в этом разделе
- Отображать результаты в виде тем
-
Быстрый поиск
- Последние сообщения
Больше…
-
Этот сайт использует файлы cookie. Продолжая пользоваться данным сайтом, Вы соглашаетесь на использование нами Ваших файлов cookie.
Accept
Узнать больше.Скрыть объявление

Содержание
- Проблемы пилота
- Горелка неисправна
- Проблемы контроля температуры
- Проблемы с фильтрацией масла

Frymaster — известный и часто используемый кулинарный инструмент в ресторанной индустрии. Если ваш Frymaster не работает эффективно, вы можете выполнить несколько шагов по устранению неполадок, чтобы диагностировать и устранить проблему. Типичные неисправности, с которыми может столкнуться Frymaster, обычно связаны с пилотом, горелкой, проблемами контроля температуры, фильтрацией масла или утечкой масла.
Проблемы пилота
Проверьте подачу газа. Убедитесь, что главный кран подачи газа открыт. Если он включен, но вы не можете зажечь Frymaster, возможно, засорилось пилотное отверстие или в газовых линиях есть воздух.
Очистите вокруг пилотного отверстия стальной щеткой, чтобы удалить весь мусор, который может засорить блок и препятствовать зажиганию пламени.
Проверьте, правильно ли подключен гибкий газовый шланг и подключена ли фритюрница.
Посмотрите, полностью ли закрыт сливной клапан, если у вас есть система фильтрации. Рукоятка клапана должна быть закрыта, чтобы питание поступало на газовый клапан, когда он взаимодействует с микровыключателем. Открытая ручка клапана — даже приоткрытая — не даст ему сработать.
Горелка неисправна
Поверните ручку горелки и зажгите пламя. Если огонь идет только с одной стороны или не горит со всех сторон должным образом, возможно, отверстия вашей горелки забиты. Выключите пламя, очистите отверстия металлической щеткой и снова зажгите.
Следите за колебаниями пламени. Это может быть вызвано колебаниями давления газа или воздуха в кухонной атмосфере.
Слушайте пламя горелки. Если он слишком шумный, давление газа может быть слишком высоким или газовый клапан заблокирован. Уменьшите давление и проверьте, не заблокирован ли газовый клапан, и удалите мусор металлической щеткой.
Проблемы контроля температуры
Проверьте температуру масла с помощью термостата или наконечника пирометра. Если температура не остается в пределах заданного значения, возможно, ваш термостат не калиброван, ручка или гибкий вал на валу термостата ослаблен, провод термостата отсоединен от блока или сломан, или термостат неисправен.
Проверьте провод, чтобы убедиться, что он подключен и не оборван. Если он отсоединен или болтается, подключите его. Если он сломался, придется заменить термостат.
Затяните ручку или вал термостата, если он ослаблен. Замените термостат, если эти решения не устранили проблемы с контролем температуры.
Проблемы с фильтрацией масла
Послушайте, чтобы определить, работает ли насос. Если насос работает, но масло не проходит через фильтр, посмотрите на фильтровальную бумагу и ее размер. Посмотрите на дно фильтровального лотка, чтобы убедиться, что уплотнительные кольца на месте. Если уплотнительные кольца отсутствуют или изношены, насос всасывает воздух и не позволяет фильтру работать должным образом.
Если насос не работает, дайте двигателю остыть не менее 15 минут. Найдите красный переключатель сброса на двигателе насоса, ближайшем к оператору, и нажмите его, чтобы перезапустить двигатель. Если двигатель перезапускается и насос начинает перекачивать, проверьте его эффективность. Если он запускается, но не перекачивает, насос может быть заблокирован из-за неправильного размера фильтра или неправильной установки, позволяющей проникать внутрь частицам пищи.
Отключите питание от системы фильтрации, снимите входной трубопровод с насоса и с помощью отвертки вручную поверните шестерни насоса назад, чтобы удалить застрявшие частицы, или поверните их вперед, чтобы более мягкие предметы прошли через насос.
Используйте шнек или дренажную змею, чтобы удалить частицы пищи, которые прошли и забили всасывающую трубку.
-
Привет. Кажется, ты используешь AdBlock. Наш форум развивается и существует за счет доходов от рекламы. Добавь нас в исключения =)
КАК ДОБАВИТЬ?

-
Ответить в тему
-
Создать тему
Рекомендованные сообщения
- Жалоба
-
#1
Всем Доброго дня! Такая проблема…Месяц назад на 9G5030 периодически при работе вылетала ошибка Water error…по совету форума замкнул два провода черных на датчике воды всё стало работать вновь.. без проблем. Но вот уже два дня..при запуске станка вновь вылетает Water error.. проводки от датчика надёжно скручены…при сбросе и запуске..начинает работать 1-5 сек. и вновь Water error…Что проверить или сделать?…луч идёт только с кнопки тест блока розжига трубки..можно ли снять датчик… а два шланга с него соединить между собой, понимаю неправильно..но это временно.Всё циркулирует через чиллер 3000…
- Цитата
Поделиться сообщением
Ссылка на сообщение
Поделиться на других сайтах
- Жалоба
-
#2
Нет ничего более постоянного чем временное!!) К тому же новогодняя пора, ажиотаж. Ну уберете вы датчик (это лементарно), потом окажется, что дело не в нем, а в недостатке давления. Сожгете трубу, будет фейверк на НГ. Проверьте напор (давление). Вы когда шланг пережимаете чиллер пищит?
- Цитата
Поделиться сообщением
Ссылка на сообщение
Поделиться на других сайтах
Награды пользователя


- Жалоба
-
#3
- Цитата
Поделиться сообщением
Ссылка на сообщение
Поделиться на других сайтах
- Жалоба
-
#4
Снимите шланг и проверьте напор. Вода вообще циркулирует? Я вот не помню, ваш чиллер оснащен звуковым сигналом!
- Цитата
Поделиться сообщением
Ссылка на сообщение
Поделиться на других сайтах
Награды пользователя
- Жалоба
-
#5
В настройках отключите water protect
- Цитата
Поделиться сообщением
Ссылка на сообщение
Поделиться на других сайтах
- Жалоба
-
#6
@PavelK МОЖНО УЗНАТЬ ГДЕ И КАК ОТКЛЮЧИТЬ… ВРУЧНУЮ ЧЕРЕЗ ДИСПЛЕЙ СТАНКА ИЛИ В ПРОГРАММЕ LASERWORK?
@PavelK МОЖНО УЗНАТЬ ГДЕ И КАК ОТКЛЮЧИТЬ… ВРУЧНУЮ ЧЕРЕЗ ДИСПЛЕЙ СТАНКА ИЛИ В ПРОГРАММЕ LASERWORK?
- Цитата
Поделиться сообщением
Ссылка на сообщение
Поделиться на других сайтах
- Жалоба
-
#7
В LaserWork, где на память не помню, могу вечером глянуть.
- Цитата
Поделиться сообщением
Ссылка на сообщение
Поделиться на других сайтах
- Жалоба
-
#8
@008shadow проверю вечером циркуляцию…есть какой-нить совет чем прочистить или какое средство прогнать через чиллер, чтобы лучше циркулировала?
@PavelK да было бы хорошо узнать и написать ..как отключить…весь форум перерыл,,, да пишут отключить water protect.. но как это сделать и где инфы нет…а ещё лучше скрин по-возможности
- Цитата
Поделиться сообщением
Ссылка на сообщение
Поделиться на других сайтах
- Жалоба
-
#9
15 минут назад, Lazerboy сказал:
а ещё лучше скрин по-возможности
Так же! Проги под рукой нет(
- Цитата
Поделиться сообщением
Ссылка на сообщение
Поделиться на других сайтах
Награды пользователя
- Жалоба
-
#10
Все обыскал в проге станка…не найти water protec(..
- Цитата
Поделиться сообщением
Ссылка на сообщение
Поделиться на других сайтах
- Жалоба
-
#11
Я бы все же проводочки то, идущие к датчику прозвонила бы..:)
- Цитата
Поделиться сообщением
Ссылка на сообщение
Поделиться на других сайтах
- Жалоба
-
#12
ВОПРОС РЕШЕН…ПРОВОДА ОТ ДАТЧИКА ВОДЫ ПЛОХО СКРУТИЛ МЕЖДУ СОБОЙ….НО КАК УЗНАТЬ КАК ЕГО ЧЕРЕЗ ПРОГРАММУ БЫЛО БЫ ИНТЕРЕСНО!
ЭТО Я ПРО ДАТЧИК ВОДЫ..
ОТКЛЮЧИТЬ..
- Цитата
Поделиться сообщением
Ссылка на сообщение
Поделиться на других сайтах
- Жалоба
-
#13
В LaserWork:
Вверху в менюшке Config -> System Settings -> вкладка Machine param -> нажать Read -> в списке изменить пункт Water protection -> нажать Write
- Цитата
Поделиться сообщением
Ссылка на сообщение
Поделиться на других сайтах
- Жалоба
-
#14
- Цитата
Поделиться сообщением
Ссылка на сообщение
Поделиться на других сайтах
- Жалоба
-
#15
Поделиться сообщением
Ссылка на сообщение
Поделиться на других сайтах
Присоединяйтесь к обсуждению
Вы можете опубликовать сообщение сейчас, а зарегистрироваться позже.
Если у вас есть аккаунт, войдите в него для написания от своего имени.
-
Сейчас на странице
0 пользователей
Нет пользователей, просматривающих эту страницу.
DISPLAYED MESSAGE
CONDITION/INDICATES
«Water Detected»
The Leak Detector component (see page 10) is
sensing the presence of water.
CM LCD Error Message
Warning:
If there is standing water in the area surrounding the
appliance DO NOT TOUCH any appliance, electrical
switch or electrical device while standing in water. If
water is continually flooding the area — locate and
close a shut off valve up stream from the water leak
or shut off the water supply to the building. Do not
return to service any appliance or iCOMM™
component until the surrounding floor and area
where you will be standing is completely dry.
Possible Causes:
• Leak Detector is currently exposed to water
• Leak Detector has not had sufficient time to dry
out after exposure to water
• Leak Detector wiring/circuit is shorted
• Leak Detector is defective
Service Note:
If there is no danger present from standing in water
press the Display Button on the CM several times to
silence the alarm if it is sounding — see Figure 2 on
page 6 and Display Button Operation on page 30.
Leak Detector operation is based on continuity. The
CM monitors the Leak Detector circuit and initiates a
Water Detected error message if the circuit is
closed. The Leak Detector must dry out completely
before the alarm condition can be cleared. The Leak
Detector will air dry over time or can be dried
manually when disconnected.
TROUBLESHOOTING ERROR MESSAGES
42
CHECK/REPAIR
• See Warning in first column if there is water on the
floor or area where you will be standing before
performing any procedures listed here.
• If there has been water flooding on the floor that
initiated this error message contact a qualified
service agent to correct/repair the cause.
• If after any water flooding conditions have been
repaired and the Leak Detector is no longer
exposed to water the Water Detected error mes-
sage continues: Turn off power to the CM — dis-
connect the round «5 VDC» power plug on the CM.
Dry out the Leak Detector component with paper
towels, compressed air or a heat gun. Restore
power to the CM.
• Ensure the Leak Detector is 100% dry. Turn off
power to the CM and disconnect the two Leak
Detector wires from the Leak Detector Terminal
Strip on the CM — see Figure 5 on page 10.
Closely inspect the wiring between the CM and
the Leak Detector for damage, pinched or shorted
wiring — replace any damaged or shorted wiring.
Use stranded 18/2 available from local electrical
supplies and home centers.
Using an ohm meter check for continuity between
the two wires disconnected. If there is continuity
present — replace the Leak Detector if you are cer-
tain it is completely dry and the wiring is not dam-
aged or shorted.
• Turn off power to the CM and disconnect the Leak
Detector wiring. Restore power to the CM. If the
Water Detected error message & alarm continues
call 888 928-3702 for further technical assistance.
DISCLOSURE: This post may contain affiliate links, meaning when you click the links and make a purchase, I receive a commission. As an Amazon Associate I earn from qualifying purchases.
Everybody loves that crispy taste of fried chicken. But no matter how hard you try, you can’t achieve that taste of fries or fried chicken at home. As a result, you end up ordering fried chicken instead of trying to make it at home.
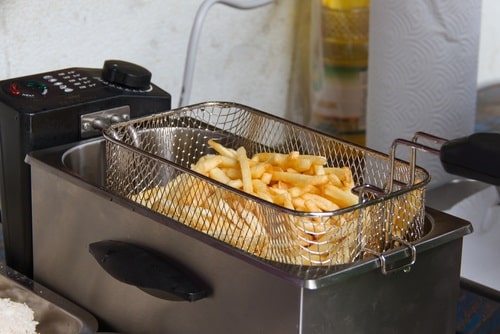
But if you get a deep fryer, you can easily solve this issue and make delicious and crispy fried chicken at home. A deep fryer is a kitchen appliance in which you can cook food by submerging it in oil. The temperature of the oil in a deep fryer ranges from 350 °F to 375 °F.
The high temperature is the reason food gets light brown and crispy once it is cooked. For a long time, deep fryers were only used in commercial kitchens. They were manufactured while keeping the needs of commercial kitchens in mind.
But nowadays, household units are also available. As a result, more and more people are getting a deep fryer for their homes. But getting an air fryer and cooking food in it is one thing; taking care of it is another.
You have to keep your air fryer clean if you want to keep on enjoying crispy fried chicken at home. Sometimes, the lack of care can lead to problems. In such a situation, you can try to fix the issue at home first before taking your air fryer to the store for repairs.
T-fal is one of the most reliable companies for home appliances. It has been providing its customers with premium quality, durable products for many years. Usually, people hardly face problems while using T-fal products, but there can be issues after some years.
Recently, some customers reported trouble with the draining of the T-fal deep fryer. This issue can be complex as you cannot put your appliance in the dishwasher.
Here we will let you know more about this problem and the best possible solution to help people with the draining of their T-fal deep fryer.
Troubleshoot: T-fal Deep Fryer Not Draining
You can fix most of the basic issues with an electrical appliance at home. But people don’t realize this and go to the repair shop straightaway. If you are facing any issue with an electric appliance, you should not go to the repair shop before analyzing the problem.
This will more likely make you waste your money on something that you could have handled at home. The lack of knowledge about such issues is why people turn to the repair shop when an appliance is not working correctly.
Solutions for T-fal Deep Fryer Draining

If your deep fryer is not draining, you will have trouble cleaning the appliance. Once old oil begins to gather in your deep fryer, it will damage the inner walls of your machine. If you can’t drain the old oil, you also won’t make anything in your deep fryer again.
These are some of the reasons why draining a deep fryer is so important. Without draining, you won’t be able to get high-quality, delicious, and crispy food at home whenever you want.
Some of the primary issues that most people face while using a T-fal deep fryer are draining. Even after pressing the draining button, the deep fryer does not drain the oil. This can be a problem as it would lead to oil and residue buildup in the appliance.
If this issue is not fixed, your deep fryer will not make delicious foods for you. So here we’re mentioning some of the best solutions you need to look at if you own a T-fal deep fryer and are having trouble draining it.
1. The Temperature of Oil is High
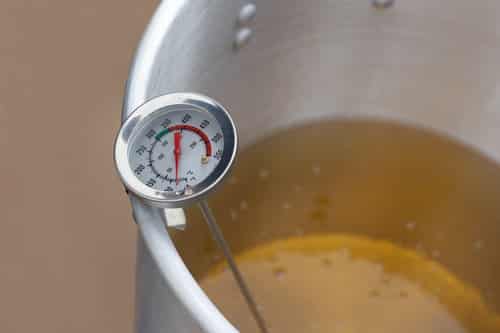
A deep fryer relies on hot oil to make crispy fries, fried chicken, fish, and other snacks. If the oil inside the deep fryer is not hot, your food will not get cooked the way you want it to. But the hot oil that is useful when cooking can be damaging when draining the appliance.
In addition, the hot oil is hazardous in itself, whether in a deep fryer or a pan on the stove. Many times, people end up getting their skin burnt because of hot oil.
But the temperature of the hot oil in a deep fryer is much higher than the temperature of the oil in a pan, which is why you need to be more careful when handling a fryer. One of the most common reasons your T-fal deep fryer is not draining is that the temperature of the oil is too high.
The fryer can gauge the temperature, and if the oil inside it is very hot, it won’t let you carry on with the draining process. If you try to drain the oil while it is still hot, you can damage the deep fryer and hurt yourself as well.
If the oil temperature inside the T-fal deep fryer is high, wait for it to lower down. Only once the oil has cooled down should you try to drain it. If you follow these steps, you will be able to resolve the draining issue without any problem.
The high-temperature oil in the deep fryer can be very harmful to humans. It can cause fourth-degree burns on your skin. By not draining the hot oil, your T-fal deep fryer is taking care of you.
2. Automatic Filtration is Off
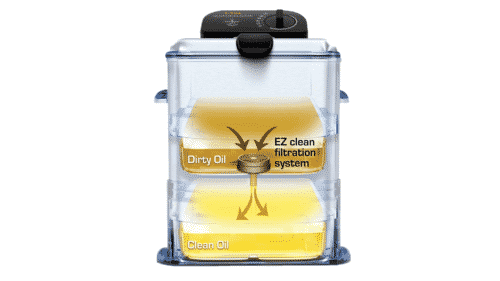
Modern appliances come with a lot of useful features. These features can make it easier for us to operate these appliances. For example, you may panic if your T-fal deep fryer is not draining, but sometimes, this problem can be caused by a minimal error.
Most of the time, users forget to turn on the automatic filtration switch, which becomes why their T-fal deep fryer won’t drain. If you don’t turn on the automatic filtration switch, the oil won’t be sent to the plastic container at the bottom of the deep fryer once the cooking is complete.
If all the oil is not in one place, you won’t be able to drain it. This is one of the reasons why your deep dryer won’t allow you to drain it. It is better to avoid draining the fryer without turning the automatic filtration switch on because otherwise, your appliance can get damaged.
Automatic filtration is one of the features of the T-fal deep fryer that can keep your appliance functional for years. Most of the time, people end up neglecting an appliance. But with a useful feature like this, you can keep your appliance working for years with only a little care.
3. Clogged Filter Grid

We all know how annoying it can be when something gets stuck in the kitchen pipe, and you can’t do the dishes. You have to wait for the plumber to come and fix the issue before you can get back to your chores. This proves that drainage is not possible when something is clogged.
If your deep fryer does not filter the oil properly, its filter grid may get clogged or partially blocked. Likewise, the clogged grid or partial blockage can be the issue if your deep fryer is not draining.
But if you are facing this issue, you don’t have to worry about it. There is a simple solution that can clear the filtration grid and make the draining process easier.
Empty your deep fryer and clean up the filtration grid with warm water and a non-metallic brush to resolve the issue. If you use a metallic brush, it will damage your deep fryer. It is one of the things that people don’t pay any attention to but can end up damaging an appliance.
You can also use dishwashing soap to clean up the blockage. After you are done with cleaning, push the red button at the fryer’s bottom for draining water. After it, your fryer is perfectly fine to work again.
Conclusion
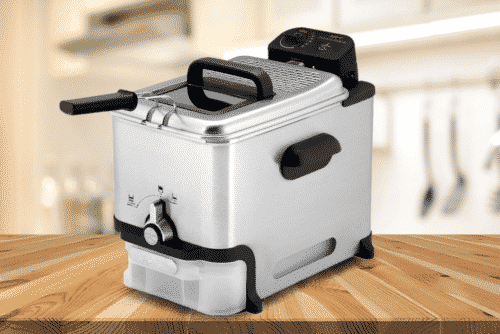
A T-fal deep fryer is an ideal appliance for those who want to make crispy fried food at home. It is one of the purchases that you won’t regret making. Once you get a T-fal deep fryer for your home, you won’t feel like ordering fried food from a restaurant.
However, your T-fal deep fryer is just like any other modern appliance. It requires proper care and cleaning. Every time you prepare something in your deep fryer, you should follow the instructions listed in the manual. If you make any mistake, you can end up damaging your appliance.
If you own a T-fal deep fryer, this article is the perfect place for finding fixes to draining issues. In the article, we have come up with some solutions for resolving draining issues.
So, if you face such problems, try any of these fixes after examining your deep fryer’s condition. If these solutions do not work, call the T-fal Customer care center or leave a comment below. We will resolve your issues as soon as possible.

")
-
- Поделиться
Доброе время суток.
Никто не сталкивался с подобной проблемой ? В поиске ответа не нашел. Купил аппарат Necta Astro б/у. Поставил на точку. Периодический автомат выдает ошибку «water». Заметил что сразу после промывки ошибка выскакивает. При одиночных продажах не так часто. Помпа стоит свежая.
Ошибка не «no water», а «water»
-

2

Ссылка на комментарий
Поделиться на другие сайты
- Ответов
29 - Создана
8 г - Последний ответ
8 г
Топ авторов темы
-
7
-
10
-
3
-
2

")
-
- Поделиться
Надо включить, Канистра 1.
-
1
Ссылка на комментарий
Поделиться на другие сайты
- Автор
-
- Поделиться
Большое спасибо. Помогло. На других автоматах всегда использовалась канистра 0, подобных проблем никогда не было.
Изменено 25 марта, 2014 пользователем igorkz
Ссылка на комментарий
Поделиться на другие сайты
- Автор
-
- Поделиться
Думал что избавился от ошибки, а нет. Пробовал и tank 2. Ошибка всеравно выскакивает. Из-за чего данная ошибка появляется ?
Изменено 28 марта, 2014 пользователем igorkz
Ссылка на комментарий
Поделиться на другие сайты
-
- Поделиться
По каждой функции аппарата, в софте прописан соответствующий тайм-аут (время за которое эта функция должна отработать свой цикл), так вот заполнение расширительного бачка порой не производится за прописанный тайм-аут, то есть помпа которая закачивает воду в расширительный бачок не успевает закачать нужный объём, до момента срабатывания микровыключателя. В виду того что на Астро используется два бойлера и один из них, тот что используется для раздачи воды на растворимые напитки, соединён с расширительным бачком по принципу сообщающихся сосудов, уровень воды повышается медленно, а по сему самое правильное в такой ситуации использовать для заполнения расширительного бачка, помпу ULKA EP-8, производительность которой значительно превышает этот же показатель у помпы ULKA EХ-5. большого давления там не нужно а вот скорость с которой восьмёрка закачивает воду в расширительный бачок, очень даже поможет в таком вопросе. Ну и как самый простой вариан, не стоит сбрасывать со счетов неисправность микровыключателя на самом расширительном бачке.
P.S. Кстати, я бы проверил на предмет подтеканий воды, всевозможные соединения на бойлере растворимых напитков.
Изменено 28 марта, 2014 пользователем Holland и Holland
-
1
Ссылка на комментарий
Поделиться на другие сайты
- Автор
-
- Поделиться
Обычно когда помпа недокачивает аппарат пишет «no water«. А тут ошибка «water«. Бойлер для растворимых напитков сегодня смотрел, вроде всё в порядке было. Клапана тоже не пропускают. Завтра тогда еще раз проверю два бойлера на подтекание и заменю микрик.
Ссылка на комментарий
Поделиться на другие сайты
")
-
- Поделиться
Помпа скорее всего не причем, EX5 прекрасно справляется, нужно включить режим работы от канистры, а сейчас у вас от магистрали.
Этот параметр как раз и влияет на тайм ауты.
Ссылка на комментарий
Поделиться на другие сайты
-
- Поделиться
А сообщение №2 в этой теме, о чём говорит?
Изменено 1 апреля, 2014 пользователем Holland и Holland
Ссылка на комментарий
Поделиться на другие сайты

")
-
- Поделиться
Купил аппарат Necta Astro б/у!!!! А может просто в бойлере много накипи????
Ссылка на комментарий
Поделиться на другие сайты
- Автор
-
- Поделиться
Поменял помпу, счетчик, микрик на поплавке, сделал инициализацию, выбрал «канистра 1». Ошибка всеравно выходит.
Пробовал удержать микрик. Ошибку выдает «no water», но не «water» . Никак не могу разобраться по какой причине аппарат такую ошибку выдает.
С набором воды это никак не связано, вода в бочке остается на таком же уровне и при удалений ошибки, помпа не срабатывает.
Когда накипь обычно с растворимого бойлера при сливе белая каша вытекает. Тут вода чистая. Да и бойлер смотрю 12 года стоит
Изменено 2 апреля, 2014 пользователем igorkz
Ссылка на комментарий
Поделиться на другие сайты
-
- Поделиться
это ни о чем не говорит.
интересная ситуация!!!
Ссылка на комментарий
Поделиться на другие сайты
- Автор
-
- Поделиться
это ни о чем не говорит.
интересная ситуация!!!
Проверил бойлер. Накипи на нем не было.
Ссылка на комментарий
Поделиться на другие сайты
- Автор
-
- Поделиться
Подниму тему. Может кто сталкивался с данной проблемой.
Замучался уже с этим аппаратом. Каждое утро заезжаю, удаляю ошибку и до вечера он работает.
Плату уже сегодня попробую заменить.
Изменено 9 апреля, 2014 пользователем igorkz
Ссылка на комментарий
Поделиться на другие сайты
-
- Поделиться
Кроме того что аппарт периодически, а вернее каждое утро, выдаёт ошибку, от вас больше ничего неизвестно. Как удаляете ошибку, в каком положении поплавок в расширительном бачке, какой уровень воды в расширительном бачке когда открываете аппарат при ошибке, повышается ли уровень воды в ведре жидких отходов? На все эти вопросы вы должны дать ответ, а вернее об этом должны были рассказать, прежде чем спрашивать, что вам делать. Экстрасенсорными способностями, из присутствующих на форуме людей (ну наверное кроме Хоттабыча) никто не обладает, что бы просто взять и угадать что там у вас происходит. Пишите обо всем и поподробнее — получите более точный ответ.
Ссылка на комментарий
Поделиться на другие сайты
")
-
- Поделиться
Чтобы не плодить десять тем попробую обратиться здесь.
Купил б/у necta c5. Привез, привел в порядок, почистил, включил — не дает воду в кофеблок. По тестам никаких ошибок не пишет. В чай и растворимый нормально подает, а в кофеблок не идет вода. Я снял с кофеблока трубку, думал пробка может или загрязнился канал, дунул в обе стороны — контакт есть, вода тоже есть, а значит канал чист препятствий нет. Но не качает воду.
Предыдущий хозяин говорит с точки снял, все нормально работало. Третий день бьюсь дома с аппаратом, в мануалах нет инфы по этому делу. Народ , пните пожалуйста в правильном направлении.
Ссылка на комментарий
Поделиться на другие сайты

-
- Поделиться
А помпа то шумит когда в бойлер закачивает?…
Ссылка на комментарий
Поделиться на другие сайты
-
- Поделиться
Помпа нормально качает. У меня воду берет из канистры, в опциях канистра ON. На материнке DL1 зеленым моргает, а DL3 постоянно желтым светит. Имеет ли это какое-нибудь отношение — не знаю
Изменено 9 апреля, 2014 пользователем Eset74
Ссылка на комментарий
Поделиться на другие сайты
-
- Поделиться
Настало время, узнать вам, что в аппарате две помпы, а вернее два насоса, один качает воду в расширительный бачок и тот что подаёт воду на напитки через бойлер…. вот про второй насос Хоттабыч и спрашивает. Хотя по теме написано что вода на растворимые напитки идёт, соответственно напрашивается вывод (2), пережат помол или помпа второго насоса сдохла (шарик качал-качал и скачался).
Однако вопрос следовало бы закинуть в тему Помпа.
Изменено 9 апреля, 2014 пользователем Holland и Holland
Ссылка на комментарий
Поделиться на другие сайты
-
- Поделиться
Как пережатие помола влияет на подачу воды в кофеблок? я на входе кофеблока вынул трубку и вставил в бутыль 0.5, подачи нет. растворимая группа нормально получает воду.
Изменено 9 апреля, 2014 пользователем Eset74
Ссылка на комментарий
Поделиться на другие сайты
-
- Поделиться
Если помол очень мелкий, то вода вообще может не проходить через таблетку, ввиду того что у помпы снизилась продуктивность от износа некоторых внутренних частей.
В вашем же случае, может катушка сгорела либо клапан закипел (что маловероятно), либо на катушку не поступает напряжение, тогда тут уже нужно плату смотреть.
Ссылка на комментарий
Поделиться на другие сайты
- Автор
-
- Поделиться
Дело было в плате. Поменял 2 платы на аппарате еще в пятницу. Аппарат по сегодняшний день работает без проблем .
В сервисном мануале прочитал что может из-за реле к12 ошибка выскакивать. Там же указано что данная релюшку отвечает за моторчик миксера, не знаю в чем тут связь. Сегодня перепаял релюшку. Проверю на днях.
Изменено 14 апреля, 2014 пользователем igorkz
Ссылка на комментарий
Поделиться на другие сайты
- 5 месяцев спустя…
- Автор
-
- Поделиться
Столкнулся опять с данной проблемой. Как сделать чтоб при нажатий на кнопку в аппарате ошибка удалялась. Заметил на некоторых аппаратах она удаляется. Например когда нет воды в аппарате, при нажатий на кнопку он пытается её закачать. Может где в настройках включается.
Ссылка на комментарий
Поделиться на другие сайты

")
-
- Поделиться
Сегодня столкнулись с аналогичной проблемой «Water». Автомат Coibri C4.
Ситуация следующая:
Автомат при включении попросил инициализацию, прошли. Теперь при каждом включении появилась надпись «Check inst.»
После каждого напитка выдает ошибку «water», независимо от напитка. Ошибку можно скинуть быстрым нажатием концевика расширительного бочка. Затем идет нагрев бойлера и снова можем выбирать напиток.
Откуда искать начало проблемы, пока не понятно. Перед этим была проблема с кабелем МДБ (интерфйесная плата-монетник/купюрник). Плохой контакт в разъеме на купюрик. Возможно перемкнули концы. Больше грешить не на что.
До этого автомат проверяли (несколько напитков), проблем не было. В России автомат не работал.
Изменено 28 сентября, 2014 пользователем mbkgroup.ru
Ссылка на комментарий
Поделиться на другие сайты

-
- Поделиться
в меню пункт «конфигурация Т.А.» выставить везде «ON»
Ссылка на комментарий
Поделиться на другие сайты
-
- Поделиться
Как связана ошибка «Water», с функциями в меню Конфигурация Т.А.?
Ссылка на комментарий
Поделиться на другие сайты
Содержание
- Проблемы пилота
- Горелка неисправна
- Проблемы контроля температуры
- Проблемы с фильтрацией масла
Frymaster — известный и часто используемый кулинарный инструмент в ресторанной индустрии. Если ваш Frymaster не работает эффективно, вы можете выполнить несколько шагов по устранению неполадок, чтобы диагностировать и устранить проблему. Типичные неисправности, с которыми может столкнуться Frymaster, обычно связаны с пилотом, горелкой, проблемами контроля температуры, фильтрацией масла или утечкой масла.
Проблемы пилота
Проверьте подачу газа. Убедитесь, что главный кран подачи газа открыт. Если он включен, но вы не можете зажечь Frymaster, возможно, засорилось пилотное отверстие или в газовых линиях есть воздух.
Очистите вокруг пилотного отверстия стальной щеткой, чтобы удалить весь мусор, который может засорить блок и препятствовать зажиганию пламени.
Проверьте, правильно ли подключен гибкий газовый шланг и подключена ли фритюрница.
Посмотрите, полностью ли закрыт сливной клапан, если у вас есть система фильтрации. Рукоятка клапана должна быть закрыта, чтобы питание поступало на газовый клапан, когда он взаимодействует с микровыключателем. Открытая ручка клапана — даже приоткрытая — не даст ему сработать.
Горелка неисправна
Поверните ручку горелки и зажгите пламя. Если огонь идет только с одной стороны или не горит со всех сторон должным образом, возможно, отверстия вашей горелки забиты. Выключите пламя, очистите отверстия металлической щеткой и снова зажгите.
Следите за колебаниями пламени. Это может быть вызвано колебаниями давления газа или воздуха в кухонной атмосфере.
Слушайте пламя горелки. Если он слишком шумный, давление газа может быть слишком высоким или газовый клапан заблокирован. Уменьшите давление и проверьте, не заблокирован ли газовый клапан, и удалите мусор металлической щеткой.
Проблемы контроля температуры
Проверьте температуру масла с помощью термостата или наконечника пирометра. Если температура не остается в пределах заданного значения, возможно, ваш термостат не калиброван, ручка или гибкий вал на валу термостата ослаблен, провод термостата отсоединен от блока или сломан, или термостат неисправен.
Проверьте провод, чтобы убедиться, что он подключен и не оборван. Если он отсоединен или болтается, подключите его. Если он сломался, придется заменить термостат.
Затяните ручку или вал термостата, если он ослаблен. Замените термостат, если эти решения не устранили проблемы с контролем температуры.
Проблемы с фильтрацией масла
Послушайте, чтобы определить, работает ли насос. Если насос работает, но масло не проходит через фильтр, посмотрите на фильтровальную бумагу и ее размер. Посмотрите на дно фильтровального лотка, чтобы убедиться, что уплотнительные кольца на месте. Если уплотнительные кольца отсутствуют или изношены, насос всасывает воздух и не позволяет фильтру работать должным образом.
Если насос не работает, дайте двигателю остыть не менее 15 минут. Найдите красный переключатель сброса на двигателе насоса, ближайшем к оператору, и нажмите его, чтобы перезапустить двигатель. Если двигатель перезапускается и насос начинает перекачивать, проверьте его эффективность. Если он запускается, но не перекачивает, насос может быть заблокирован из-за неправильного размера фильтра или неправильной установки, позволяющей проникать внутрь частицам пищи.
Отключите питание от системы фильтрации, снимите входной трубопровод с насоса и с помощью отвертки вручную поверните шестерни насоса назад, чтобы удалить застрявшие частицы, или поверните их вперед, чтобы более мягкие предметы прошли через насос.
Используйте шнек или дренажную змею, чтобы удалить частицы пищи, которые прошли и забили всасывающую трубку.
DISCLOSURE: This post may contain affiliate links, meaning when you click the links and make a purchase, I receive a commission. As an Amazon Associate I earn from qualifying purchases.
Everybody loves that crispy taste of fried chicken. But no matter how hard you try, you can’t achieve that taste of fries or fried chicken at home. As a result, you end up ordering fried chicken instead of trying to make it at home.
But if you get a deep fryer, you can easily solve this issue and make delicious and crispy fried chicken at home. A deep fryer is a kitchen appliance in which you can cook food by submerging it in oil. The temperature of the oil in a deep fryer ranges from 350 °F to 375 °F.
The high temperature is the reason food gets light brown and crispy once it is cooked. For a long time, deep fryers were only used in commercial kitchens. They were manufactured while keeping the needs of commercial kitchens in mind.
But nowadays, household units are also available. As a result, more and more people are getting a deep fryer for their homes. But getting an air fryer and cooking food in it is one thing; taking care of it is another.
You have to keep your air fryer clean if you want to keep on enjoying crispy fried chicken at home. Sometimes, the lack of care can lead to problems. In such a situation, you can try to fix the issue at home first before taking your air fryer to the store for repairs.
T-fal is one of the most reliable companies for home appliances. It has been providing its customers with premium quality, durable products for many years. Usually, people hardly face problems while using T-fal products, but there can be issues after some years.
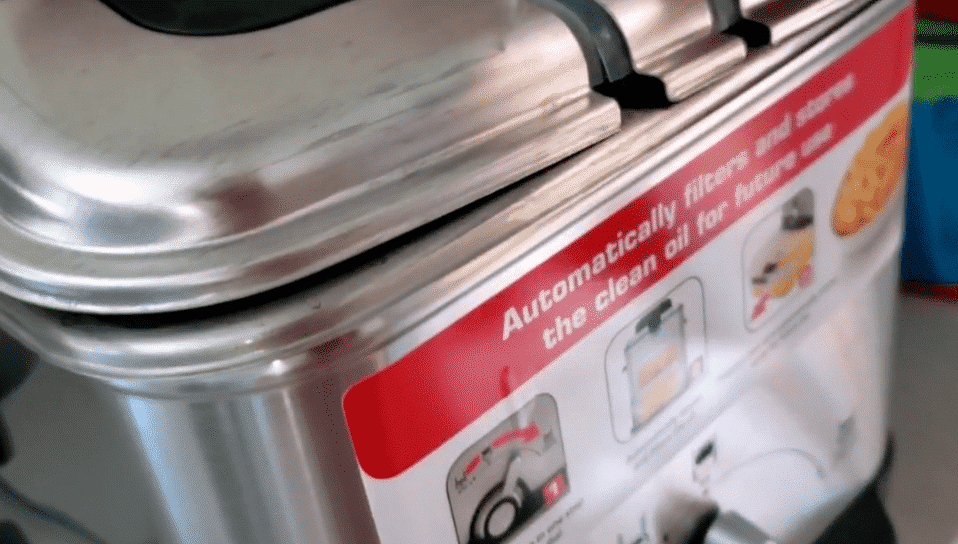
Recently, some customers reported trouble with the draining of the T-fal deep fryer. This issue can be complex as you cannot put your appliance in the dishwasher.
Here we will let you know more about this problem and the best possible solution to help people with the draining of their T-fal deep fryer.
Troubleshoot: T-fal Deep Fryer Not Draining
You can fix most of the basic issues with an electrical appliance at home. But people don’t realize this and go to the repair shop straightaway. If you are facing any issue with an electric appliance, you should not go to the repair shop before analyzing the problem.
This will more likely make you waste your money on something that you could have handled at home. The lack of knowledge about such issues is why people turn to the repair shop when an appliance is not working correctly.
Solutions for T-fal Deep Fryer Draining
If your deep fryer is not draining, you will have trouble cleaning the appliance. Once old oil begins to gather in your deep fryer, it will damage the inner walls of your machine. If you can’t drain the old oil, you also won’t make anything in your deep fryer again.
These are some of the reasons why draining a deep fryer is so important. Without draining, you won’t be able to get high-quality, delicious, and crispy food at home whenever you want.
Some of the primary issues that most people face while using a T-fal deep fryer are draining. Even after pressing the draining button, the deep fryer does not drain the oil. This can be a problem as it would lead to oil and residue buildup in the appliance.
If this issue is not fixed, your deep fryer will not make delicious foods for you. So here we’re mentioning some of the best solutions you need to look at if you own a T-fal deep fryer and are having trouble draining it.
1. The Temperature of Oil is High
A deep fryer relies on hot oil to make crispy fries, fried chicken, fish, and other snacks. If the oil inside the deep fryer is not hot, your food will not get cooked the way you want it to. But the hot oil that is useful when cooking can be damaging when draining the appliance.
In addition, the hot oil is hazardous in itself, whether in a deep fryer or a pan on the stove. Many times, people end up getting their skin burnt because of hot oil.
But the temperature of the hot oil in a deep fryer is much higher than the temperature of the oil in a pan, which is why you need to be more careful when handling a fryer. One of the most common reasons your T-fal deep fryer is not draining is that the temperature of the oil is too high.
The fryer can gauge the temperature, and if the oil inside it is very hot, it won’t let you carry on with the draining process. If you try to drain the oil while it is still hot, you can damage the deep fryer and hurt yourself as well.
If the oil temperature inside the T-fal deep fryer is high, wait for it to lower down. Only once the oil has cooled down should you try to drain it. If you follow these steps, you will be able to resolve the draining issue without any problem.
The high-temperature oil in the deep fryer can be very harmful to humans. It can cause fourth-degree burns on your skin. By not draining the hot oil, your T-fal deep fryer is taking care of you.
2. Automatic Filtration is Off
Modern appliances come with a lot of useful features. These features can make it easier for us to operate these appliances. For example, you may panic if your T-fal deep fryer is not draining, but sometimes, this problem can be caused by a minimal error.
Most of the time, users forget to turn on the automatic filtration switch, which becomes why their T-fal deep fryer won’t drain. If you don’t turn on the automatic filtration switch, the oil won’t be sent to the plastic container at the bottom of the deep fryer once the cooking is complete.
If all the oil is not in one place, you won’t be able to drain it. This is one of the reasons why your deep dryer won’t allow you to drain it. It is better to avoid draining the fryer without turning the automatic filtration switch on because otherwise, your appliance can get damaged.
Automatic filtration is one of the features of the T-fal deep fryer that can keep your appliance functional for years. Most of the time, people end up neglecting an appliance. But with a useful feature like this, you can keep your appliance working for years with only a little care.
3. Clogged Filter Grid
We all know how annoying it can be when something gets stuck in the kitchen pipe, and you can’t do the dishes. You have to wait for the plumber to come and fix the issue before you can get back to your chores. This proves that drainage is not possible when something is clogged.
If your deep fryer does not filter the oil properly, its filter grid may get clogged or partially blocked. Likewise, the clogged grid or partial blockage can be the issue if your deep fryer is not draining.
But if you are facing this issue, you don’t have to worry about it. There is a simple solution that can clear the filtration grid and make the draining process easier.
Empty your deep fryer and clean up the filtration grid with warm water and a non-metallic brush to resolve the issue. If you use a metallic brush, it will damage your deep fryer. It is one of the things that people don’t pay any attention to but can end up damaging an appliance.
You can also use dishwashing soap to clean up the blockage. After you are done with cleaning, push the red button at the fryer’s bottom for draining water. After it, your fryer is perfectly fine to work again.
Conclusion
A T-fal deep fryer is an ideal appliance for those who want to make crispy fried food at home. It is one of the purchases that you won’t regret making. Once you get a T-fal deep fryer for your home, you won’t feel like ordering fried food from a restaurant.
However, your T-fal deep fryer is just like any other modern appliance. It requires proper care and cleaning. Every time you prepare something in your deep fryer, you should follow the instructions listed in the manual. If you make any mistake, you can end up damaging your appliance.
If you own a T-fal deep fryer, this article is the perfect place for finding fixes to draining issues. In the article, we have come up with some solutions for resolving draining issues.
So, if you face such problems, try any of these fixes after examining your deep fryer’s condition. If these solutions do not work, call the T-fal Customer care center or leave a comment below. We will resolve your issues as soon as possible.
frymaster error code | frymaster wiring diagram |programming code| service codes
FRYMASTER ERROR CODE,FRYMASTER DEEP FRYER PROGRAMMING CODE
TROUBLESHOOTING,FRYMASTER SERVICE CODE,SERVICE PASSWORD
ELECTRICAL POWER SPECIFICATIONS

1. Lighted Display — left side display of various functions and
operations.
2. Lighted Display — right side display of various functions
and operations.
3. Storage Switch — locks program in computer.
4. ON/OFF Switch — controls power supply for left side of
dual fry pot computer.
5. ON/OFF Switch — controls power supply for right side of
dual fry pot computer.
6/7. Product and Coding Switches — enter code for access to
computer and programming functions.
8. Programming Switch — used when reprogramming
computer memory. On single fry pot computer, either left or right switch will control
power.
WARNING FRYER MUST BE FILLED WITH OIL, SHORTENING,
OR WATER BEFORE TURNING ON COMPUTER.
PROGRAMMING INSTRUCTIONS FOR THE FRYMASTER
COMPUTER. PLEASE READ INSTRUCTIONS BEFORE
PROGRAMMING COMPUTER.
FULL POT
1. Press ON/OFF SWITCH, Item 4 or 5.
2. To enter program mode, press PROGRAMMING SWITCH
(Item 8), «CODE» will appear in left display. If you have
pressed this switch in error and do not wish to program,
simply press PROGRAMMING SWITCH (Item 8), again.
NOTE: Computer will flash «BUSY» if cooking is in progress.
3. Enter Code Number: Press 1,6,5,0 in that sequence on Item
6 and 7. (Your program will not be accepted unless these
numbers are entered. This prevents an unauthorized person
from changing your present instructions.)
4. «SP-r» (SET POINT) will appear in the left display (Item 1).
This is for setting temperature; temperature previously
selected will be displayed in the right display (Item 2). Enter
temperature desired. Press PROGRAMMING SWITCH,
(Item  to lock in temperature setting. If you do not need to
change the settings, press PROGRAMMING SWITCH (Item 8).
5. “SELP» (SELECT PRODUCT) appears in Item 1. Press the
product button to be programmed.
6. «SENS» appears in Item 1. The sensitivity number previously
selected will be displayed in Item 2. Enter the new desired
sensitivity number. Press PROGRAMMING SWITCH (Item
to lock in sensitivity setting.
NOTE: SENS — Sensitivity is a built-in feature that causes the
computer to adjust cooking time to compensate for the drop in
shortening temperature when a basket of product is placed into
the fryer. Different food products will vary in density, basket load
size and initial temperature. Food products will also vary in how
well cooked a product is required to be. A proper sensitivity
setting for each product will assure a high-quality product each
time. For example: four ounces of french fries can be
programmed to be cooked to the same quality as two and one half pounds. Some experimenting with the range of 1 to 9 may
be required to obtain the desired quality to meet your
specifications.
7. «COOC» is now displayed in Item 1. If a cooking time has
been entered in the program prior to this programming, it will
appear in Item 2. If that time is correct, press
PROGRAMMING SWITCH (Item 8). If you wish to change
that time, enter the numbers desired. The new time will be
displayed in Item 2. Press PROGRAMMING SWITCH
(Item 8).
8. «SH-» is now displayed in Item 1. If your product requires
shaking during the cooking process, set the time by
pressing the number of minutes to cook before shaking.
This number will appear in the right display (Item 2).
Example: Total Cook Time 3:00 minutes
Shake After Cooking 1:00 minute
9. Set the desired shake time. At the end of the set time, a
beeper will sound, and the product button will flash for 3
seconds. If none is required, set the time at «0» and press
PROGRAMMING SWITCH (Item 8).
10. «HD-» will appear in Item 1. Set the time you require for
holding the cooked product, 13 seconds to 60 minutes.
Press PROGRAMMING SWITCH (Item 8). If you do not
wish to use the HOLD time, enter «0» and press
PROGRAMMING SWITCH (Item 8). «SELP» will again
display in Item 1. If more products are to be programmed,
return to Step 5 and follow all instructions to this point.
ADDITIONAL HOLD TIME INSTRUCTIONS
Programming hold timer to another product button: In the event
the same product is being cooked in more than one basket, any
product button can be programmed to use the hold timer
normally used with a different product button. Example: Program
button «3» for 7:00 minutes hold time. Then when programming
button «R» for hold time, press address 4. Both «3» and «R» will
then use the same hold time of 7:00 minutes. See below for
button numbers and their assigned address numbers. Any other
button can be programmed to use the same hold time.
BUTTON L 1 2 3 4 5 6 7 8 9 0 R
ADDRESS 1 2 3 4 5 6 7 8 9 10 11 12
11. When you complete your program, lock in the program by
pressing
STORAGE AND TEMPERATURE CHECK SWITCH
(ITEM 3).
SPLIT POT
1. Press either ON/OFF SWITCH, Item 4 or Item 5.
2. To enter the program modes, press PROGRAMMING
SWITCH (Item 8). «CODE» will appear in the left display
(Item 1). If you have pressed this switch in error and do not
wish to program, simply press PROGRAMMING SWITCH,
(Item again. NOTE: You cannot program the computer
while it is in the cook mode. The computer will flash «BUSY»
if cooking is in progress.
3. Enter Code Number: Press 1,6,5,0 in that sequence on Item
6 and 7. (Your program will not be accepted unless these
numbers are entered. This prevents an unauthorized person
from changing your present instructions.)
4. «SP-r» (SET POINT) will appear in Item 1; this is for setting
the cooking temperature for the right side of split pot. The
temperature previously selected will be displayed in Item 2.
Enter new temperature desired. Press PROGRAMMING
SWITCH (Item to lock in temperature setting. If you do not
wish to change the setting, press PROGRAMMING SWITCH
(Item 8).
5. «SP-L» (SET POINT) will appear in the left display (Item 1).
This is for setting the cooking temperature for the left side of
split pot. The temperature previously selected will be
displayed in the right display (Item 2). Enter the new
temperature desired and press PROGRAMMING SWITCH
(Item to lock in temperature setting. If you do not wish to
change the setting, press PROGRAMMING SWITCH (Item
8).
6. «SELP» (SELECT PRODUCT) will appear in Item 1. Select
buttons «L» through «5» (Item 6) for programming the left side
of split pot; select buttons «6» through «R» (Item 7) for
programming the right side of split pot. Press the product
switch (Item 6 or 7) to be programmed.
7. «SENS» will appear in Item 1. Refer to steps 6-11 under Full
Pot Programming Instructions to program individual product
buttons.
BOIL FEATURE
1. Before switching the fryer(s) ON, close the fry pot drain
valve(s): fill empty fry pot with mixture of cold water and
FRYMASTER FRYER ‘N’ GRIDDLE cleaner. Follow
instructions when mixing
2. To program computer for Boil Feature, press ON/OFF
SWITCH (Item 4 or 5).
3. Press PROGRAMMING SWITCH (Item «CODE» will
appear in the left display.
4. Enter Code Number: Press 1,6,5,3 in that sequence. The
right display will read BOIL. The temperature is automatically
set for a temperature of 195°F (91°C). The fryer will attain
this proper boil temperature and remain there until the OFF
switch (Items 4 or 5) is pressed which cancels the boil-out
mode. In high-altitude locations, the fryer must be monitored
constantly for over-boil conditions. If over-boil conditions
occur, turn off fryer immediately, allow to cool and re-enter
boil mode to continue the boil-out operation.
FRYER RECOVERY TIME CHECK
1. The computer automatically checks the recovery time each
time the pot temperature drops below 250 °F (121°C). To
check recovery time, press PROGRAMMING SWITCH (Item
«CODE» will appear in the left display (Item 1).
2. Enter Code Number: Press 1,6,5,2 in that sequence on Items
6 and 7. The recovery time will appear in both displays, (Item
1 and Item 2) for five seconds.
TEMPERATURE SELECTION
MODE —
FAHRENHEIT TO CELSIUS
1. To change the computer temperature from Fahrenheit to
Celsius or Celsius to Fahrenheit, press ON/OFF SWITCH
(Item 4 or 5).
2. Press the PROGRAM CHECK SWITCH (Item 8). «CODE»
will appear in left display (Item 1).
3. Enter Code Number 1,6,5,8 in that sequence on Items 6 and
7. The computer will automatically toggle the temperature
from Fahrenheit to Celsius or Celsius to Fahrenheit.
4. Press the TEMPERATURE CHECK SWITCH (Item 3) to
display the temperature in the newly selected mode.
CONSTANT OIL-TEMPERATURE-DISPLAY MODE
1. The cooking oil temperature will be displayed constantly at
all times. To program constant temperature display, press
ON/OFF SWITCH (Item 4 or 5).
2. Press the PROGRAM CHECK SWITCH (Item 8). «CODE»
will appear in left display (Item 1).
3. Enter Code 1,6,5,L in that sequence on Items 6 and 7. The
COMPUTER DISPLAY (Item 2) for full pot (Item 1 and 2) for
split pot will display oil temperature constantly.
4. To remove the constant oil-temperature display, repeat step 2
and 3. NOTE: During product cooking process, the cooking
time will not be displayed, but timing is taking place.
RE SERIES E ELECTRIC FRYERS
SERVICE PROCEDURES
General
Before performing any maintenance on your Frymaster fryer, disconnect the fryer from the electrical
power supply.
When electrical wires are disconnected, it is recommended that they be marked in such a way as to
facilitate re-assembly.
Replacing
a Controller
1.
Disconnect the
fryer from
the electrical
power supply.
2.
The controller bezel is held in place by tabs at the top and bottom.
Slide the metal bezel up to disengage the lower tabs. Then
slide the bezel
down to disengage the upper tabs.
3.
Remove the two screws from the upper corners of the control panel. The control panel is hinged
at the bottom and swings open from
the top.
4. Unplug the wiring harness from the connector on the back of the controller and disconnect the grounding wire
from terminal adjacent to the connector. Remove
the control panel assembly by lifting
it from the hinged slots in the control
panel
frame.
5. Remove the controller from the control panel assembly and install the replacement controller.
Reinstall the
control panel
assembly by reversing steps
1 and 2.
Replacing
Component Box Components
1.
Disconnect the
fryer from
the electrical
power supply.
2. The controller bezel is held in place by tabs at the top and bottom.
Slide the metal bezel up to disengage the lower tabs. Then
slide the bezel
down to disengage the upper tabs.
3.
Remove the two screws from the upper corners of the control panel and allow the control panel
to swing down.
4. Unplug the wiring harness from the 15—pin connector on the interface board and disconnect the
grounding wire from terminal adjacent to the 15—pin connector on
the back of the controller.
Remove the control panel
assembly by lifting it
from the hinge slots in the control panel frame.
5. Disconnect the wiring from the component to be replaced, being sure to make a note of where each
wire
was connected.
6.
Dismount the component to be replaced and install the new component, being sure that any
required spacers, insulation,
washers, etc.
are in place.
NOTE: If more room to work is required, the control panel frame assembly may be removed by removing the hex head screws that secure it to the
fryer
cabinet (see
illustration below). If
this option is chosen, all control panel assemblies must be
removed per steps 1 and 2 above. The
cover
plate on the lower front of the component box may also be removed if
desired.
7.
Reconnect the wiring disconnected in Step 3, referring to your notes and the wiring diagrams on
the fryer door to ensure that the
connections are
properly made.
Also, verify that no other wiring was
disconnected accidentally
during the replacement
process.
8. Reverse steps 1 through 4 to complete the replacement and
return the fryer to service.
Replacing
a High—Limit Thermostat
1.
Remove the filter pan and lid from the unit. Drain the frypots
into a Shortening Disposal Unit
(SDU) or other appropriate metal container.
2.
Disconnect the fryer from the electrical power supply and reposition it to gain access to the rear of the fryer.
3.
Remove the four screws from
both the left and right
sides of the lower back panel.
4.
Locate the high—limit that is being
replaced
and follow
the
two—black
wires to the 12—pin
connector C—6. Note
where the leads are connected prior to removing
them
from the connector.
Unplug
the 12—pin connector C—6 and using a pin—pusher push the pins of the high—limit out of
the
connector.
5.
Using a wrench,
carefully unscrew the
high—limit thermostat
to be replaced.
6. Apply Loctite™ PST 567 or equivalent sealant to the threads of the replacement and screw it
securely into the
frypot.
7 Insert the leads into the 12—pin connector C—6 (see illustration below).
For full—vat units or the
left half of a dual—vat unit (as viewed from the rear of the fryer) the leads go into positions 1 and
2 of the connector. For the right half of a dual—vat unit (as viewed from the rear of the fryer), the
leads
go into positions 7 and 8. In
either case,
polarity does
not matter.
8. Reconnect the 12—pin connecting plug C—6. Use wire ties to secure any loose wires.
9. Reinstall the back panels reposition the fryer under the exhaust hood, and reconnect it to the electrical power supply to return the fryer to service.
Replacing a Temperature Probe
1. Remove the filter pan and lid from the unit. Drain the frypots into a Shortening Disposal Unit
(SDU) or other appropriate metal container.
2.
Disconnect the fryer from the electrical power supply and reposition it to gain access to the rear of the fryer.
3. Remove the four screws from both sides of the lower back panel. Then remove the two screws
on both the left and right sides of the back of the tilt housing. Lift the tilt housing
straight up to
remove from the fryer.
4.
Locate the red and white wires of the temperature probe to be replaced.
Note
where the leads are connected prior to removing them from the connector.
Unplug the 12—pin connector C—6 and using
a pin—pusher push
the
pins of the temperature probe out of
the connector.
5. Raise the element and remove the securing probe bracket and metal tie wraps that secure the probe to the
element (see illustration
below).
6.
Gently pull on the temperature probe and grommet, pulling
the wires up the rear of the fryer and through the element tube
assembly.
7. Insert the replacement temperature probe (wires first) into the tube assembly ensuring that the
grommet is in place. Secure the probe to the elements using
the bracket which was removed in
Step
5 and the metal tie
wraps which were included
in the replacement kit.
8.
Route the probe wires out of the tube assembly following the element wires down the back of the
fryer
through the
Heyco bushings to the 12—pin connector
C—6.
Secure
the wires to the sheathing with wire ties.
9. Insert the temperature probe leads into the 12—pin connector C—6 (see illustration below). For full—vat units or the right half of a
dual—vat unit (as viewed from the rear of the
fryer) the red lead goes into position
3 and the white
lead into position 4 of the connector.
For the left half of a dual—vat unit (as viewed from the rear of the fryer), the red lead goes into position
9 and the white lead
into position 10. NOTE: Right and left refer to the fryer as
viewed
from the rear.
10. Secure any loose wires with wire ties making sure that the lead wires will not interfere with the
movement of the springs.
Rotate
the elements up and down making sure that movement is not
restricted and
that
the wires are not
pinched.
11.
Reinstall the tilt housing and back panels, reposition the fryer under the exhaust hood, and reconnect
it to the electrical
power supply to return
the fryer to
service.
Replacing a Heating
Element
1.
Perform steps 1—3
of section
1.5, Replacing a Temperature
Probe.
2.
On dual—vat fryers, and on full—vat fryers where the temperature probe is attached to the element being replaced, disconnect the wire harness containing the probe wiring.
Using a pin pusher,
disconnect the probe wires from
the 12—pin connector C—6.
3.
In the rear of the fryer directly
behind the frypot disconnect the 6—pin connector for the left element (as viewed from the front of the fryer) or the 9—pin connector for the right element. Press in on the tabs on each
side of the connector while pulling
outward on the free end to extend the
connector and
release the element leads
(see photo below). Pull the leads
out of the connector and
out of the wire sleeving.
4.
Raise the element to the full up position and support the
elements.
5. Remove the hex head screws and nuts that secure the element to the tube assembly and pull the element out of the frypot.
NOTE: Full—vat elements consist of two dual—vat elements clamped together. For full—vat
units, remove the element clamps
before removing
the nuts and screws
that secure the element to the tube assembly.
6. If applicable, recover the probe bracket and probe from the element being replaced and install
them on the replacement element. Install the replacement element in the fry pot, securing it with
the nuts and screws removed in Step 5 to the tube assembly. Ensure the gasket is between the tube
and element assembly.
7.
Route the element leads through the element tube assembly and into the wire sleeving to prevent
chafing.
Ensure that the wire sleeving is routed back through the Heyco bushing keeping it clear
from the lift springs.
Also
ensure that the wire sleeving extends into the tube assembly to prevent the edge of the tube assembly from chafing the wires.
Press the pins into the connector in
accordance
with the diagram on the following page, and then close the
connector to lock the
leads in place.
NOTE: It is critical that the wires be routed through the sleeving to prevent
chafing.
8. Reconnect
the element
connector ensuring that
the latches lock.
9. Insert the temperature probe leads into the 12—pin wiring harness connector C—6 (see illustration
below). For full—vat units or the
right half of a
dual—vat unit, the
red
lead goes into position 3 and the white into position 4. For the left half of a
dual—vat unit, the
red
lead goes into position
9 and the white into position 10. NOTE: Right
and
left refer to the
fryer as viewed from
the rear.
10. Reconnect
the 12—pin connector C—6
of the wiring harness
disconnected in Step
2.
11. Lower the element down
onto the basket
rack.
12. Reinstall the tilt housing and back panels, reposition the fryer under the exhaust hood, and
reconnect it to the electrical power supply.
Replacing
Contactor Box Components
1.
If replacing a contactor box component above the built—in filter system, remove the filter pan and
lid from the unit. Drain the frypots into a
Shortening Disposal Unit or other appropriate metal container. If
replacing a contactor box
component in a
non-filter unit or a frypot that’s not
over the filter pan, drain the frypot
above the box into a Shortening Disposal Unit or other
appropriate metal
container.
2.
Disconnect the
fryer from the electrical
power supply.
3. Remove the two screws securing the cover of the contactor box. The contactor boxes above the filter pan are accessed by sliding
under the fryer.
They are located to the left and right above the guide
rails (see photo below). The contactor boxes of non-filter units or frypots not over the
filter pan are accessed
by opening
the fryer door directly under the affected frypot.
4.
The contactors and relays are held on by threaded pin studs so that only removal of the nut is
required to replace the component.
5.
After performing necessary service, reverse steps 1—4 to return the
fryer to operation.
Replacing
a Fry pot
1.
Drain the fry pot into the filter pan
or, if replacing
a
fry pot over
the
filter
system, into
a Shortening Disposal Unit or
other appropriate metal container. If replacing a fry pot over the
filter system, remove the filter pan
and lid from the unit.
2. Disconnect the fryer from the electrical power supply and reposition it to gain access to both the front
and rear
3.
Slide the metal bezel up to release the bottom
tabs, then slide the bezel down to disengage the upper tabs.
4. Remove the two screws from the upper corners of the control panels and allow them to swing down (see illustration and photo on page 1—1).
5. Unplug the wiring harnesses and ground wires from the backs of the controllers.
Remove the controllers
by
lifting them
from the hinge slots in the control
panel
frame.
6.
Remove the tilt housing and back
panels from the fryer. The tilt housing must be removed
first in order to
remove the upper back
panel.
7. To remove the tilt housing remove the hex head screws from the rear edge of the housing.
The
housing can be lifted straight
up and off the fryer.
8.
Remove the control
panel by removing the screw in
the center and the
nuts on both sides.
9.
Loosen the component
boxes by removing the screws,
which secure them
in the cabinet.
10. Dismount the top cap by removing
the nuts at
each
end that secure it
to the cabinetry.
11. Remove the hex head
screw that
secures the
front of the frypot to the cabinet
cross brace.
12. Remove the top-connecting strip
that covers the
joint with the adjacent
frypot.
13.
Unscrew the Teflon vent/vacuum—breaker tube fitting, unscrew the nut located on the front of each
section
of drain tube, and
remove the tube
assembly from the fryer.
14.
Remove the covers from the drain safety switch and disconnect the switch wiring at the switch.
15.
At the rear of the fryer, unplug the 12—pin connector C—6 and, using a pin pusher, disconnect the
high—limit
thermostat leads.
16. Disconnect the
oil return flexline at the
frypot end.
17. Raise the elements to the “up” position and disconnect
the element springs.
18. Remove the machine screws and nuts that secure the element tube assembly to the frypot.
Carefully lift the element assembly from the frypot and secure it to the cross brace on the rear of
the fryer with
wire ties or tape.
19. Carefully lift
the frypot from
the fryer and
place it upside down on a stable work
surface.
20. Recover the drain valve(s), oil return flexline connection fitting(s), and high—limit thermostat(s) from the frypot. Clean threads and apply Loctite PST 567 or equivalent sealant to the threads of
the recovered parts
and
install them in the replacement
frypot.
21. Carefully lower the replacement frypot into the fryer. Reinstall the hex head screw removed in
step 7 to attach the frypot to
the fryer.
22. Position
the element tube assembly in the frypot and reinstall the machine screws and nuts
removed in step 14.
23. Reconnect the oil return flexlines to the frypot, and replace aluminum
tape, if necessary, to
secure heater strips to the flexlines.
24. Insert the high—limit thermostat leads disconnected in step 13 (see illustration on page 1—3 for pin positions).
25. Reconnect the drain safety switch wiring to the switch(es) in accordance with the diagram below then
reinstall the switch covers.
26. Reinstall
the drain tube assembly.
27. Reinstall the top connecting strips, top cap, control panel, component box, tilt housing and back
panels.
28. Reinstall controllers in the control panel frame and reconnect the wiring harnesses and ground wires.
29. Reposition the fryer under the exhaust hood and reconnect
it to the electrical power supply.
Built-in
Filtration System Service Procedures
Filtration System Problem Resolution
One of the most
common causes of filtration problems
is placing the filter paper on the bottom of the filter pan rather than
over the filter screen.
Whenever the complaint is “the pump is running, but no oil is being filtered,” check the installation
of the filter paper, and ensure that the correct size is being used.
While you are checking the filter paper, verify that the O—rings on the pick—up tube of the filter pan are in good condition. Missing or worn
O-rings allow the
pump to take in
air
and decrease its efficiency.
If the pump motor overheats,
the thermal overload will trip
and the motor will not start until it is reset. If the pump motor does not start, press
the red reset
switch (button) located on the
rear of the
motor at the front of the fryer
If the pump starts after resetting the thermal overload switch, then something
is causing the motor to
overheat. A major cause of overheating is when several frypots are filtered sequentially, overheating
the pump and motor. Allow
the pump motor to cool at least 30 minutes before resuming
operation. Pump overheating can
be caused
by:
• Solidified shortening in
the pan or filter lines, or
• Attempting to filter unheated oil (cold oil is more viscous,
overloading the pump motor and causing it to overheat).
If the motor runs but the pump
does not return oil, there is a blockage
in the
pump. Incorrectly
sized or installed paper/pads will allow
food particles and
sediment to pass through
the filter pan and into
the pump. When sediment enters the
pump, the gears
bind, causing the motor to overload, again
tripping the thermal overload.
Shortening that
has solidified in the pump will also
cause it to seize,
with the same result.
A pump seized by debris or hard shortening can usually be freed by manually moving the gears with a
screwdriver or other
instrument.
Disconnect power to the filter system,
remove the
input plumbing from the pump, and use a screwdriver to
manually turn the
gears.
●
Turning
the pump gears in reverse will
release a hard particle.
● Turning the pump gears forward will push softer objects and solid shortening through the
pump and allow free movement of
the gears.
Incorrectly sized or installed paper/pads will also allow food particles and sediment to pass through and clog the suction tube on the bottom of
the filter pan. Particles large enough to block the suction tube may indicate that the crumb tray is not being used.
Pan blockage can also occur if shortening
is left in the pan and allowed to solidify.
Blockage removal can be accomplished by forcing the item
out with an auger or drain snake. Compressed air
or other pressurized gases should not be used to force out
the blockage.
1.9.2 Replacing the Filter Motor, Filter Pump, and
Related
Components
1. Remove the filter pan and lid from the unit. Drain the frypots
into a Shortening Disposal Unit
or other appropriate metal container.
2. Disconnect the fryer from the electrical power supply and reposition it to gain access to both the front
and rear.
3. Disconnect the two flexlines running to the oil—return manifold at the rear of the fryer as well as the pump suction
flexline at the
end of the filter pan connection (see photo below)
4.
Loosen the nut and
bolt that secures the
bridge to the oil-return manifold.
5.
Remove the cover plate from the
front of the motor and disconnect
the motor wires.
6. Unplug the pump motor assembly 6—pin connector C—2 and, using a pin pusher, disconnect the
vent vacuum—breaker solenoid (pins
2 and 5) that is attached
to the oil return manifold.
7. Remove the two nuts and bolts that secure the front of the bridge to the cross brace and carefully slide the bridge rearward off
the cross brace
until its front end can be lowered to the
floor. Undo the single nut holding it in place in back. Be careful not to let the rear of the bridge
slip off the manifold
at this point.
8. Get a good grip on the bridge, carefully
pull it forward off the oil-return manifold, and lower the
entire assembly to the floor.
Once on the floor,
pull the assembly out the front
of the fryer.
9. When required service has been completed, reverse steps 6—12 to reinstall the bridge. NOTE: The black motor wires go on the top terminal, the
white on the bottom. The pump solenoid valve
wires go in positions
1 and 4 of the 6—pin connector C—2; the vent vacuum—breaker solenoid valve wires
go in positions 2 and 5; the red/black
heater tape wires go
into position 3 and the violet/white wires go into position 6 (see illustration
on the following page
10. Reconnect the unit to the electrical power supply, and verify that the pump is functioning correctly (i.e., when a filter handle
is placed in the ON position, the motor
should start and there
should be strong suction at the
intake fitting and outflow
at the rear flush
port.)
11.
When
proper operation has
been verified,
reinstall the
back panels and
the filter pan
and lid.
12. Reposition
the fryer under the exhaust hood and reconnect it to the electrical power supply to
return the fryer to
service.
Replacing the Filter Transformer or Filter Relay
Disconnect the
fryer from the
electrical power supply. Remove the left controller from the
fryer to expose the interior of the left component box. The filter transformer and relay
are located as shown
in the illustration below. NOTE: The right component box is identical to the left except that the filter transformer and relay are not present. The components are held on by threaded pin studs so
that only removal of the nut is required to replace the component.
Basket Lift
Service Procedures
RE Series electric fryers may be equipped with automatic basket lifts.
Basket lifts always come in pairs, although each operates independently.
A
modular
basket lift
(illustrated on the following page) is a self-contained
sub-assembly
consisting of a pair
of toothed rods which support removable
basket lift arms, a
pair of reversible— drive
gear motors, and four microswitches.
The gear
motors engage
the teeth of the rods, moving them up or
down depending upon the
motors’ direction of rotation.
The microswitches at the upper and lower limits of movement stop the motors when the
basket is in the full up or
full down position.
Timing
circuitry in the
controller initiates and
stops
basket
lift operation
depending
upon
the variables programmed by the
operator. When the product button is pressed, the timing circuitry
activates a coil in the
basket lift relay to supply power to the
lower microswitch. The
microswitches stop the motor
at the lift’s upper and
lower travel
limits and reverse the direction of
current flow thus reversing the motor
direction.
When the
product button is pushed on the computer/controller, current flows through a coil in the basket lift relay, causing the lower circuit to be activated. The basket lift lowers, closing the normally open upper-micro—switch.
When the downward—moving rod opens the lower normally closed microswitch, the power to the motor ceases to flow.
When
the computer/controller times out, the
current to the relay coil is cut, allowing the upper circuit to be activated. The basket lift then
raises and re-closes the lower microswitch. When the basket lift rod clears the upper microswitch,
the microswitch reopens, power to the circuit is cut, and the motor stops.
Pushing the product button
restarts the cycle.
Problems with the basket lift
can be grouped into three categories:
● Binding/jamming problems
● Motor and gear problems
● Electronic problems
MOTOR
AND GEAR PROBLEMS
With the modular basket lift, the most likely
problem to be encountered in this category is erratic
motion of the lift due to a worn drive gear.
Failure to keep the lift rod and bushings
properly lubricated will cause unnecessary wear
of the gear. The problem is corrected by replacing the worn
gear.
If the lift cycles correctly but fails to remain in the up position (i.e., goes up, but then slowly settles back down into the frypot), the
problem is a failed motor brake. A
failed motor brake cannot be repaired and
requires replacement
of the motor itself.
If power is reaching the motor but the motor fails to run, the motor is burned out and must be
replaced.
ELECTRONIC
PROBLEMS
Within this category are problems associated with the relays, microswitches, capacitors, resistors,
interface board, wiring, and controls.
The most common problem in this category is a lift that
continuously travels up and down. This
is usually caused by a microswitch that is out of adjustment.
Troubleshooting the electronics of
a modular basket lift is simply a
process of verifying current flow
through the individual components up to and including the motor. Using
a multimeter set to the 250
VAC range, check the connections on both sides of the component for the presence of the applied line
voltage. The schematic below and
the
wiring diagram on page 1—16 can
identify
the
components and wiring connection points.
Interface Board Diagnostic Chart
The following
diagram and charts provide ten quick system checks that can be performed using only
a multimeter.

|
Meter Setting |
Test |
Pin |
Pin |
Results |
|
12 VAC Power |
50 VAC Scale |
3 of J2 |
1 of J2 |
12—16 VAC |
|
24 VAC Power |
50 VAC Scale |
2 of J2 |
Chassis |
24—30 VAC |
|
*Probe Resistance (RH) |
R X 1000 |
11 of J2 |
10 of J2 |
See Chart |
|
*Probe Resistance (LH) |
R X 1000 |
1 of J1 |
2 of J1 |
See Chart |
|
High—Limit Continuity (RH) |
R X 1 OHMS |
9 of J2 |
6 of J2 |
0 — OHMS |
|
High—Limit Continuity (LH) |
R X 1 OHMS |
6 of J1 |
9 of J1 |
0 — OHMS |
|
Latch Contactor Coil (RH) |
R X 1 OHMS |
8 of J2 |
Chassis |
3—10 OHMS |
|
Latch Contactor Coil (LH) |
R X 1 OHMS |
5 of J1 |
Chassis |
3—10 OHMS |
|
Heat Contactor Coil (RH) |
R X 1 OHMS |
7 of J2 |
Chassis |
11—15 OHMS |
|
Heat Contactor Coil (LH) |
R X 1 OHMS |
4 of J1 |
Chassis |
11—15 OHMS |
Disconnect 15—Pin harness from the computer/controller before testing the probe circuit.
Содержание
- Проблемы пилота
- Горелка неисправна
- Проблемы контроля температуры
- Проблемы с фильтрацией масла
Frymaster — известный и часто используемый кулинарный инструмент в ресторанной индустрии. Если ваш Frymaster не работает эффективно, вы можете выполнить несколько шагов по устранению неполадок, чтобы диагностировать и устранить проблему. Типичные неисправности, с которыми может столкнуться Frymaster, обычно связаны с пилотом, горелкой, проблемами контроля температуры, фильтрацией масла или утечкой масла.
Проблемы пилота
Проверьте подачу газа. Убедитесь, что главный кран подачи газа открыт. Если он включен, но вы не можете зажечь Frymaster, возможно, засорилось пилотное отверстие или в газовых линиях есть воздух.
Очистите вокруг пилотного отверстия стальной щеткой, чтобы удалить весь мусор, который может засорить блок и препятствовать зажиганию пламени.
Проверьте, правильно ли подключен гибкий газовый шланг и подключена ли фритюрница.
Посмотрите, полностью ли закрыт сливной клапан, если у вас есть система фильтрации. Рукоятка клапана должна быть закрыта, чтобы питание поступало на газовый клапан, когда он взаимодействует с микровыключателем. Открытая ручка клапана — даже приоткрытая — не даст ему сработать.
Горелка неисправна
Поверните ручку горелки и зажгите пламя. Если огонь идет только с одной стороны или не горит со всех сторон должным образом, возможно, отверстия вашей горелки забиты. Выключите пламя, очистите отверстия металлической щеткой и снова зажгите.
Следите за колебаниями пламени. Это может быть вызвано колебаниями давления газа или воздуха в кухонной атмосфере.
Слушайте пламя горелки. Если он слишком шумный, давление газа может быть слишком высоким или газовый клапан заблокирован. Уменьшите давление и проверьте, не заблокирован ли газовый клапан, и удалите мусор металлической щеткой.
Проблемы контроля температуры
Проверьте температуру масла с помощью термостата или наконечника пирометра. Если температура не остается в пределах заданного значения, возможно, ваш термостат не калиброван, ручка или гибкий вал на валу термостата ослаблен, провод термостата отсоединен от блока или сломан, или термостат неисправен.
Проверьте провод, чтобы убедиться, что он подключен и не оборван. Если он отсоединен или болтается, подключите его. Если он сломался, придется заменить термостат.
Затяните ручку или вал термостата, если он ослаблен. Замените термостат, если эти решения не устранили проблемы с контролем температуры.
Проблемы с фильтрацией масла
Послушайте, чтобы определить, работает ли насос. Если насос работает, но масло не проходит через фильтр, посмотрите на фильтровальную бумагу и ее размер. Посмотрите на дно фильтровального лотка, чтобы убедиться, что уплотнительные кольца на месте. Если уплотнительные кольца отсутствуют или изношены, насос всасывает воздух и не позволяет фильтру работать должным образом.
Если насос не работает, дайте двигателю остыть не менее 15 минут. Найдите красный переключатель сброса на двигателе насоса, ближайшем к оператору, и нажмите его, чтобы перезапустить двигатель. Если двигатель перезапускается и насос начинает перекачивать, проверьте его эффективность. Если он запускается, но не перекачивает, насос может быть заблокирован из-за неправильного размера фильтра или неправильной установки, позволяющей проникать внутрь частицам пищи.
Отключите питание от системы фильтрации, снимите входной трубопровод с насоса и с помощью отвертки вручную поверните шестерни насоса назад, чтобы удалить застрявшие частицы, или поверните их вперед, чтобы более мягкие предметы прошли через насос.
Используйте шнек или дренажную змею, чтобы удалить частицы пищи, которые прошли и забили всасывающую трубку.
Войти или зарегистрироваться
Pitco PITCO серии SE, SEH
Тема в разделе «Фритюрницы», создана пользователем Demagogys, 19 фев 2012.
-

Demagogys
Команда форума
Администратор
СпециалистИнструкция на фритюрницы PITCO серии SE, SEH
Вложения:
-
Инструкция на фритюрницы PITCO серии SE,SEH(rus).doc
- Размер файла:
- 467,5 КБ
- Просмотров:
- 546
Demagogys,
19 фев 2012
#1 -
-
Demagogys
Команда форума
Администратор
СпециалистИнструкция на фритюрницы PITCO SEH-50, тех. обслуживание и эл. схемы
Вложения:
-
Инструкция на фритюрницы PITCO SEH-50,ТО и эл. схемы(rus).doc
- Размер файла:
- 3,6 МБ
- Просмотров:
- 276
Demagogys,
19 фев 2012
#2 -
-
Demagogys
Команда форума
Администратор
СпециалистИнструкция и деталировка на эл. фритюрницы PITCO
Вложения:
-
Инструкция на эл. фритюрницы PITCO(rus).doc
- Размер файла:
- 105,5 КБ
- Просмотров:
- 207
-
Деталировка на эл. фритюрницы PITCO(eng).pdf
- Размер файла:
- 3,1 МБ
- Просмотров:
- 153
Demagogys,
19 фев 2012
#3 -
-
Res
Региональный сервисПишет rprobeop se 14 кто сталкивался? Спасибо
Res,
5 июл 2016
#4


(Вы должны войти или зарегистрироваться, чтобы ответить.)
- Похожие темы:
-
Pitco
PITCO DD-E24RUFM, DD24-RUFM(Gas)
Demagogys,
24 фев 2012, в разделе: Фритюрницы- Ответов:
- 1
- Просмотров:
- 5.737
- Demagogys
- 24 фев 2012
-
Материнская плата для индукции вт-350t (3,5 квт) 900 серии ( с июня 2017 года)
ЯрославТехник,
1 окт 2022, в разделе: Витрина товаров- Ответов:
- 0
- Просмотров:
- 339
- ЯрославТехник
- 1 окт 2022
-
Магистраль (коллектор) подачи моющего средства для пароконвектоматов от electrolux серии aos
Вадим Венско,
14 сен 2022, в разделе: Витрина товаров- Ответов:
- 0
- Просмотров:
- 398
- Вадим Венско
- 14 сен 2022
-
Eliwell
Ремонт контроллера IWP750 серии WP35D
Вадим Венско,
20 июл 2022, в разделе: Камеры холодильные- Ответов:
- 0
- Просмотров:
- 662
- Вадим Венско
- 20 июл 2022
-
Руководство по эксплуатации контроллеров серии DTK Delta
Руст1975,
23 ноя 2021, в разделе: Контроллеры- Ответов:
- 0
- Просмотров:
- 846
- Руст1975
- 23 ноя 2021
-
Sveba Dahlen S-серии печь
Виталий Смирнов,
22 ноя 2021, в разделе: Печи- Ответов:
- 0
- Просмотров:
- 1.032
- Виталий Смирнов
- 22 ноя 2021
-
Diosna Тестомес серии SP
Леонид10,
16 июл 2021, в разделе: Тестомесы- Ответов:
- 2
- Просмотров:
- 1.332
- Леонид10
- 21 июл 2021
Поделиться этой страницей
- Войти через Facebook
- Войти через Twitter
- Войти через Google
- Ваше имя или e-mail:
- У Вас уже есть учётная запись?
-
- Нет, зарегистрироваться сейчас.
- Да, мой пароль:
-
Забыли пароль?
-
Запомнить меня
Поиск
-
- Искать только в заголовках
- Сообщения пользователя:
-
Имена участников (разделяйте запятой).
- Новее чем:
-
- Искать только в этой теме
- Искать только в этом разделе
- Отображать результаты в виде тем
-
Быстрый поиск
- Последние сообщения
Больше…
-
Этот сайт использует файлы cookie. Продолжая пользоваться данным сайтом, Вы соглашаетесь на использование нами Ваших файлов cookie.Accept
Узнать больше.Скрыть объявление
T-fal deep fryers are great kitchen appliances.
They are reliable, easy to use, and they save time.
Unfortunately, some models don’t drain properly.
If you have a T-fal deep fryer that won’t drain, you might want to consider replacing it.
T-fal makes a wide variety of kitchen appliances, including deep fryers, waffle makers, ovens, griddles, and even pizza ovens.
The company has been around since 1947 and is headquartered in Germany.
Here are three steps to fix a T-fal deep-fryer that won’ t drain.
1.
Check the Drain Valve
2.
Clean the Drain Line
3.
Tighten the
Troubleshoot: T-fal Deep Fryer Not Draining
If you are having problems with your T-Fal deep fryer not draining, there are several steps you can take to troubleshoot the problem. First, check if the drain hose is clogged. If it is clogged, try unclogging it using a plunger. Next, check if the drain pump is working properly. If the pump isn’t working, replace it. Finally, check if the drain pan is full of oil. If it’s empty, fill it back up.
Solutions for T-fal Deep Fryer Draining
T-fal deep fryers are designed to be used with a specific type of oil. If you’re using another type of oil, you’ll need to change the oil filter. To remove the old filter, unscrew the top of the unit and pull off the filter. Then, pour the new oil into the bottom of the unit and screw the top back on.
1. The Temperature of Oil is High
If the oil is too hot, it could burn the food being fried. It’s important to check the oil frequently and adjust the temperature accordingly.
2. The Food Is Not Sticking
Answer: Make sure the food is fully submerged in the oil. If not, the food will float to the surface and stick to the sides of the pan.
2. Automatic Filtration is Off
Filtration is very important to remove any impurities from the oil. Without filtration, the oil will become cloudy and unhealthy.
3. The Food Is Burning
Answer: This happens if the oil is too hot. To avoid burning, reduce the heat and wait until the oil cools down.
3. Clogged Filter Grid
If the filter grid is clogged, the oil will not flow properly. It will stop flowing and the burner will shut off automatically. Remove the filter grid and clean it thoroughly.
4. Oil Level Too Low
Answer: Make sure the level of oil is sufficient enough to cover the bottom of the pan.
How do you deep clean a deep fryer?
Sticky oil can be removed from the bottom of a deep fryer using a paper towel. Simply place a paper towel under the basket and press down firmly. This method works well if the oil is not hot enough to burn skin. If the oil is still too hot, you can use a metal spoon to scrape off the oil.
What is the best way to clean a deep fat fryer?
Yes, but not recommended. Deep fryers are designed to withstand high temperatures. Vinegar is acidic and will corrode metal parts of the deep fryer. It is better to clean the deep fryer using soap and warm water.
When should you clean drain or filter the deep fat fryer?
To clean a deep fryer, simply pour 1/4 cup of white vinegar into the bottom of the basket and let it sit overnight. In the morning, drain the vinegar from the bottom of the basket. This method works well for cleaning deep fryers.
How do you clean a deep fryer at home?
Deep fryers have filters that trap any particles from the oil. These filters need to be cleaned periodically. The easiest way to clean these filters is to remove the basket and place it upside down into a sink filled with warm water. This will help loosen any debris stuck in the filter. Once loosened, simply drain the water and allow the filter to dry completely.
How do you clean a deep fryer filter?
Deep fryers are easy to clean if you follow these steps. First, remove the basket from the unit. Next, wash the outside of the unit with warm soapy water. Then, rinse the unit thoroughly under running water. Finally, dry the unit completely.
How do you clean a deep fryer with vinegar?
You should clean your deep fryer after every use. It is important to clean your deep fryer because if you don’t clean it properly, it could lead to clogged drains and other problems. Cleaning your deep fryer is easy. First, remove the basket from the deep fryer. Then, pour hot water into the bottom of the deep fryer until the water comes halfway up the sides of the deep fryer. Let the water sit for about 10 minutes. After 10 minutes, drain the water out of the deep fryer using a strainer or colander. Put the strainer or colander in the sink and let the water drip out of the deep fry. Once the water dries, wipe down the outside of the deep fryer with a damp cloth. Make sure to dry off any parts of the deep fryer that were not cleaned. If you have a deep fryer with removable filters, take those out and wash them thoroughly. If you have a non-removable filter, simply rinse it under warm running water.
Can you boil out a deep fryer with vinegar?
Deep fat fryers are very easy to clean. Simply remove the basket from the unit and wash it thoroughly under running water. Make sure to dry completely after washing. If you notice any residue or grease build up on the bottom of the basket, simply wipe it off using a paper towel. Once the basket is cleaned, place it back into the unit and fill it with vegetable oil. Deep fat fryers are designed to hold a certain amount of oil. If you notice the oil level dropping below the recommended amount, simply refill the unit with additional oil.
How do you remove sticky oil from a deep fryer?
Deep cleaning a deep fryer is not difficult but it does take some time and effort. First, remove the basket from the deep fryer and place it upside down on a baking sheet. Next, pour hot water into the bottom of the deep fryer until it reaches about half way up the sides of the fryer. Then, turn off the burner and let the water cool. Once the water has cooled, drain the water and wipe down the interior of the fryer using a damp cloth. Be sure to dry the outside of the fryer well. Finally, fill the fryer back up with vegetable oil and set the temperature to 350 degrees Fahrenheit. Let the oil heat up for 30 minutes and then check the oil level. If necessary, top off the oil. After 30 minutes, turn off the burner again and allow the oil to cool completely. Remove the basket and wipe down the exterior of the fryer with a damp cloth. Wipe the interior of the fry pan with a paper towel. Now, put the basket back in the fryer and replace the lid. Turn the burner back on and wait for the oil to heat up again. Repeat the process if necessary.