Обновлен: 2 года назад
Номер статьи (ID) 187482
Распространенные проблемы
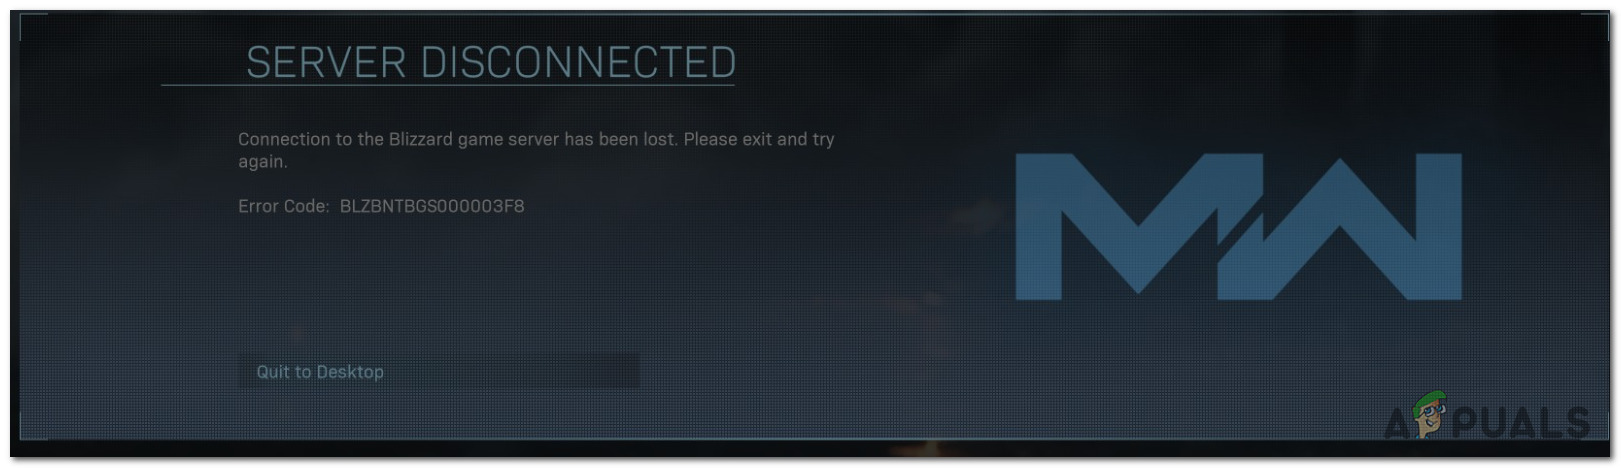
Соединение с игровым сервером Battle.net было утеряно. Пожалуйста, выйдите и попробуйте снова.
Код ошибки: BLZBNTBGS000003F8
Эта ошибка указывает на неполадку с подключением к серверам Call of Duty.
- Проверьте наличие информации о текущих затруднениях в ленте BlizzardCSEU_RU в Twitter.
- Удостоверьтесь, что вы запускаете игру через приложение Battle.net.
- Убедитесь, что вы авторизованы через правильную учетную запись Battle.net.
- Устраните неполадки с интернет-подключением.
Ничего не помогло?
Если вы попробовали все шаги, но затруднение не было устранено, пожалуйста свяжитесь со службой поддержки Activision.
Привет.
Последние два дня наблюдаю проблемы в Call of Duty MW (2019) и Warzone соответственно тоже. Через 10-20 минут игры меня отключает от сервера с ошибкой, что в шапке. Покурил гугл, нашел пару «решений» по очистке кэша, смене региона и добавлении правил для фаервола. Все предложенные варианты испробовал, но все по-прежнему. Ничего в сети не менялось, роутер, провайдер, IP, пакет услуг и т.д. прежние. У кого-то сейчас есть такая проблема, может была и вы ее решили?
Нужна помощь, братцы.
UPD: С выходом патча 1.21.1 проблема исчезла, вроде как.
The Error Code BLZBNTBGS000003F8 is an issue that many COD Modern Warfare and COD Call of Duty Black Ops 4 players are getting immediately after their game connection is interrupted. The problem seems only to affect the multiplayer component – Users are kicked out online matches, and the connection with Blizzard servers is lost whenever it occurs.
What’s causing the Error Code BLZBNTBGS000003F8?
- Bad Killer Networking Driver – Even though these networking drivers are marketed towards games, there are several Killer models (particularly E2220) that are known to cause this behaviour if the latest driver is installed. If this scenario is applicable, you should be able to resolve the issue by rolling back the networking driver back to an older version.
- ISP is unable to connect with Blizzard or Battle.net servers – This scenario is quite common with Asian and Australias users. The Australian ISP Optus is notoriously known for having this problem. In this case, you can fix the problem by using a VPN to change the location that you’re accessing the servers from.
- Incorrect DNS server – If you’re only encountering the issue while trying to play on ASIA servers, it’s probably because of an incorrect DNS server. In this case, you can fix the issue by changing the Preferred DNS Server and the Alternate DNS server via the Network Connection menu.
- General – If this is the case you may check to ensure your router is powered on, and is connected to your ISP. Wait a few minutes, and make sure that your PC/Laptop is connected to the internet. You may sometimes have to restart the router if Windows 10 says, that the PC cannot connect to the network.
Method 1: Rolling back networking driver (if applicable)
Several Windows 10 users that were encountering this issue with Killer E2200 networking drivers have managed to fix this issue entirely after rolling back the driver using Device Manager. After they manage to revert to an older version of the networking driver, they were able to play COD Modern Warfare or COD Black Ops 4 without getting random BLZBNTBGS000003F8 disconnects.
Here’s a quick guide on rolling back on the networking driver:
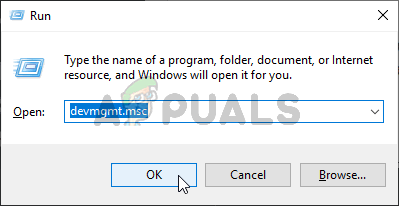
- Press Windows key + R to open up a Run dialogue box. Next, type “devmgmt.msc” and hit Enter to open up Device Manager. If you see the UAC (User Account Control) window, click Yes to open the utility with admin access.

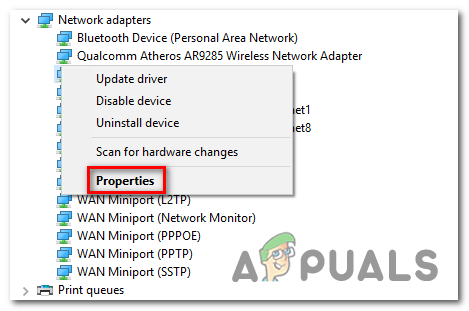
Running Device Manager - Once you’re inside Device Manager, scroll down through the list of installed devices and expand the menu associated with Network adapters (by clicking on the drop-down arrow).
- Inside the Network adapters menu, locate your Killer E2200 driver, right-click on it and choose Properties from the newly appeared context menu.

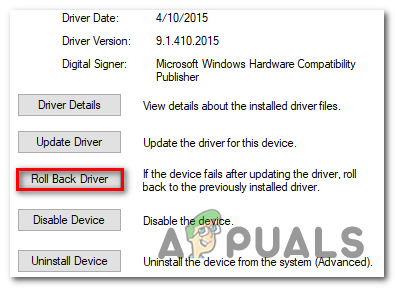
Accessing the Properties screen of the Networking driver - Once you’re inside the Properties menu of your networking driver, select the Driver tab from the top of the window, next click on Roll Back Driver and click Yes to confirm the installation rollback.

Rollback the Killer Networking driver - Wait for the operation to complete and restart your computer if the system doesn’t do it automatically.
- At the next computer startup, see if the issue is now resolved.
If the same problem is still occurring with the same frequency, move down to the next potential fix below to resolve the BLZBNTBGS000003F8 error.
Method 2: Using a VPN
As it turns out, one of the most common instances that will end up triggering the BLZBNTBGS000003F8 error is a situation in which your PC is unable to get through to some servers on Blizzard or Battle.net network. It has now been confirmed that some ISPs are having trouble routing to Blizzard and Battle.net servers.
This issue is being consistently reported in Australia and certain Asian countries. In Australia, the vast majority of reports are with the Optus Australia ISP.
Fortunately, if this scenario is applicable, you can fix the issue quite easily by using a VPN – This will end up changing the routing to these problematic servers and allow the connection to be established.
Note: You don’t have to use a paid VPN if you don’t want to. It works just as well with free options (as you’re going to see below).
Here’s a quick guide on installing and using a free VPN to avoid the BLZBNTBGS000003F8 error code:
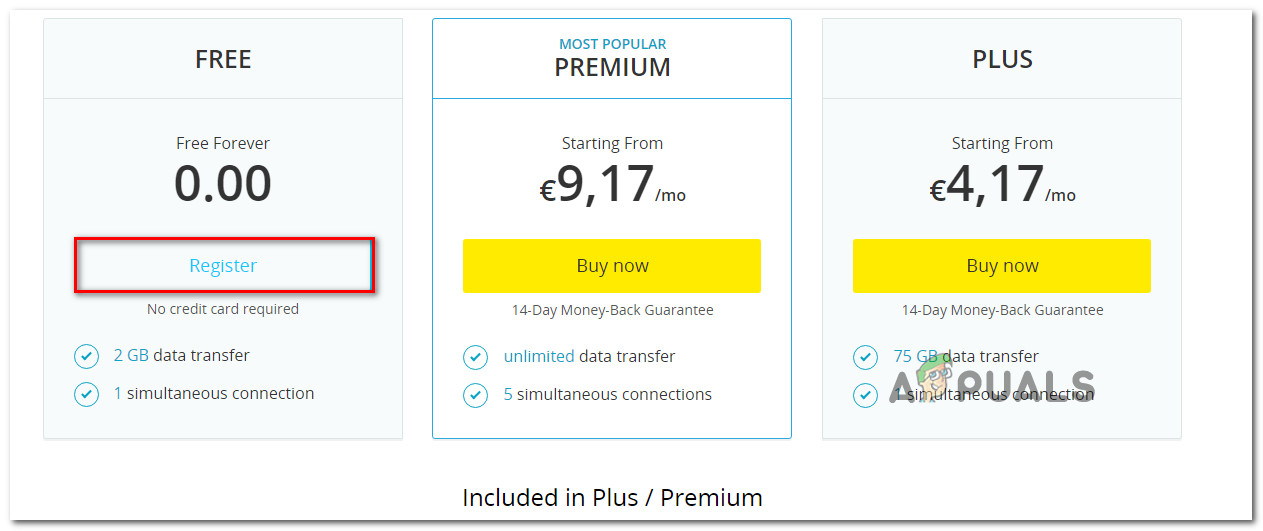
- Visit this link (here) and hit the Download Now button to initiate the download. Once you get to the next screen, hit the Register button associated with the free account, then download the free version of the Hide.me VPN solution.

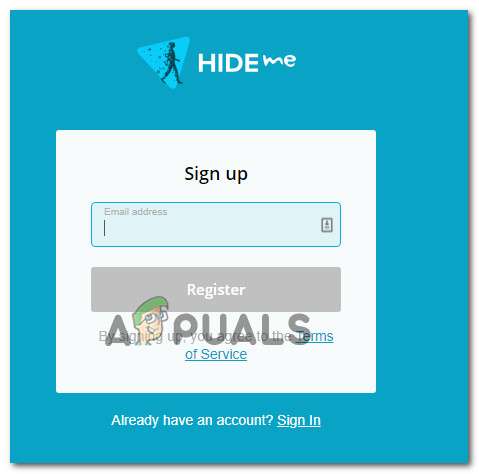
Downloading the VPN solution - At the next screen, enter your email address to complete the registration. It’s important to make sure that you’re using a valid email address because you will later be required to verify the registration from that email address.

Registering for the service - Once the registration is complete, navigate to your email inbox and look for the verification email that you received from Hide.me. Once you find it, click on Activate my account to get started.
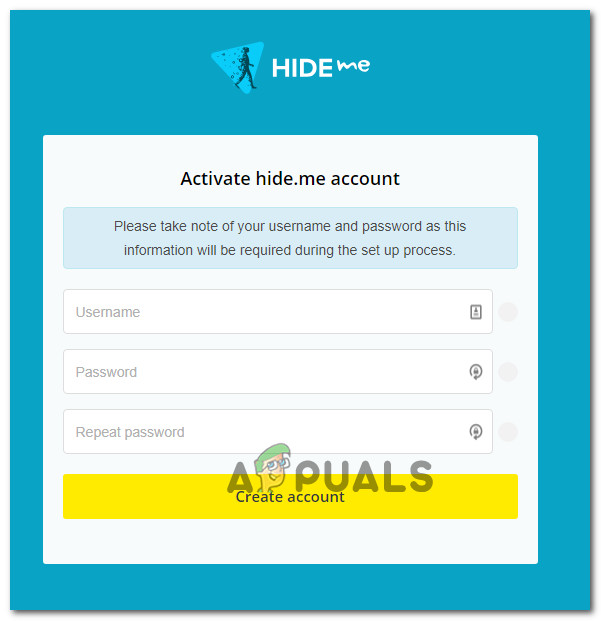
- Once you manage to complete the verification, you will be taken to a screen where you’ll need to choose an appropriate user and password for your Hide.me account. After you manage to do this, click on Create Account.

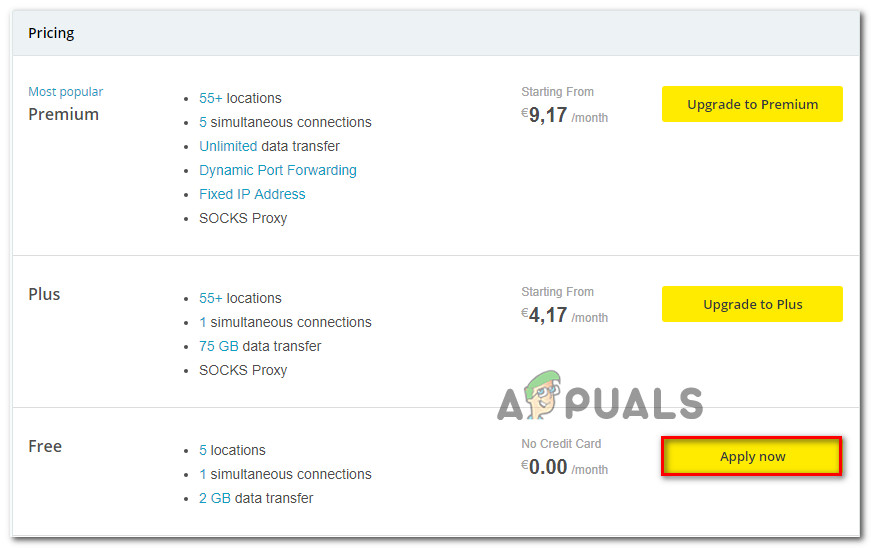
Creating an account with Hide.me - After you’ve successfully signed into the account that you have just set up, make your way to Pricing > Free and click on the Apply Now button to activate the free plan that you’re entitled to.

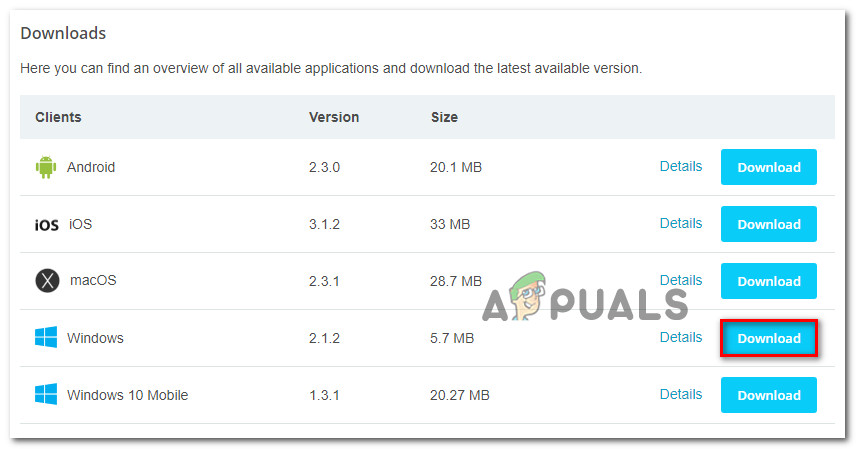
Apply for the free account - Once the free plan is enabled, move over to the Download clients tab and click on the Download Now button that’s corresponding to your operating system version to initiate the download.

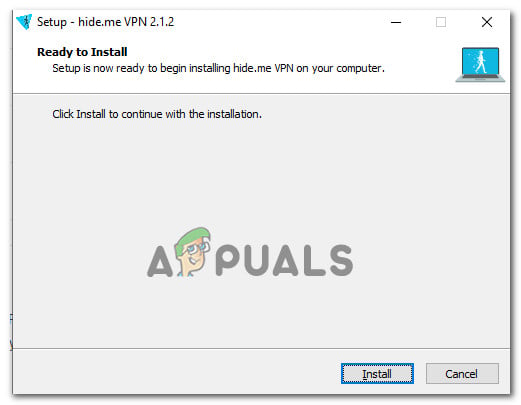
Downloading the Windows client of Hide.me - Once the download is complete, double-click on the newly-downloaded executable, then follow the installation screen to complete the operation.

Installing the Hide.Me VPN application - After the installation is complete, all you need to do is sign in with the account that you previously created at step 4. Next, all you need to do is click on Start your free trial, and select a location that’s different from Asia or Australia. That’s it.
- While the VPN is active, launch the COD game that you were encountering the BLZBNTBGS000003F8 error and see if the issue is now resolved.
If the same problem is still occurring, move down to the next method below.
Method 3: Changing the DNS server
Another popular fix for the BLZBNTBGS000003F8 error is to modify the default DNS server from the Network and Internet menu. This fix was confirmed to be successful on all recent Windows versions.
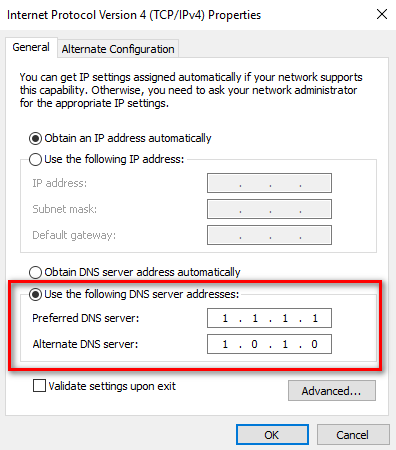
A lot of affected users that we’re encountering the issue when trying to play on ASIA servers have confirmed that the issue was resolved after they modified the Preferred DNS Server to 1.1.1.1 and the Alternate DNS Server to 1.0.1.0.
Here’s a quick guide on how to change the DNS server in order to fix the Call of Duty BLZBNTBGS000003F8 error via the Network Connection section:
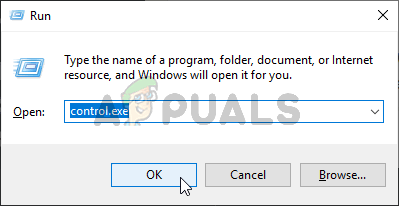
- Open u a Run dialogue box by pressing Windows key + R. Next, type ‘control.exe’ inside the text box and press Enter to open up a Control Panel.
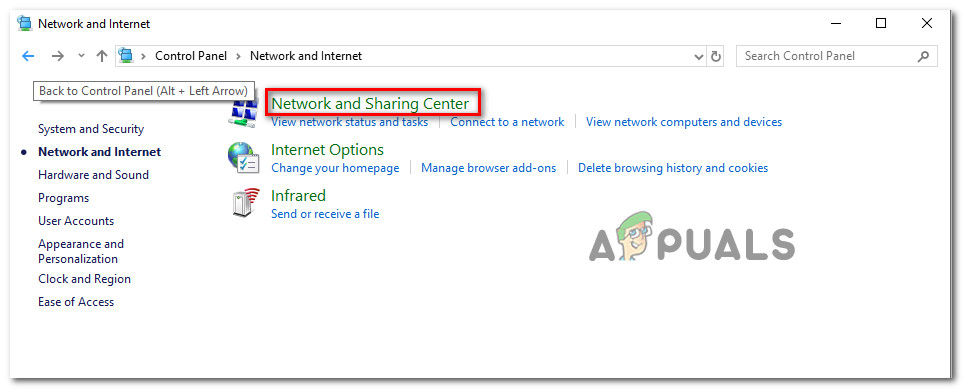
Running Control Panel - Once you’re inside the Classic Control Panel interface, click on Network and Internet, then click on Network and Sharing Center.

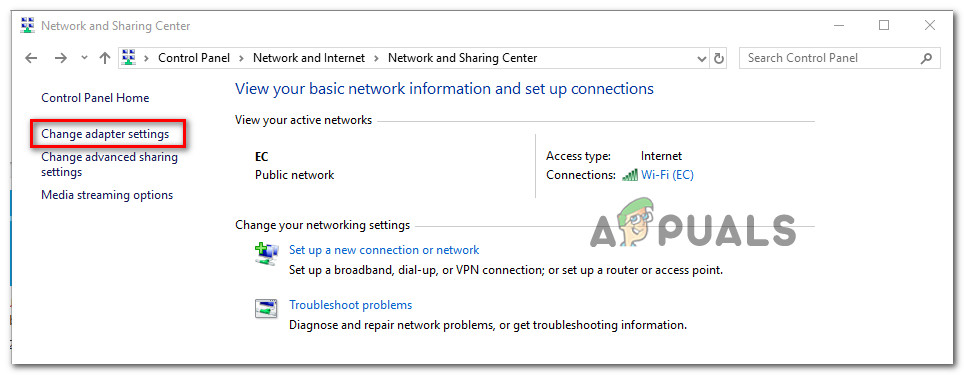
Accessing the Network and Sharing Center via classic Control Panel - Once you’re inside the Network and Sharing Center screen, click on the Change adapter settings hyperlink.

Accessing the adapter menu - Once you’re inside the Network Connections menu, right-click on the network that you are currently connected to and choose Properties from the newly appeared context menu.

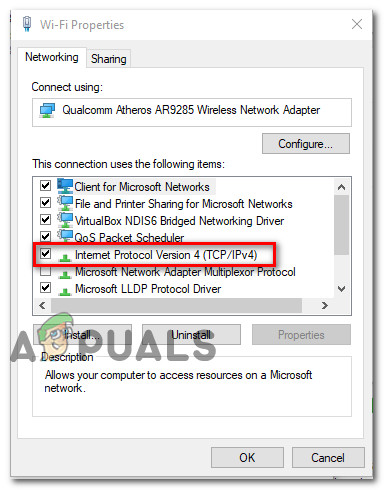
Opening the Properties screen of the active connection - Once you’re inside the Properties screen, go to the Networking tab, then double-click on the Internet Protocol Version 4 (TCP / IPv4).

Accessing the Internet Protocol Version 4 settings - Once you’re inside the Properties screen of Internet Protocol Version 4, enable the box associated with Use the following DNS server address toggle. next, set 1.1.1.1 as the Preferred DNS Server and 1.0.1.0 as the Alternate DNS Server.

Changing the alternate DNS server - Hit Ok to save the changes, then restart your computer to allow these new changes to be implemented.
- At the next computer startup, launch the game that was causing the BLZBNTBGS000003F8 error once again and see if the issue is now resolved.


Kevin Arrows
Kevin Arrows is a highly experienced and knowledgeable technology specialist with over a decade of industry experience. He holds a Microsoft Certified Technology Specialist (MCTS) certification and has a deep passion for staying up-to-date on the latest tech developments. Kevin has written extensively on a wide range of tech-related topics, showcasing his expertise and knowledge in areas such as software development, cybersecurity, and cloud computing. His contributions to the tech field have been widely recognized and respected by his peers, and he is highly regarded for his ability to explain complex technical concepts in a clear and concise manner.
One of the most anticipated games of 2019, Call Of Duty Modern Warfare has finally released and we have to say that everything about the game feels awesome so far.
Unfortunately, the game is not completely free from performance issues. People have already started reporting about problems like lag, crashes, black screen issue, blurry game textures, fps drops, various dev errors, different bug & glitches, etc. But we are here to talk about the error codes.
Looks like a lot users are experiencing the Error Code BLZBNTBGS000003F8 in Call Of Duty Modern Warfare 2019? Don’t worry you are alone. Here is how to fix it.
What is the Error Code BLZBNTBGS000003F8 in COD MW 2019
It is an error code that pops up after you get disconnected from the game. The error message shows : Server Disconnected – Connection to the Blizzard game server has been lost. Please exit and try again – Error Code : BLZBNTBGS000003F8 and your only option is to Quit to desktop.
There are a lot of reasons for this error code but none of them are related to the performance of your PC. So don’t worry. Here are some reasons behind this error code:
- An update for the game just dropped
- Blizzard Servers are offline
- Your internet connection is not working properly
This is really annoying because you get disconnected even when you are in the middle of a match.
How to fix this error
Check your connection
First you have to make sure that everything is alright from your side and that your internet connection is working properly. Here is list of things you can do:
- Check your internet connection
- Do a speedtest
- Check whether you are getting request timed out or not. Just press Windows+R on your keyboard and type “ping <your IP address> -t” and press enter. Wait for few seconds and see if request timed out shows up
Blizzard Server Status
Now that you are sure that there is no problem from your side, check the status of the Blizzard game servers. You can check their status from here. If the servers are down then you have no choice but to wait for the servers to come back up.
Restart Battle.net
Just restart the Battle.net app on your PC. The error code could be due to the Battle.net launcher malfunctioning on your PC.
These are all the fixes that we have for this error code at this moment. There is no proper way to fix this issue as it does not qualify as a proper bug. The problem is time related and will get fixed eventually. So you don’t need to worry.
If you think this guide had helped you then let us know in the comment section below. If you have any addition to make regarding this topic then also you can comment below. Good luck!
Check out some other COD MW 2019 guides:
- COD Modern Warfare – Best/Optimal Graphics settings
- Call of Duty MW 2019 – PC Keyboard controls
- COD MW 2019 – How to change character
- How to unlock and equip Combat Knife
That’s all folks!
Last Updated on August 27, 2020

Shoaib, 30, is a simple guy who loves to play video games, and enjoys new cuisines sporadically. He has been gaming since he was 7 years old, and with an experience of 22 years, under his belt, there is not a single AAA game in this world, that he hasn’t played. Despite being a MBA Graduate he decided to follow his passion. And because of his love for gaming, Frondtech came into existence.
If you are looking for an answer to How to Fix BLZBNTBGS000003F8 error then this article is for you. Many gamers have been complaining about being removed from Call of Duty Black Ops: Cold War during online matches.
![[SOLVED] How to Fix BLZBNTBGS000003F8 error](https://cdn.omggamer.com/wp-content/uploads/2022/12/SOLVED-How-to-Fix-BLZBNTBGS000003F8-error.jpg)
When this happens, they see a “BLZBNTBGS000003F8 Error” on their screen, which is often followed by a Battle.net launcher error. And if you have no idea why you are facing this Error while playing Call of Duty Black Ops: Cold War and how you can solve it, we have your back!
Contents
- 1 What is BLZBNTBGS000003F8?
- 2 Reasons for BLZBNTBGS000003F8
- 2.1 Network Driver
- 2.2 DNS
- 2.3 ISP
- 3 How to Fix BLZBNTBGS000003F8 error
- 3.1 Check your Firewall Settings
- 3.2 Use VPN
- 3.3 Update Drivers
- 3.4 Change DNS Server
- 3.5 Flush DNS
- 3.6 Clear the Battle.net Cache Folder
- 3.7 Restart Router
- 3.8 Restart the PC
What is BLZBNTBGS000003F8?
The BLZBNTBGS000003F8 Error you face while playing Call of Duty Black Ops 4 means that your game connection has been interrupted. The error pops up during multiplayer gaming and the players end up being removed from online matches. Now, let us look at some of the potential reasons for this error.

Reasons for BLZBNTBGS000003F8
A couple of reasons why you could be seeing the BLZBNTBGS000003F8 Error are:
| Reasons: BLZBNTBGS000003F8 Error |
|---|
| 1. Network Driver |
| 2. DNS |
| 3. ISP |
Also Read: [SOLVED] How to Fix Steam Service Error in 2023
Network Driver
Network Drivers can cause connection-related issues. And Killer Models like E2220 are the prime cause of this error if the driver installed is not up-to-date.

DNS
If you are playing on ASIA servers and that’s the only time you face the BLZBNTBGS000003F8 Error, then it is because you are using the wrong DNS server.

ISP
There might be a high possibility that you are facing the BLZBNTBGS000003F8 Error because the ISP cannot connect to Blizzard or Battle.net servers. It is a prevalent issue for Asian and Australian users. You can use a VPN to solve this error easily.
Must Read: [SOLVED] Nintendo Switch Won’t Connect to WiFi in 2022
Well, now is the time to look at how you can solve the BLZBNTBGS000003F8 Error you face while playing Call of Duty.

A few ways to try and have a seamless gaming experience are: Below are the fixes to solve BLZBNTBGS000003F8 error:
| Fixes: BLZBNTBGS000003F8 Error |
|---|
| Fix 1: Check your Firewall Settings |
| Fix 2: Use VPN |
| Fix 3: Update Drivers |
| Fix 4: Change DNS Server |
| Fix 5: Flush DNS |
| Fix 6: Clear the Battle.net Cache Folder |
| Fix 7: Restart Router |
| Fix 8: Restart the PC |

Check your Firewall Settings
The Windows Firewall came into existence to safeguard users from unauthorized users accessing files and data on their computers. However, there might be certain situations where it blacklists even legitimate connections. If the Firewall is restricting you from connecting to the Call of Duty game, then here is how you can turn off the Windows Defender Firewall:
- Step 1: Head to the Start Menu and search for Windows Firewall. Then, click on Windows Defender Firewall.
- Step 2: Now, click on “Allow an app through Windows Defender Firewall” and look for Call of Duty: Black Ops Cold War in the list of apps that pop up.
- Step 3: Ensure that you have selected both, Public and Private. Now, click on OK and launch the game again.
Also Read: Intel VS AMD for Gaming PC in 2023 [Honest Review]
If following this technique does not help, move on to the next one.

Use VPN
One of the main reasons you face BLZBNTBGS000003F8 Error while playing Call of Duty Black Ops 4 is that your system couldn’t connect to the servers on Battle.net or Blizzard. The error occurring due to the ISPs not being able to connect to servers is rather common in Australia and Asia, especially with the Aussie gamers using Optus Australia ISP.
Must Read: Samsung 990 PRO Review in 2023 [Best for Gaming PC]
Therefore, fixing the error is especially easy in this scenario as all you need to do is use a VPN. It does not matter if you use a paid or a free one here.

Update Drivers
Your BLZBNTBGS000003F8 Error usually occurs when there is an issue with your internet connection. An outdated network adapter driver can cause a hindrance to your gaming experience.
To resolve this issue, update your network driver either manually by going to the manufacturer’s website or using third-party software. And once you have successfully updated the driver, launch Call of Duty again to see if the error is solved or not.

Change DNS Server
Changing your DNS server is a quick and easy way to solve the BLZBNTBGS000003F8 Error. You will have to switch the Preferred DNS Server to 1.1.1.1 and the Alternate DNS Server to 1.0.1.0. Here’s how you can do so:
Also Read: Best DDR5 RAM for Gaming PC [Gamers Choice]
- Step 1: On your computer, go to the Control Panel and select Network and Internet. Then, click on Network and Sharing Centre.
- Step 2: You will then be directed to a new window; in that window, select the Change adapter settings hyperlink.
- Step 3: You will be now taken to the Network Connections window; in that window, select the network you are using now and click on Properties.
- Step 4: In Properties, select the option that reads Networking and double-click on Internet Protocol Version 4 (TCP / IPv4), and enable Use the following DNS server address.
- Step 5: Now, set 1.1.1.1 as the Preferred DNS Server and 1.0.1.0 as the Alternate DNS Server. Click on OK and have a shot at launching the game again.

Flush DNS
Your system’s DNS cache gathers the data about the sites you visit, to elevate your experience. However, this caching of data may hinder your connection if the data is corrupt or outdated. In this case, flush your DNS cache with the steps below:
Related: Best OS for Gaming PC in 2023 [Gamers Choice]
- Step 1: Head on to the Start Menu and search “cmd”. After that, click on Command Prompt and choose Run as Administrator.
- Step 2: A window will appear; type “ipconfig/flushdns” in that window and hit Enter.
- Step 3: When the operation is successful, you will see a message that reads, “Successfully flushed the DNS Resolver Cache”. This should solve your BLZBNTBGS000003F8 Error.

Clear the Battle.net Cache Folder
Another reason you are facing this error could be due to a corrupted cache folder in Battle.net. To solve this, you will have to delete the Battle.net cache folder by following these steps:
- Step 1: Go to Blizzard programs and press the Ctrl+Shift+Esc keys to open the Task Manager.
- Step 2: Select the Processes tab, and in case the agent.exe or Blizzard Update Agent is running, end the task by right-clicking on it.
- Step 3: Go to the folder containing the cache directory by pressing the Windows key and R. The Run dialogue box will pop up; type “%ProgramData%” and hit Enter.
- Step 4: All you have to do now is delete the cache directory at “%ProgramData%\Blizzard Entertainment\Battle.net\”.

Restart Router
If none of the above-stated solutions work for you, try restarting your router to solve the BLZBNTBGS000003F8 Error. To do so, follow these steps:
- Step 1: Switch off the router, unplug the power cords, and hang tight for a few minutes before plugging it back into the main switch.
- Step 2: Once your router is ready, connect it to your computer and re-launch the game.

Restart the PC
The easiest way to solve the BLZBNTBGS000003F8 Error is by restarting your system. It can be a possibility that there is some temporary glitch with your system or the game, which could be solved by exiting the game, restarting your computer, and launching the game again.

We have now come to the end of our guide to fixing the BLZBNTBGS000003F8 Error on Call of Duty Black Ops 4. We hope, it turned out to be resourceful for you. If it is, then also share with your friends who are also facing the same error and keep visiting omggamer.com for more gaming guides, and updates on gaming, upcoming game, gaming build, and much more.